USEFUL INFORMATION ABOUT YOUR VEHICLE
design and production by : Drake Enterprises Limited - drakeenterprises@btinternet.com
CHILD SEATS
FUEL
IN CASE OF BREAKDOWN
DRIVER’S SEAT
Vehicle specifications are subject to change. When the engine is turned off, ensure that the starter switch is in position II when operating electrical items such
as door mirrors and windows, etc. This vehicle does not include any manufacturer handbooks or manuals.
No responsibility is accepted for inaccuracies or misunderstanding caused by the wording of this guide. If in any doubt ask a member of staff for assistance.
Use hazard lights. Attempt to park
in a safe position.
Use an emergency phone rather
than a mobile as emergency
services will then know the location
of the vehicle.
Never use a child seat in a front
passenger seat which is fitted with
an active airbag (SRS). Follow all
fitting instructions carefully.
Check seat positioning and security
before use.
VEHICLE INSTRUCTION CARD
TYRE PRESSURES (COLD)
CONTROLS
When parked, the handbrake should be fully
applied with the vehicle left in first or reverse
gear for vehicles equipped with manual
transmission or P (Park) for vehicles with
automatic transmission.
CAUTION!
For assistance after an accident/incident, please call 0800 0280 999
For assistance after a breakdown or help with tyres or windscreens please refer to the numbers on the tax disc holder.
TYRE HELPLINE
In the event of having a punctured tyre
please call the Europcar Tyre Helpline
0800 0280 999 for ANY assistance.
NOTE: Vehicles are not usually supplied
with a tyre repair kit (for vehicles that use
this in lieu of a spare wheel).
When parked, the parking brake should be
fully applied with the vehicle left in first or
reverse gear for vehicles equipped with manual
transmission or P (Park) for vehicles with
automatic transmission.
CAUTION!
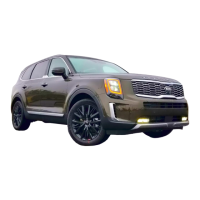
4 DOOR SALOON
5 SEATS
Passive arming of electronic engine immobiliser after removal of the key from the starter switch. Visible VIN plate.
Key / remote control operated central dead locking. Depress the centre console central locking switch to lock the doors
from the inside. Auto locking of doors on vehicle motion. Some vehicles feature a keyless entry system.
Centrally locked. Use the key or remote control to unlock / open.
Electric adjustment operated by the control pad on the driver’s door.
Electric front operated via control buttons on the driver’s door.
If fitted, roof mounted switchgear is used to control the electric tilt / slide panoramic sunroof.
Located on the edge of the rear doors. Press the central locking switch to activate. Check from inside that the doors are
securely locked.
Ensure gear selector is in neutral (or P if automatic) and electric parking brake is on. Use a normal ignition key start/stop
procedure, or some vehicles are fitted with an engine start/stop button (simply carry the key in your pocket or handbag,
and press the button to start or stop the engine). Select desired gear. Release electric parking brake and brake pedal and
gently press the accelerator to move the vehicle. Some vehicles feature auto engine start/stop technology where the engine
switches off at standstill or when idling - just depress the clutch to instantly restart the engine.
Located under flap on rear offside. Centrally locked. Remote release. Lift the edge of the flap to open it, and twist off the
cap anticlockwise.
Pull bonnet release lever located on the right of the driver’s footwell. Unhook catch under bonnet.
The rear seat is divided into sections which can be separately folded. To release the seat press the seat unlocking catch
and fold the seat down. To return the seat to normal use, raise the seat and push it firmly to engage the seat lock. Check it is
locked before using the seat.
For any assistance in the event of having a punctured tyre, or should the vehicle not be supplied with a spare wheel
and tyre or a tyre repair kit, please call the Europcar Tyre Helpline 0800 0280 999. Lift the carpet cover to access the
temporary spare wheel and tools. Move the vehicle to firm / level ground. Turn the engine off, select first gear (manual) or
P (automatic). Apply the handbrake or parking brake. Loosen the wheel nuts (do not remove them). Only use the specific
reinforced jack points on the underside of the vehicle. Crank the jack to lift the vehicle. Undo wheel nuts and change the
wheel. Lower the vehicle. Tighten the wheel nuts.
Select N for neutral, P when leaving the vehicle, R for reversing (the vehicle must be at a complete standstill before this
gear can be selected). For normal driving select D where the transmission will use all available forward gears automatically
(a ‘kickdown ‘ facility is provided when the accelerator is pressed all the way to the floor past the normal acceleration point
forcing the transmission to select a lower gear to obtain maximum acceleration. Release pressure on the accelerator to
return to normal accelerator use). For manual selection of gears use the D+ or D- options to select gears. Whenever the
vehicle is at a standstill apply the electric parking brake.
VIC-KIA-07 / 18-05-2018
Anti-theft system?
Locking the doors?
Opening boot/tailgate?
Adjusting door mirrors?
Opening the windows?
Operating the sunroof?
Using child door locks?
Starting the engine?
Opening fuel filler cap?
Releasing the bonnet?
Folding the rear seats?
How to change a tyre?
Driving an automatic?
Check tyre pressure regularly
Legal minimum tread depth is 1.6 mm
205/65 R16
215/55 R17
225/45 R18
Check the tyre pressure table found on
the inside of driver’s door B-pillar (or fuel
filler cap).
Note: driving speeds and travel distances
are restricted when using spacesaver spare
tyres or repaired tyres.
1 Heating & Ventilation
2 Hazard Lights
3 Starter Switch
4 Headlights
5 Sidelights
6 Indicators
7 Wipers
8 Rear Screen Wipers
9 Horn
10 Bonnet Release (not shown)
11 Heated Rear Screen
12 Rear Fog Lamp
13 Front Fog Lamp
10
3
1
11
P
R
N
D
or
4 / 5 / 6 / 12 / 13
7 / 8
2
Ensure you use the correct fuel
type. Only use unleaded petrol
in petrol vehicles (see inside of
filler flap).
Fuel Tank Capacity:
70.0 litres
Tilt
Lumbar
Legroom
Height
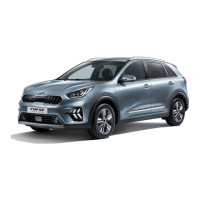
KIA OPTIMA
9
R 1 3
2 4 6
5
+
_
9
 Loading...