ASSEMBLY INSTRUCTIONS
10 11 12
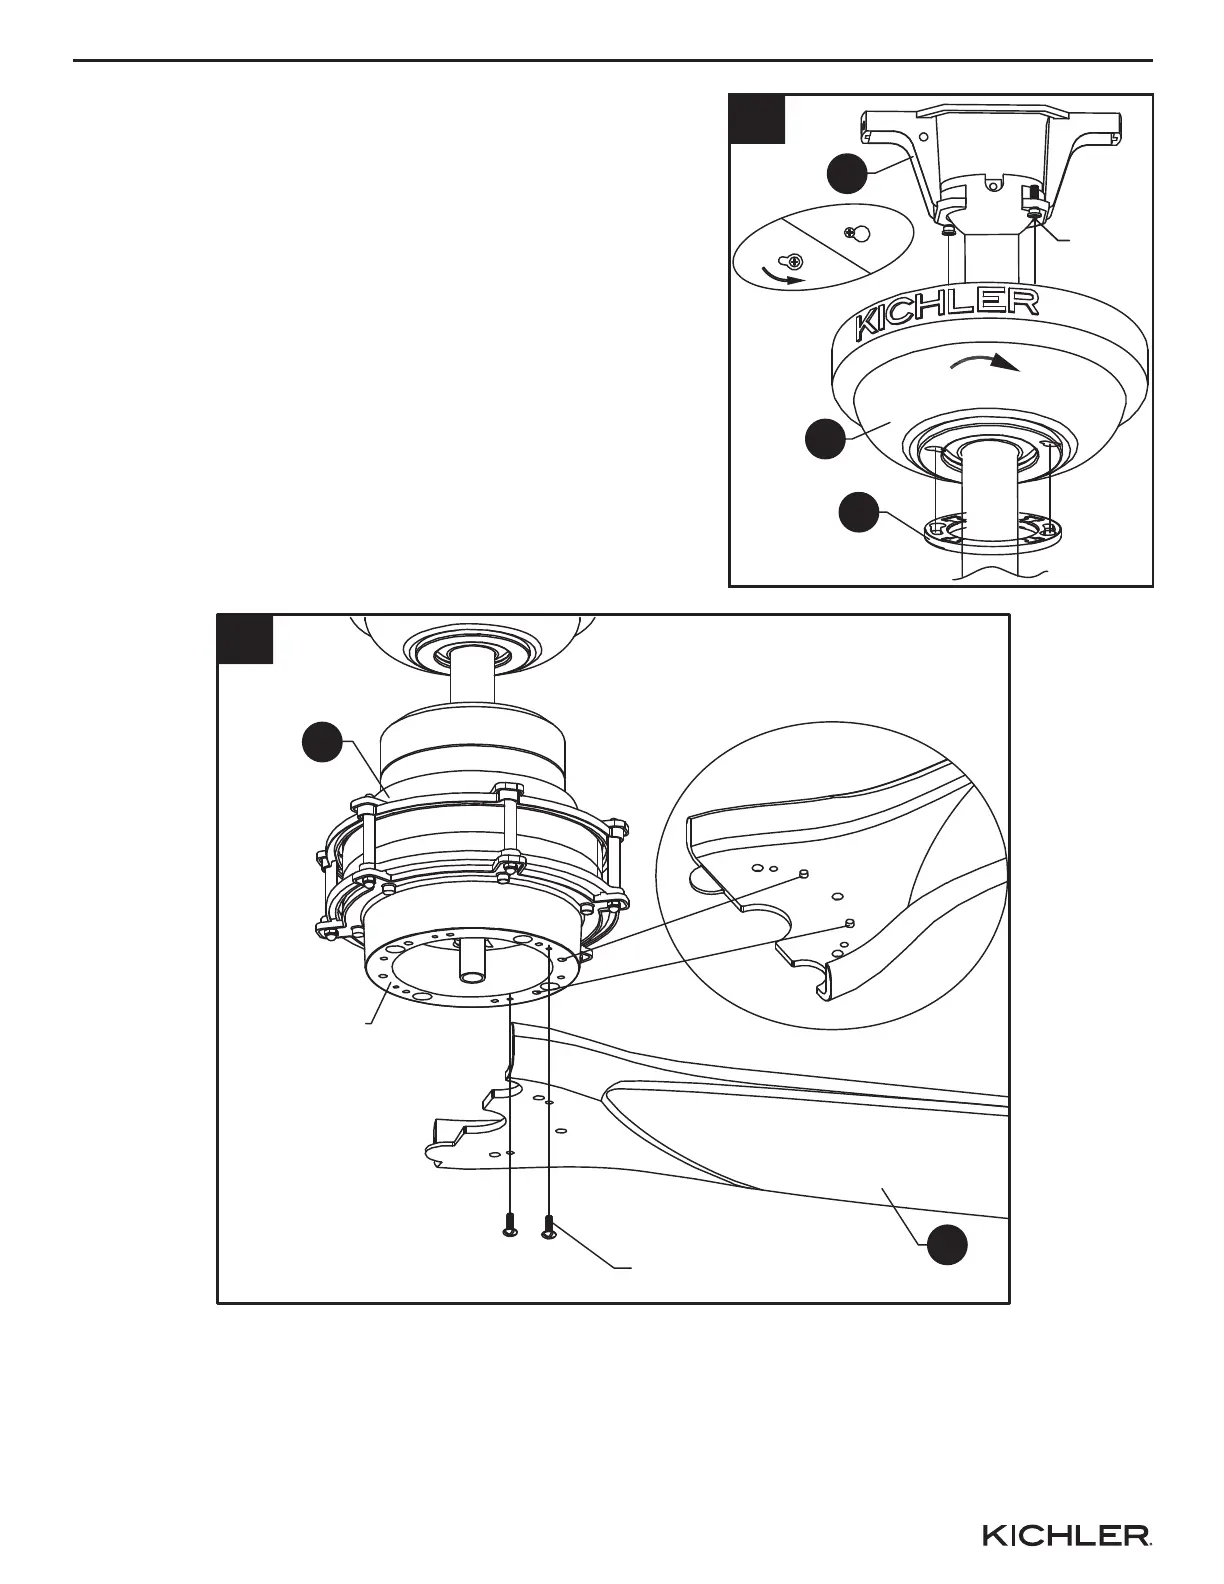
11.Raise blade (K) to the flywheel located on the motor assembly (F). Align the center hole on the
blade (K) with the hole on the flywheel marked with a red dot. Fit the two protrusions on the blade
(K) into the holes on the flywheel. Install the blade screws into the two small holes on the blade
(K). Tighten all screws.
Repeat for the remaining blade.
10. Loosen the two shoulder screws without fully
removing the hanging bracket (A). Assemble canopy
(C) by rotating keyhole slot in canopy over shoulder
screws in hanging bracket (A). Tighten shoulder
screws. Securely attach and tighten the canopy hole
cover (I) over the shoulder screws in the hanging
bracket (A) utilizing the keyhole slot twist-lock
feature.
11
Blade Screw
Flywheel
K
F
10
A
C
I
Shoulder
Screw





 To Next Page