EasyManua.ls Logo

KidKraft 65823 User Manual

KidKraft 65823
8 pages
To Next Page IconTo Next Page
Page #1 background imageLoading...
Page #1 background image
1
Item #65823
© 2011 KidKraft, LP
CAUTION:
ADULT ASSEMBLY REQUIRED. Hardware contains
small screws with sharp points. Keep unassembled
parts out of the reach of small children.
PARTS LIST
Please retain this information for future reference
To order replacement parts, please visit www.kidkraft.com
HARDWARE
My Dreamy Dollhouse
Assembly Instructions
WARNING:
CHOKING HAZARD. Small parts and sharp
points, not suitable for children under 3 years.
USE AND MAINTENANCE:
-Use on level surfaces only
-Please check assembly at regular intervals, and
frequently tighten hardware if necessary. If maintenance
is not carried out, the product could cease to function
properly.
x 2
x 3
37
38
35
46
39
43
5
6
1
4
2
3
13
x2
24
28
29
30
25
31
26
17
18
19
22
x2
7a
x 2
7b
x 2
10
11
x2
14
20
15
16
32
27
23
50
x 2
47
x 3
x 2
52
x 2
51
54
55
53
8
9
12
48
x 2
57
56
36
40
41
33a
42a
42b
42c
33b
21
44
Customer Service
1-800-933-0771
www.kidkraft.com
WARNING:
If used improperly, your dollhouse may be pulled over or fall,
creating risk of injury or damage. To minimize this risk,we
recommend that you use the enclosed wall anchor kit, which gives
you the option of attaching the dollhouse to a wall. In addition,
children should not be permitted to climb or pull on the dollhouse.
A. Blue Cross Dowel Bolt
x 4 pcs
C. Yellow Cross Dowel Bolt
x 4 pcs
D. Hex Bolt x 2 pcs
B. Cross Dowel Nut x 13 pcs
G. Yellow Cross Dowel Bolt
x 2 pcs
E. White Cross Dowel Bolt
x 1 pc
F. White Cross Dowel Bolt
x 2 pcs
H. Pink Large Head Screw
x 2 pcs
J. Yellow Cross Dowel Bolt
x 2 pcs
L. Pink Insert Bolt x 2 pcs
Q. White Insert Bolt x 2 pcs
N. Pink Small Head Screw
x 2 pcs
I. Espresso Large Head
Screw x 4 pcs
P. White Screw x 7 pcs
M. Large Head Screw x 4 pcs
O. Espresso Small Head
Screw x 2 pcs
R. Purple Screw x 4 pcs
S. Light Blue Large Head
Screw x 13 pcs
U. Screw x 4 pcs
T. Yellow Screw x 2 pcs
V. White Screw x 27 pcs
The following tool (not
included) is required for
assembly :
Phillips
®
screwdriver
Allen Wrench x 1 pc
2 in / 52 mm
2 in / 52 mm
2 in / 52 mm
3/4 in / 18 mm
3/4 in / 18 mm
3/4 in / 18 mm
1/2 in / 12 mm
1/2 in / 12 mm
K. White Cross Dowel Bolt
x 2 pcs
1/2 in / 12 mm
1/2 in / 12 mm
1/2 in / 12 mm
7/8 in / 22 mm
7/8 in / 22 mm
7/8 in / 22 mm
3/8 in / 10 mm
2 7/8 in / 72 mm
2 7/8 in / 72 mm
7/8 in / 22 mm
1 9/16 in / 40 mm
34
Question and Answer IconNeed help?

Do you have a question about the KidKraft 65823 and is the answer not in the manual?

KidKraft 65823 Specifications

General IconGeneral
BrandKidKraft
Model65823
CategoryToy
LanguageEnglish

Summary

Dollhouse Safety and Assembly Precautions

Child Safety Warnings and Adult Supervision

Highlights choking hazards, small parts, sharp points, and the necessity of adult supervision during assembly and play.

Product Stability and Maintenance Guidelines

Addresses risks of tipping and the importance of regular checks to ensure product stability and longevity.

Required Tools for Dollhouse Assembly

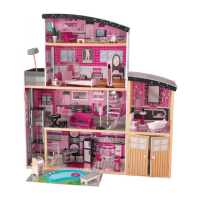
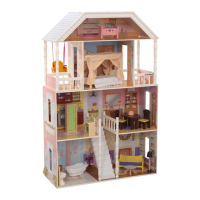
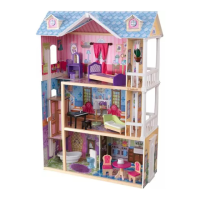
Specifies the Phillips screwdriver as the required tool for assembling the My Dreamy Dollhouse.

My Dreamy Dollhouse: Step-by-Step Assembly

Initial Assembly: Bed, Piano, and Dollhouse Base

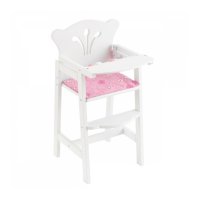
Details the initial assembly stages for the bed, piano, and the main dollhouse structure using specified hardware.

Connecting Dollhouse Walls and Floors

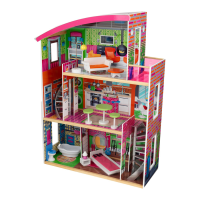
Guides the connection of main dollhouse panels and floor sections through steps 3 to 7.

Assembling Dollhouse Rooms and Walls

Focuses on assembling the main structure, matching artwork, and connecting key internal components from step 8 to 12.

Adding Dollhouse Features and Accessories

Details the attachment of specific features like windows and doors, using the correct hardware as shown in steps 13-15.

Installing Elevator and Exterior Details

Guides the installation of the elevator mechanism and exterior elements, including tips for adjusting elevator resistance.

Finalizing Dollhouse Construction

Completes the main dollhouse assembly, including attaching final parts and ensuring proper hardware tightness.

Decorative Plant Attachment and FCC Compliance

Details attaching the final decorative plant element and provides FCC compliance statements for the device.

Dollhouse Component Battery Operations

Piano and Toilet Battery Setup

Instructions for installing and operating batteries in the piano and toilet components, including activation and replacement.

General Battery Safety and Handling Tips

Provides essential guidelines for safe battery installation, use, and disposal, applicable to all dollhouse components.

Floor Lamp Battery Setup and Operation

Details the battery installation and usage for the floor lamp component, covering activation and replacement procedures.

Important Product Information and Care

General Warnings and Initial Information

Covers crucial preliminary information including parental supervision, product construction, and use guidelines.

Cleaning Instructions and Warranty Details

Provides cleaning instructions and outlines the sole and limited warranty terms for the dollhouse.

Related product manuals