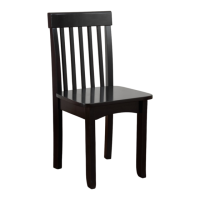
Do you have a question about the KidKraft Grand Espresso and is the answer not in the manual?
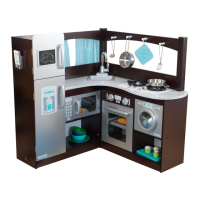
Connect side panels (8) and (9) using hardware.
Attach panel (14) and (15) to panel (8) using hardware.
Attach panel (9) to the assembly using hardware.
Attach panel (13) to the left side of the unit using hardware.
Insert panels (4) and (6) into the main structure.
Slide panel (16) into the designated slots.
Attach handle (42) to panel (24) using hardware.
Attach speaker/knob panel (23) with hardware.
Install the oven door frame (24).
Attach hinges (54a, 54b, 54c) to panel (28).
Mount panel (28) to the unit using hardware.
Install oven door panel (23) with hinges.
Attach shelf panel (20) to the unit.
Assemble the side panels (1) and (2) with top panels (7, 11, 12).
Connect side panels (1) and (2) to the base structure.
Attach the back support panel (30).
Assemble the microwave shelf unit (30) with hardware.
Insert shelf panel (19) into the unit.
Attach knobs and door handle (26, 40) to the door.
Mount the oven door (26) with attached hardware.
Attach the side panel (21) to the unit.
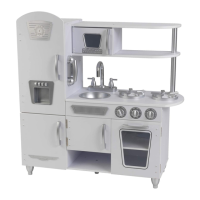
Attach support posts (36, 37) to the countertop (29).
Install the sink base (39) and burners (55) onto the countertop.
Attach doors (44) and panels (7, 8) to the main structure.
Position and attach the back panels (7, 8, 29).
Secure the back panels using hardware (G, B, E).
Attach the curtain rod (43) and curtains (32) using hardware.
Install the stovetop panel (34) with hardware.
Attach the shelf panel (33) and support (35).
Install the microwave shelf (31) using hardware.
Insert the microwave shelf panel (3) into the unit.
Attach the back panel (31) to the main assembly.
Insert the shelf panel (5) into the unit.
Attach oven doors (25, 27) with handles (41).
Mount the oven doors to the unit using hardware.
Attach the side support brackets (R) to the unit.
Hang the curtains (47) on the rod (45).
Insert the sink (38) and attach accessories (46, 48-52).
Guidance on supervising children during play to ensure safety and proper toy usage.
Instructions for cleaning the product using approved methods and materials.
Details on the product warranty, coverage, and claim process.
| Brand | KidKraft |
|---|---|
| Model | Grand Espresso |
| Category | Indoor Furnishing |
| Language | English |