3
Adjustments
Even if your KILN-SITTER was adjusted at the factory, it could have been jarred out of
adjustment during shipment or delivery. Let's first be sure the KILN-SITTER is in
proper adjustment before using.
Here are some simple adjustment checks for you to make before firing your kiln. We
urge you to make them carefully and repeat this check every 30 firings during its
lifetime.
1. TURN ALL SWITCHES OFF
2. INSTALL FIRING GUAGE
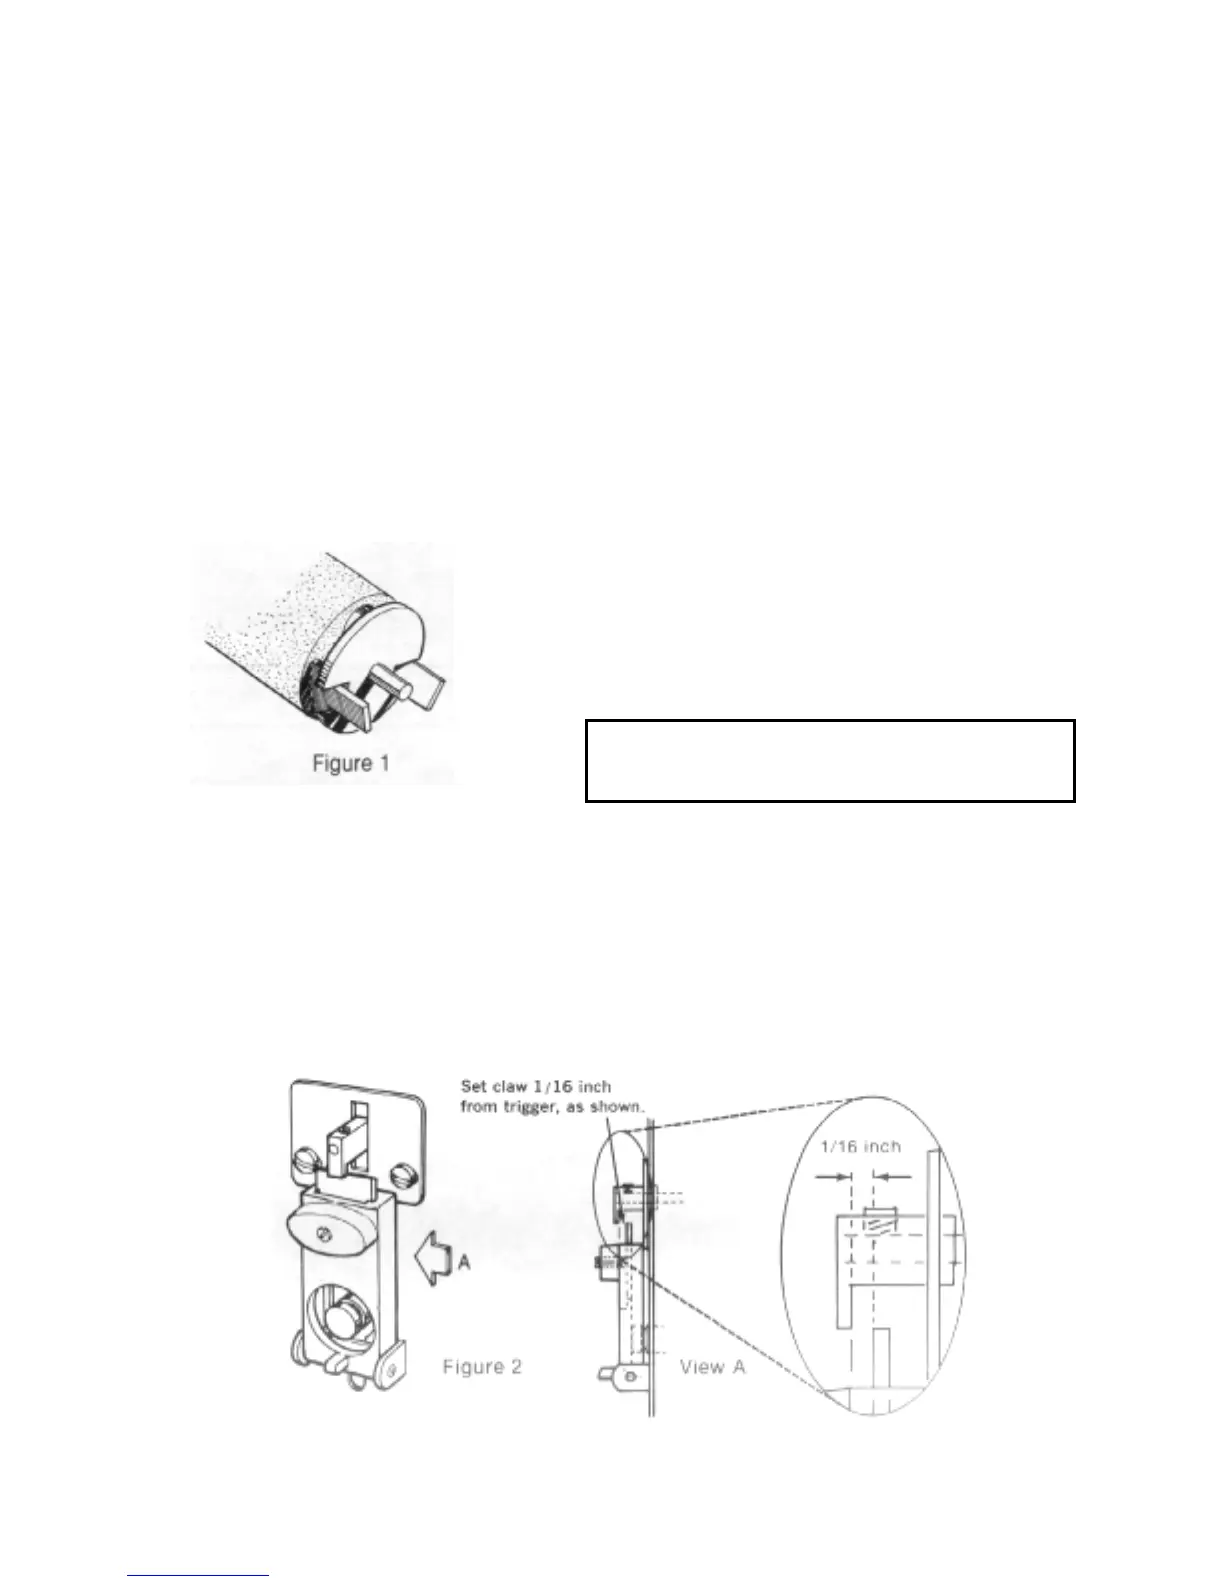
3. CHECK POSITION OF RELEASE CLAW AND WEIGHT TRIGGER
a. With the firing gauge in position, swing the weight up against the guide plate. Pull
the claw forward (against the slight play in the swivel/pivot assembly) and check for
a 1/16
th
-inch clearance between the inside tip of the claw and the face of the trigger
as shown in Figure 2. The set screw on top of the claw may be loosened if the
adjustment of the claw position is necessary. Retighten the set screw firmly.
Normally the firing gauge is in position
when your kiln is shipped from the factory
(held by a rubber band at the end of the
KILN-SITTER tube.) If it has been
removed, it should now be replaced ove
the sensing rod and cone supports, as
shown in Figure .
CAUTION : Remove firing gauge before
operating kiln.
 Loading...