6
6. TURN ALL SWITCHES OFF.
7. INSERT A FINBER INTO THE HOLE IN THE WEIGHT AND PUSH FIRMLY IN ON
THE PLUNGER UNTIL IT LOCKS.
8. FIRE THE KILN BY USING THE REGULAR KILN SWITCHES, AS INSTRUCTED
BY THE KILN MANUFACTURER. (For purposes of test firing, when the kiln is
empty, the highest temperature setting may be used.)
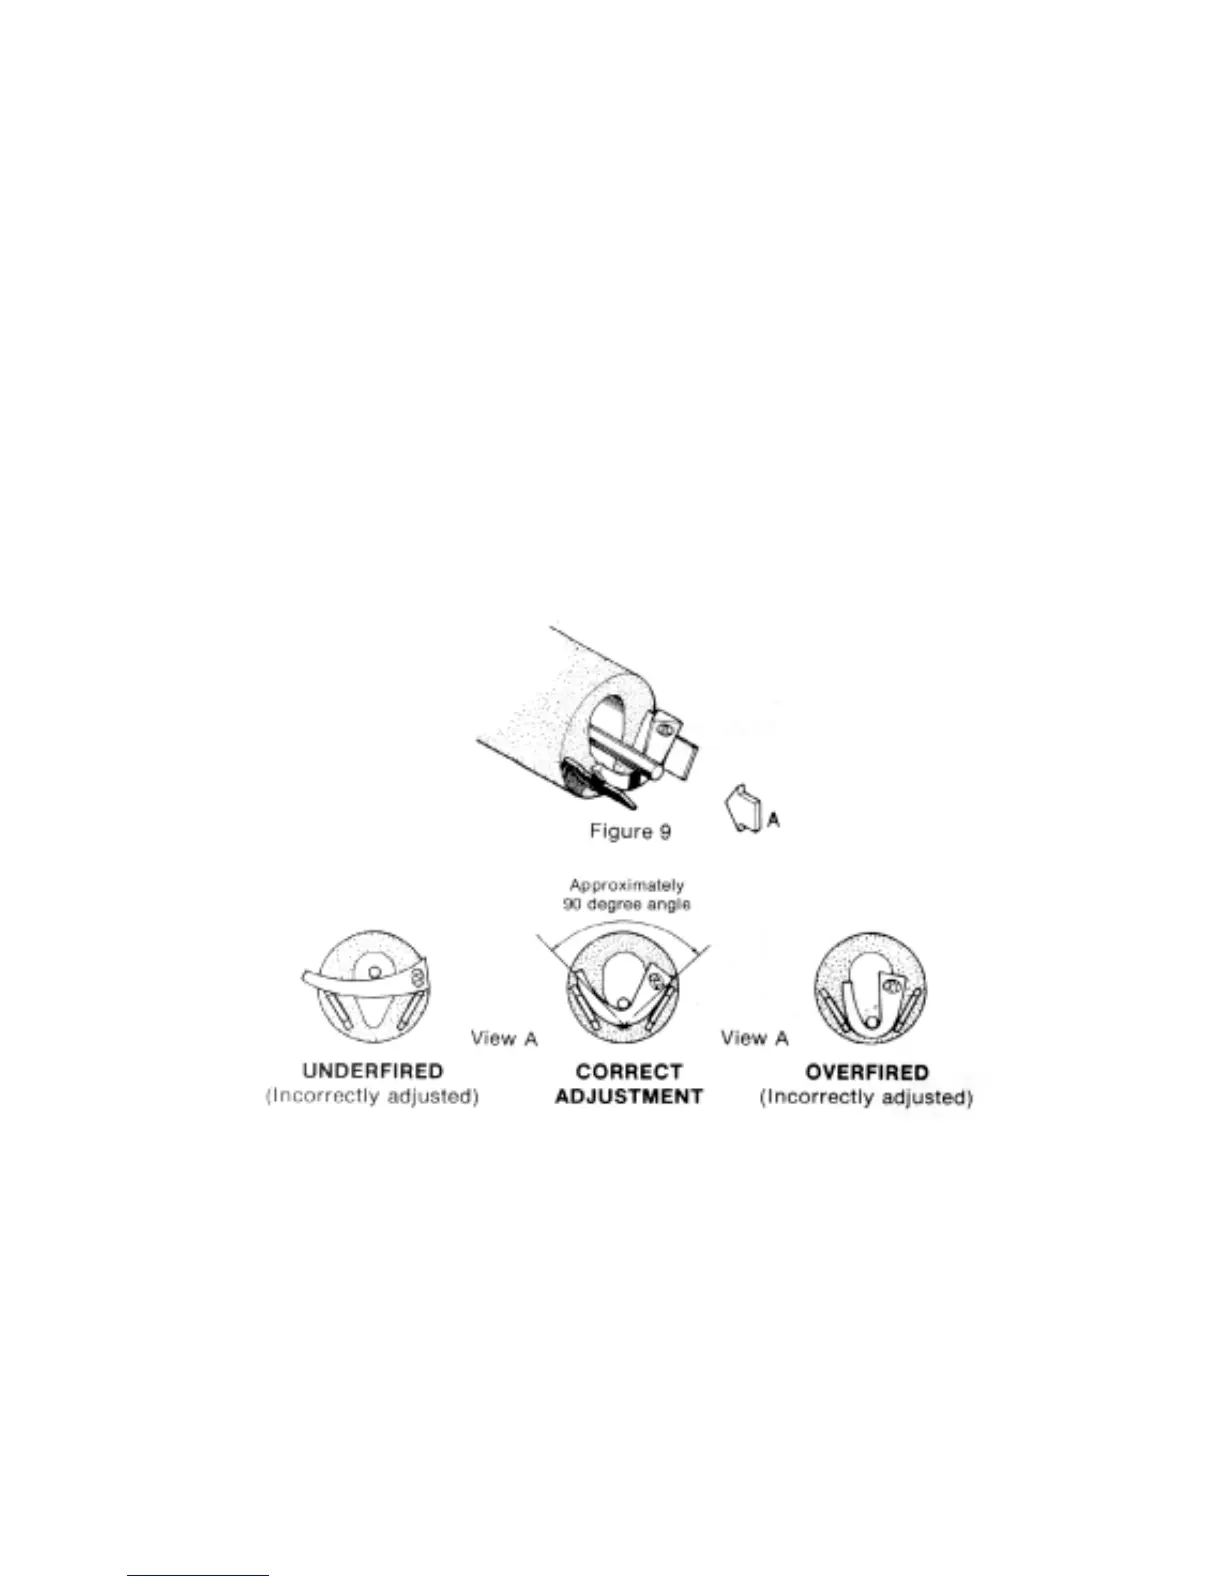
In approximately one hour the KILN-SITTER weight will drop, shutting off the kiln.
When the kiln is cool enough to handle you may open it and inspect the cone. If all
adjustments have been made correctly, the cone on the KILN-SITTER will be bent to
an approximate 90-degree angle shape similar to the illustration in Figure 9. However, if
it is bent similar to the "over-fired" illustration, reduce the kiln switch settings. This will
increase the firing time, reduce the rate of climb and allow the cone to mature properly.
The best way to verify that your load is reaching a certain firing treatment is by using
witness cones. These are valuable and inexpensive instruments that reliably measure
actual firing performance. Witness cones are optional but we recommend their use
during test firing and also periodically during normal operations, as a check for
consistent firing performance, For information on witness cones, refer to page 9.
You are now ready to begin normal firing operations.
 Loading...