1
1
( )
-
!
!
-
-
!
!
-
-
Rev. 2.27.18
-
-
Time Period Mode
1
( )
-
!
!
-
-
!
!
-
-
Rev. 2.27.18
-
-
Time Period Mode
Item #101419 9-15-21
4
READ ALL WIRE SIZING, VOLTAGE REQUIREMENTS AND SAFETY
DATA TO AVOID PROPERTY DAMAGE AND PERSONAL INJURY
U.S. PATENT #6,748,163 B2 • CIPO PATENT #2,393,882
INSTALLATION INSTRUCTIONS
WARNING
MAINTENANCE & WARRANTY
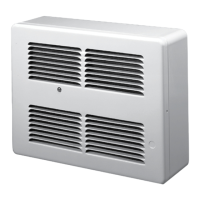
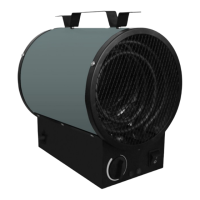
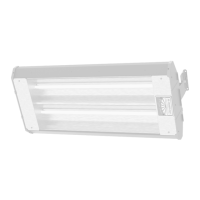
SL SERIES
Wall Heaters
Models: 1215 (120V) 2422 (240V) 2022 (208V)
SMART LIMIT
PROTECTION
®
SAVE THESE INSTRUCTIONS
KING ELECTRICAL MFG. COMPANY · 9131-10TH AVENUE SOUTH · SEATTLE, WA 98108 · PH: 206.762.0400 · FAX: 206.763.7738 · www.king-electric.com
DANGER
ELECTRIC SHOCK OR FIRE HAZARD
INSTALLATION INSTRUCTIONS
KING Electrical Mfg. Company 9131 10th Ave So. Seattle, WA 98108 Ph: 206-762-0400 Fax: 206-763-7738
Must Specify 120 or 240 Volt At Time Of Order
SL2022
208Volt, 500-750-1000-1250-1500-1750-2250 Watts
SL2422
240Volt, 500-750-1000-1250-1500-1750-2250 Watts
SL1215
120Volt, 250-500-750-1000-1250-1500 Watts
It is extremely important that you verify that the electrical power supply is the same voltage as the heater you are installing. 240
and 120 Volt heaters are not interchangeable. Powering a 240 Volt unit with 120 Volt supply wires will reduce the heater output
by approximately 75%. Powering a 120 Volt unit with 240 Volt supply wires will destroy the heater and void warranties.
CAUTION: Turn off power source supplying the heater before attempting installation, maintenance, or repairs. Lock or tag circuit
breaker or fuse panel door. Failure to do so could result in serious electrical shock, burns, or possible death.
After removing the heater from the carton, check to make sure the heater has not been damaged in shipment.
Remove the grill by loosening and removing the two screws on the side of the front panel.
Remove one 7/8" knock-out and feed the supply wire into the wall box using an approved electrical ¿ tting to prevent
cha¿ ng of the supply wires.
Install the wall can a minimum of 6" from vertical side walls. The Slim Line heater is approved to be mounted at À oor
level although we recommend mounting it 4" above the À oor. This will help the heater run cleaner, thus require less
maintenance.
Secure the wall box to 2x4 studs (Use molly bolts if studs cannot be located) using the 4 holes provided in the back of
the surface box.
Select the wattage and con¿ gure the terminals per the wiring diagram. Connect the supply wires to the leads from the
heater. Attach the ¿ eld grounding wire to the green screw or pig tail.
Replace the front grill and secure with the two screws provided. The top ¿ rst louver in the grill must be open into and
between wall can and top of heater for proper circulation of air.
The installation is now complete and the heater is ready to be energized for use.
1.
2.
3.
4.
5.
6.
7.
8.
This heater includes a manual reset thermal protector with a
self-hold feature. If the heater shuts off with the on position
and the room temperature is below the highest thermostat
setting, immediately disconnect the power to the heater at
the circuit breaker and inspect for any objects on or adja-
cent to the heater that may cause high temperatures. After
inspecting the heater, keep the power off to the heater for 10
minutes to reset the thermal protector. If the heater thermal
protector shuts the heater off again, imme-
diately turn the heater off at the circuit
break and inspect the heater for
possible fan motor failure or
dirt and lint on the heating
element. Repeat starting
procedure..
slim-line install.indd : rev. 11/06
SLP
SMART
LIMIT
PROTECTION
®
U.S. PATENT #6,748,163 B2 • CIPO PATENT #2,393,882
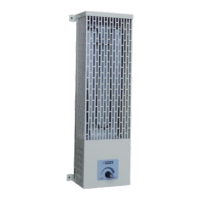
DO NOT INSTALL
VERTICALLY
It is extremely important to verify the electrical power supply is the same voltage as the heater being installed. 240 and
120 Volt heaters are not interchangeable. Powering a 208/240/277 Volt unit with 120 Volt supply wires will reduce heater
output by approximately 75%. Powering a 120 Volt unit with 208/240/277 Volt supply wires will destroy the heater and voids
all guarantees and warranties.
CAUTION: Keep electrical cords, drapery, furnishings and other combustibles at least 3 feet (.9m) from front of the heater
and away from side and rear. Do not block the heater in any manner. Can be installed w/zero WRÀRRUand no closer than
6 inches to the open edge of a door and adjacent wall. Never paint the heater grill.
WARNINGS: Turn off the power source supplying the heater before attempting any installation, maintenance or repairs.
Lock or tag circuit breaker/fuse panel door. Failure to do so could result in serious electrical shock, burns or possible death.
The superior quality and design of this heater will provide years of trouble-free performance. Each year the heater should be checked and cleaned for lint and/or dust accumulation. King
recommends using a soft bristle brush and vacuum to knock off contaminates. The motor is permanently lubricated and requires no oiling.
6/6OLP/LQH:DOO+HDWHUVFDUU\D¿YH\HDUZDUUDQW\RQWKHHOHPHQWVDQGDWZR\HDUZDUUDQW\RQFRPSRQHQWVIURPGDWHRILQVWDOODWLRQ7KLVZDUUDQW\UHTXLUHVWKDWWKHRZQHURU
his agent install the equipment in accordance with the National Electrical Code, any other applicable heating or electrical codes, and the manufacturer’s installation instructions. It further
requires that reasonable and necessary maintenance be performed on the unit. Failure to properly maintain the unit will result in the warranty being voided. The company is not liable for
DEXVHRUPLVXVHRISURGXFWDVPD\EH¿QDOO\GHWHUPLQHGE\WKHFRPSDQ\7KHFXVWRPHUVKDOOEHUHVSRQVLEOHIRUDOOFRVWVLQFXUUHGLQWKHUHPRYDORUUHLQVWDOODWLRQRISURGXFWVLQFOXGLQJ
labor costs and shipping costs incurred to return products to King Manufacturing. King Manufacturing will repair or replace, at our option, at no charge to the customer with return freight
paid by King. King Manufacturing shall not be liable for consequential damages arising with respect to the product, whether based upon negligence, tort, strict liability or contract. No other
written or oral warranty applies, nor any warranties by representatives, dealers, employees of King, or any other person. All returns require a King Return Goods Authorization (RGA);
Unauthorized returns will be refused. Do not return malfunctioning/defective products to store.
Operating voltage cannot exceed 5% of rated voltage. Operating heater above listed voltage ratings voids all guarantees and warranties.
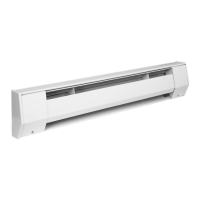
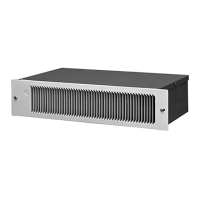
SL Slimline Series Only
zero clearance to floor
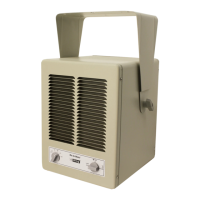
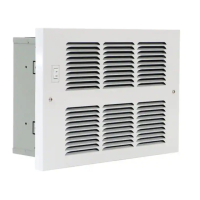
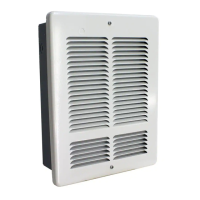
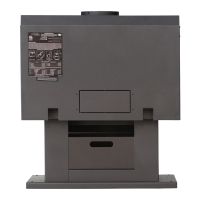
CLEANING & MAINTENANCE GUIDE FOR
PAW - SL SERIES HEATERS
Regular maintenance on an electric wall heater will prolong the life of
the product and keep it operating safely. Heaters should be cleaned and
inspected every 6 months. This guide will show in detail how to properly
clean and maintain your King electric wall heater. It will also show when
parts or perhaps the entire heater should be replaced. Listed below are
step by step instructions for cleaning and maintaining the PAW Series
Wall Heater.
WARNING: Take extreme caution when
working with electrical heaters. Turn off
the electrical power to the heater before
removing the grille of the heater. Lock,
tape or tag the circuit breaker so that the
power cannot be turned on accidentally
while working on the heater.
1. After the power is turned off, remove grille using a #2 square drive
or a #2 Phillips head screw driver. DO NOT remove heater interior
and wall can from wall! Clean grille before reinstalling.
KING ELECTRICAL MFG. CO. · 9131 - 10TH AVE SOUTH · SEATTLE, WA 98108
2. Use a soft bristled brush (1" to 2" wide) such as a paint brush to
remove any contaminants from the fan cage. Also spin the fan by hand
to make sure that it spins freely. If it feels like the motor is binding see
instructions below for oiling motor.
To clean heater, start by using a vacuum cleaner nozzle in the blow
out mode.
4. Vacuum out any material in the squirrel cage by placing the vacuum
nozzle close to the fan cage. Be careful not to bend the squirrel cage
because it could become out of balance if deformed.
The useful life on a PAW - SL Series Heater depends on the amount
of use, environment, and how often it is cleaned and maintained. Heat-
ers operated beyond their useful life are more prone to problems. For
example, when a motor slows down due to wear or lack of cleaning it
reduces the CFM and can cause the heater to overheat, tripping the
limit control. The limit will cycle the heater on and off. It is much safer to
¿[WKHF\FOLQJKHDWHUEHIRUHLWIDLOV+HDWHUVSURGXFHGDIWHUKDYH
a light which turns on when the limit trips. Heaters prior to that do not
KDYHWKHOLJKWDQGDUHWKHUHIRUHPRUHGLI¿FXOWWRGHWHFWDF\FOLQJRFFXU-
rence. One way to tell is by listening for the click that is made when the
limit trips. With regular inspection and maintenance, your heater will
RSHUDWHVDIHO\DQGHI¿FLHQWO\+HDWHUVPDQXIDFWXUHGDIWHUXVHD
manual limit and do not have a light.
3. To clean the element, point the nozzle at the element as shown on
the diagram and blow the dust out. This will dislodge any contaminates
caught on the heating element. Compressed air blown onto the element
works well also. If you have another vacuum, you can blow out from the
bottom and suck the debris from the opening at the same time which
will minimize dirt and lint being blown into the room.
5. After removing contaminates lubricate the motor shaft and bearing
with a few drops of S.A.E. 20 synthetic oil at the locations shown. Do
not use WD-40. If the motor does not spin freely after oiling, it should
be replaced. Newer models have capped bearings and cannot be oiled.
Inspect the limit and look for signs of overheated wires and parts that
may need to be replaced.