K110sm8e2.doc
8-16
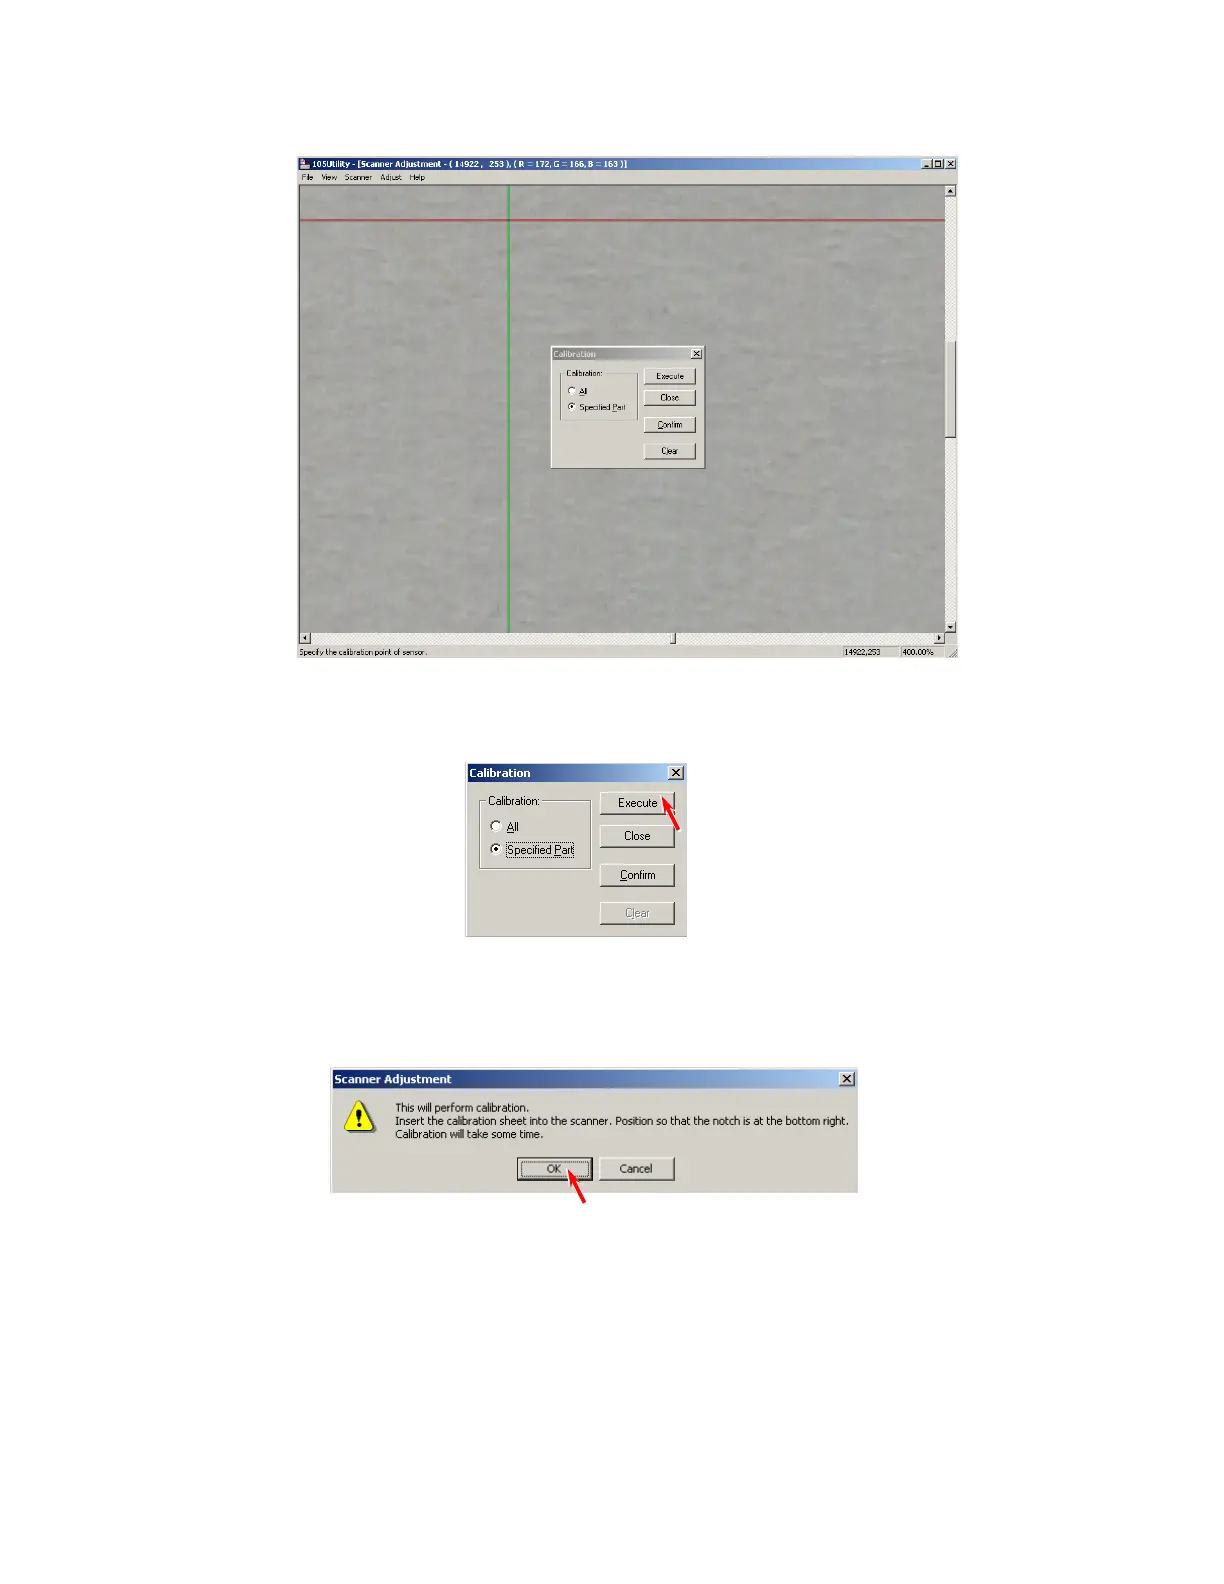
12. Move the red cursor so that its vertical line matches the defective pixel and then click the left
button of mouse.
The defective pixel is selected by this operation.
If there are some more defective pixels, select them in the same way.
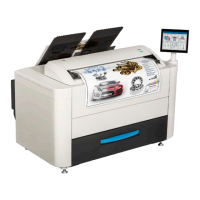
13. Click [Execute], and the selected “defective pixel” is compensated individually.
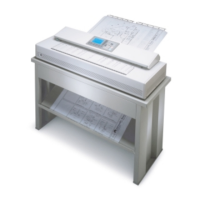
14. You will be asked to set the original again.
Set the Calibration Sheet to the scanner and click [OK].
15. Check the result of Calibration again.
Finish the adjustment if you find no problem.