2
GETTING STARTED
Thank you for purchasing the Kirsch
®
Basics Cellular Shade Collection. This shade has been custom built for you from the highest
quality materials. To avoid errors and save valuable time, please read these instructions before installing your new shade.
Please thoroughly review this instruction booklet and the enclosed packing list before beginning the installation.
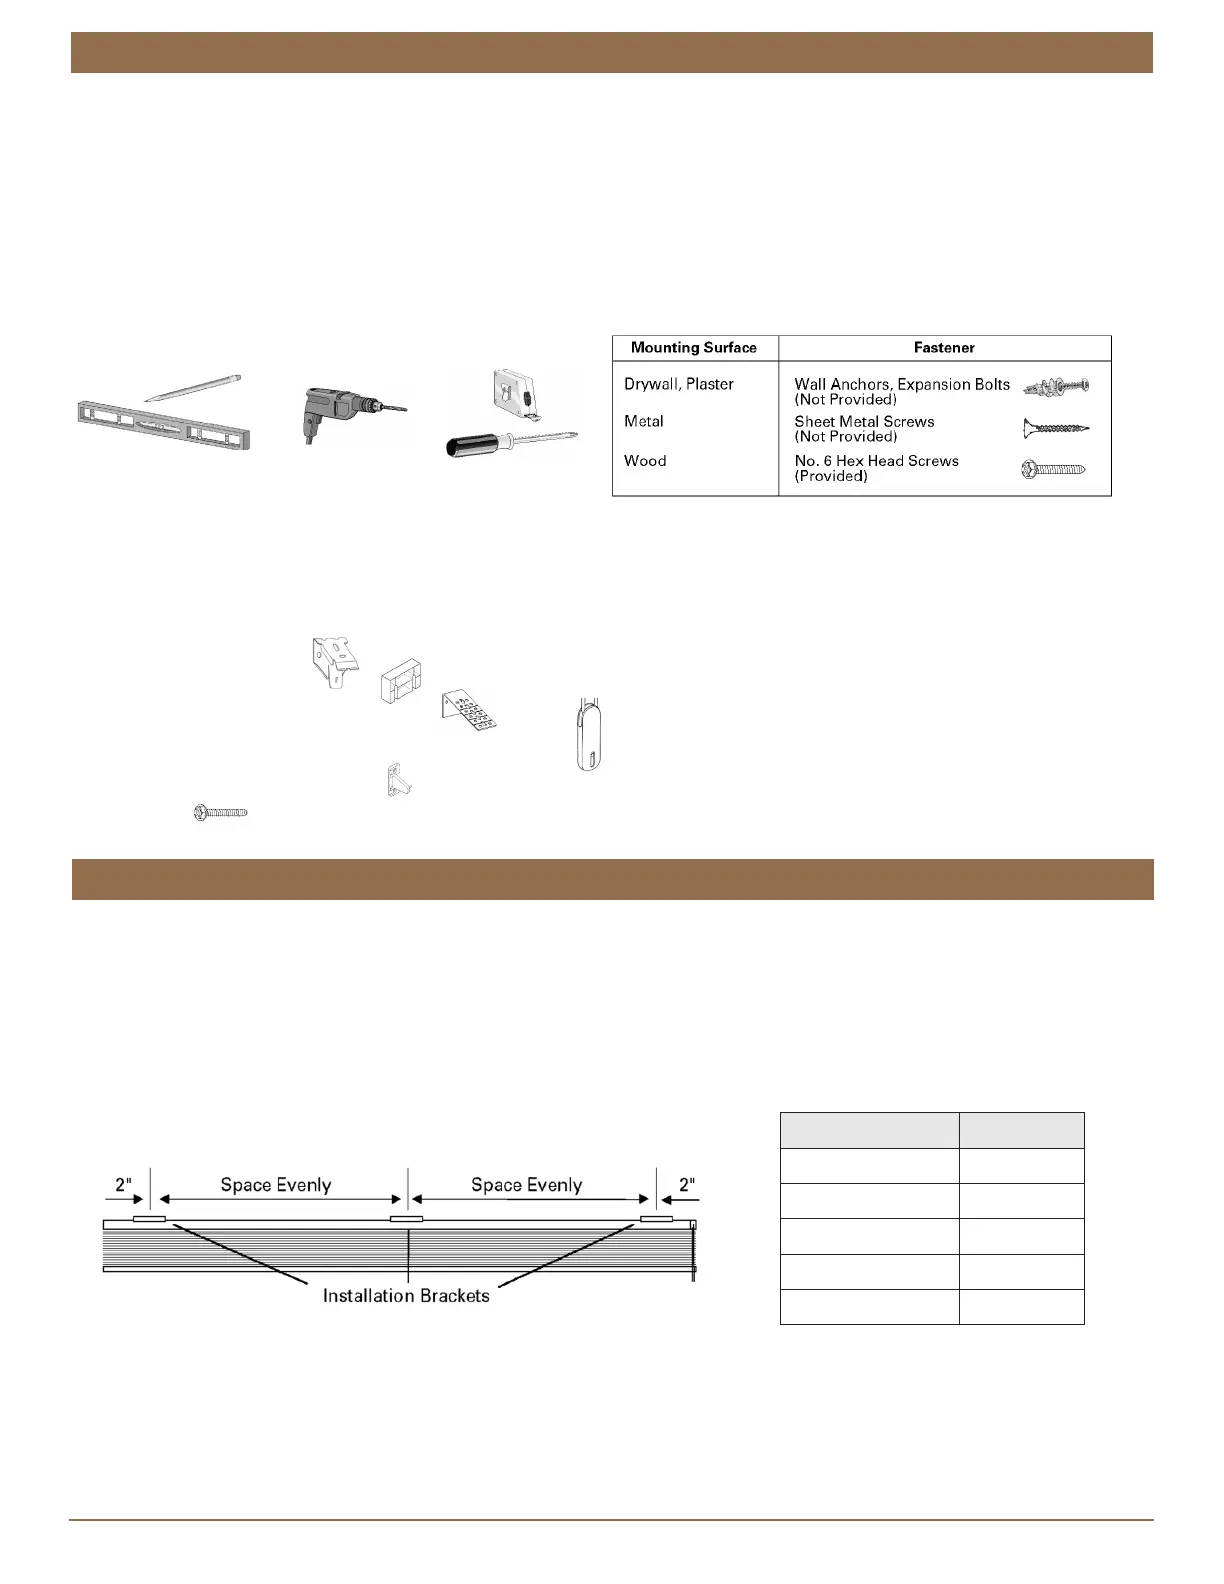
Tools You Will Need
■
Pencil or Marker
■
Measuring Tape
■
Phillips Screwdriver
■
Carpenter's Level
■
Power Drill
■
Mounting Fasteners
Parts
All the required installation components are wrapped and packaged with these instructions. Check that the parts you have
correspond to the parts shown below.
NOTE: Some parts may vary depending upon your chosen shade system or mounting option.
■
Installation Brackets
■
Spacer Blocks (optional)
■
Extension Bracket (optional)
■
Cord Tensioner Bracket & Instruction Pack (shades only)
■
Hold Down Brackets (optional)
■
Screws
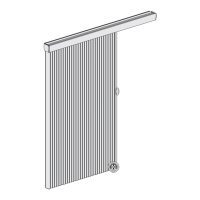
STEP 1: Mounting the Brackets
The installation brackets may be for INSIDE or OUTSIDE mounts.
■
Mounting the brackets level is essential for proper operation of the shade. Shim the brackets if necessary to achieve a level
alignment.
■
The bracket requirements and placements are the same for inside and outside mounts. Refer to the following spacing diagram
and bracket requirement chart.
INSTALLATION
Shade Width
Brackets
Required
18" to 38" 2
38-
1
⁄
8
" to 72" 3
72-
1
⁄
8
" to 106" 4
106-
1
⁄
8
" to 140" 5
140-
1
⁄
8
" to 174" 6