2. Use a flat-blade screwdriver to turn the high flame
setscrew counterclockwise approximate 90º.
3. Check that burner operates at the new high flame setting.
It may be necessary to adjust the screw setting slightly
more to get the ideal burner flame height.
When converting from LP to Natural gas, you will need to
adjust the high flame setting screw for ideal burner flame
height.
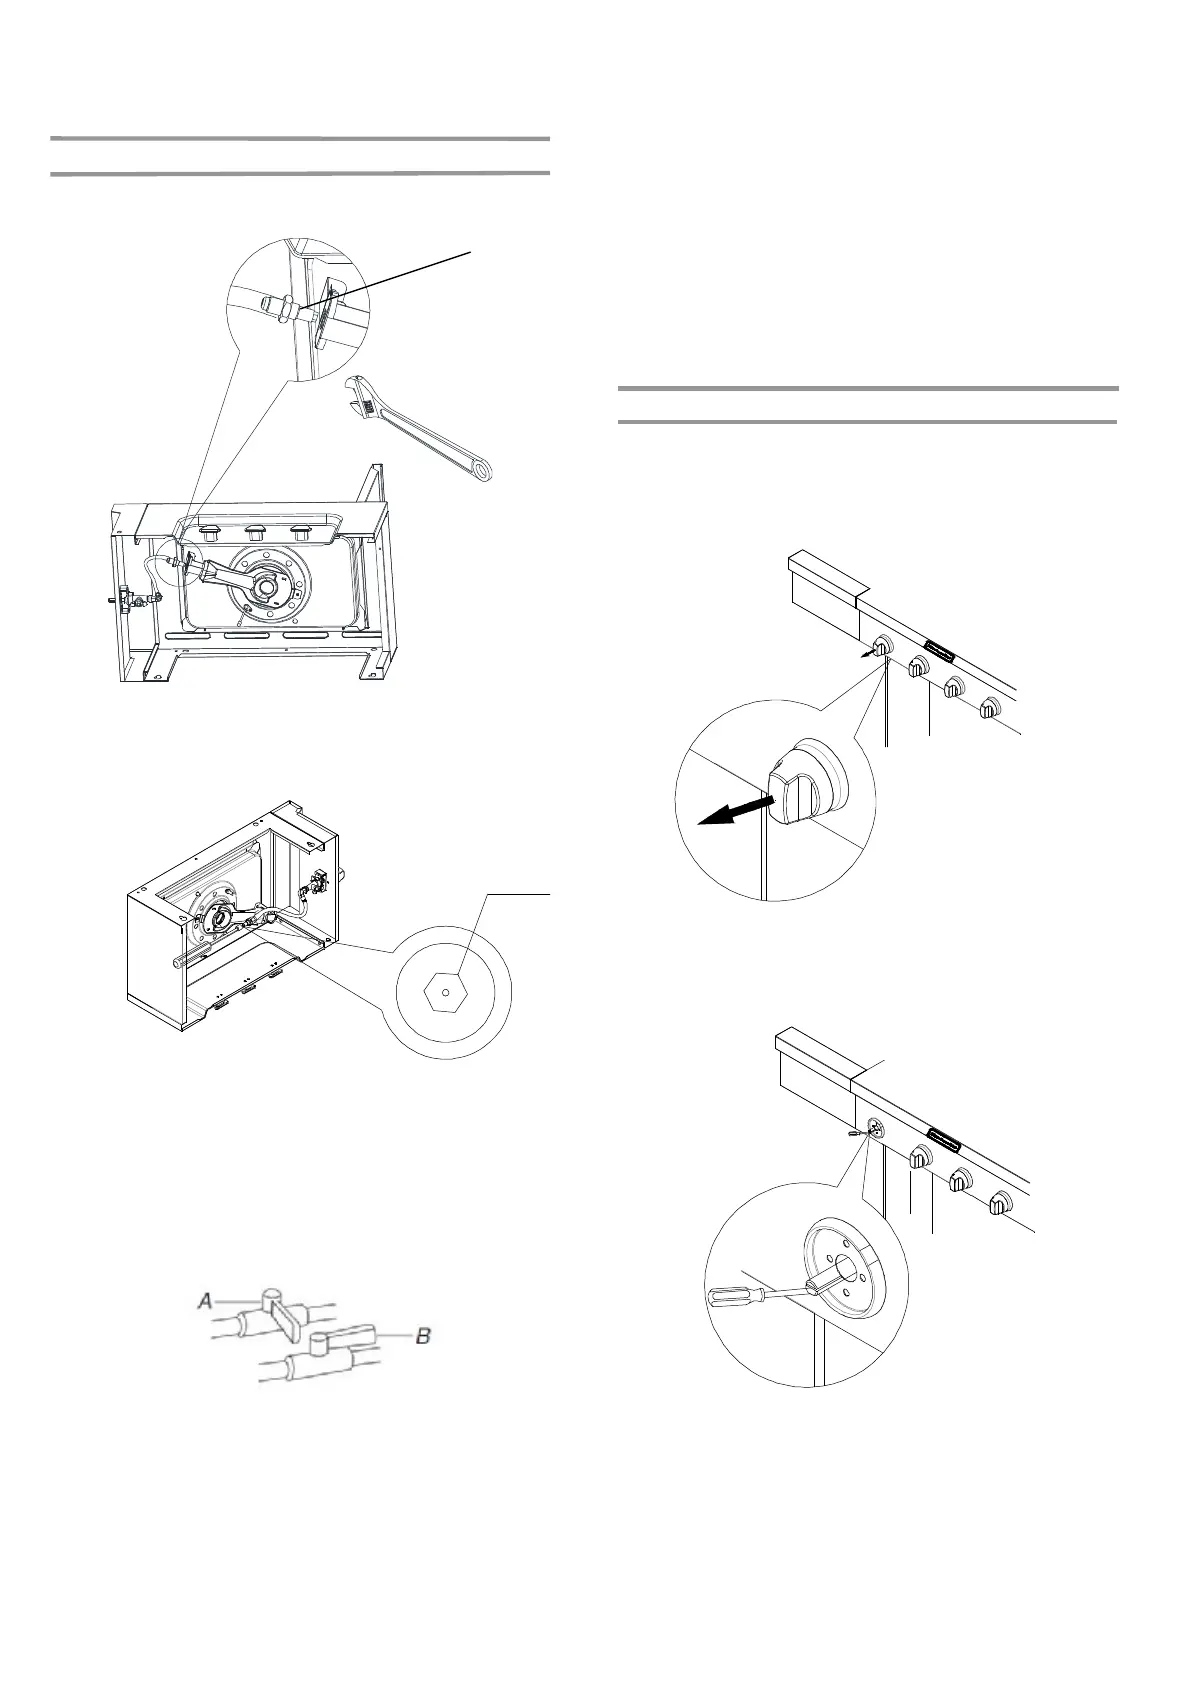
1. Remove each control knob for the main burners and side
burner
Change the Side burner Orifices
1. Use a wrench to remove the side burner orifice brass
connector with flex line end to side burner tube.
A. Side burner flex end
2. Use 6 mm socket wrench or 6 mm nut driver to remove the
orifice. Replace with the Natural gas orifice.
A. Orifice
IMPORTANT: Check that the orifice is properly installed inside of
the valve.
3.Reinstall side burner, tighten the side burner orifice brass
connector and side burner tube by using a wrench.
4. Open the manual shutoff valve in the gas supply. Then valveis
open when the handle is parallel to the gas pipe.
A
A
20
5. Test all connections using an approved noncorrosive leak-
detection solution. Bubbles will show a leak. Correct any
leak found
In the last page of the Use and Care Guide, writer “ Converted to
Natural Gas.” Also record the conversion date and the
technician/company that performed the conversion.
Note: Place LP gas parts in plastic parts bag for future use and
keep with pack containing literature.
Adjust High Flame Setting Screw
1. The appliance nameplate is located inside the grill cabinet on
the left –hand cabinet side. With a permanent marker, check
the box next to “Natural gas” and mark through “LP-Propane.”
Record Conversion
A. Closed valve
B. Open valve