ENGLISH
5
SPEED CONTROL GUIDE
NOTE: The speed control can be set to obtain speeds 1, 3, 5, 7, and 9 if a finer adjustment
is required. Do not exceed Speed 2 when preparing yeast doughs as this may cause damage
to the Stand Mixer.
Speed Accessory Action
Description
Stir Flat Beater
Flex Edge Beater*
Stir
For starting all mixing procedures, slow
stirring, combining, and mashing.
1
2 Flat Beater
Flex Edge Beater*
Slow mixing
For slow mixing, mashing, and faster
stirring.
Dough Hook To mix and knead yeast doughs,
heavy batters, and candies; mix thin or
splashy batters.
4 Flat Beater
Flex Edge Beater*
Mixing,
beating
For mixing semi-heavy batters, such
as cookies, or to combine sugar and
shortening. Medium speed for cake
mixes.
Wire Whip For adding sugar to egg whites for
meringues.
6 Flat Beater
Flex Edge Beater*
Beating,
creaming
For medium-fast beating (creaming),
or whipping. Use to finish mixing cake,
doughnut, and other batters. High
speed for cake mixes.
Wire Whip For medium-fast whipping of
ingredients requiring incorporation of
air, such as egg whites.
8 Wire Whip Fast
beating,
whipping
For whipping cream, egg whites,
and boiled frostings.
NOTE: To move the Speed Control Lever with ease, lift slightly up as you move it across
the settings in either direction.
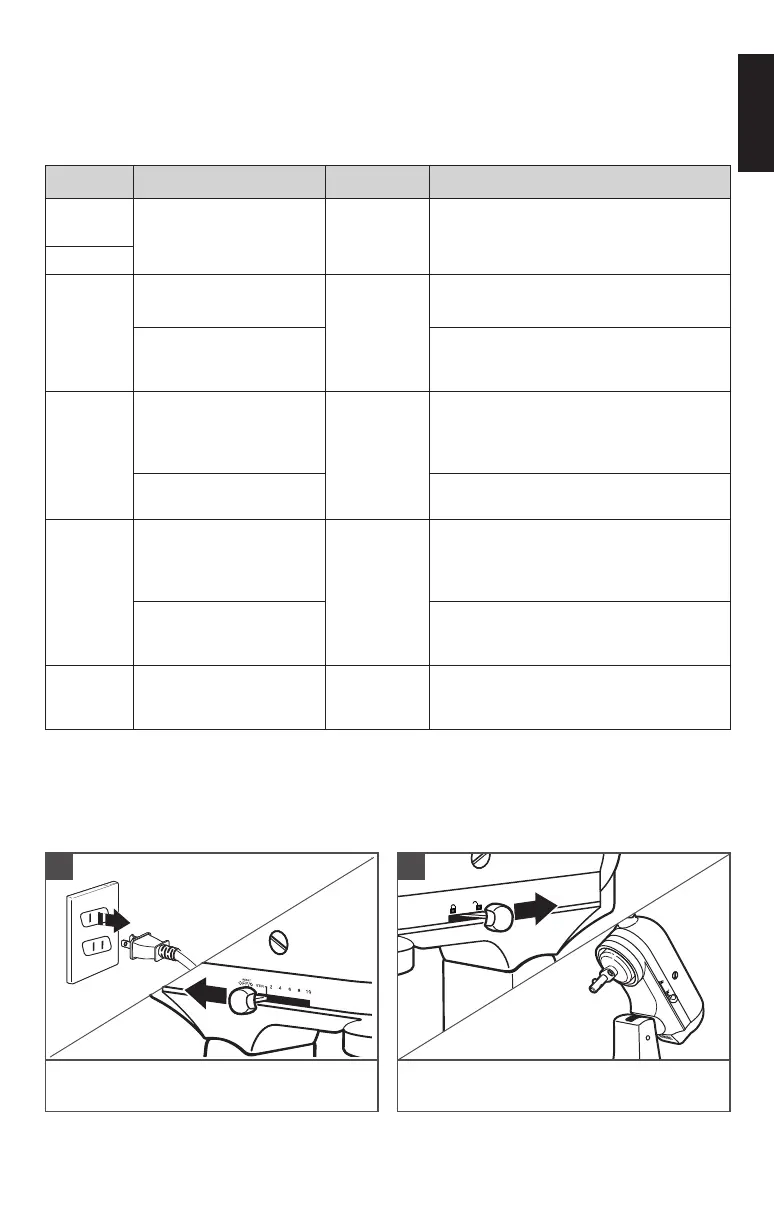
PRODUCT ASSEMBLY
Unplug and turn the Stand Mixer
“OFF/0”.
1
Unlock and lift the Motor Head. Then,
lock** the head to keep it lifted.
2
*Included with select models only. Also available as an optional accessory.
**Locking option is available on selected models.