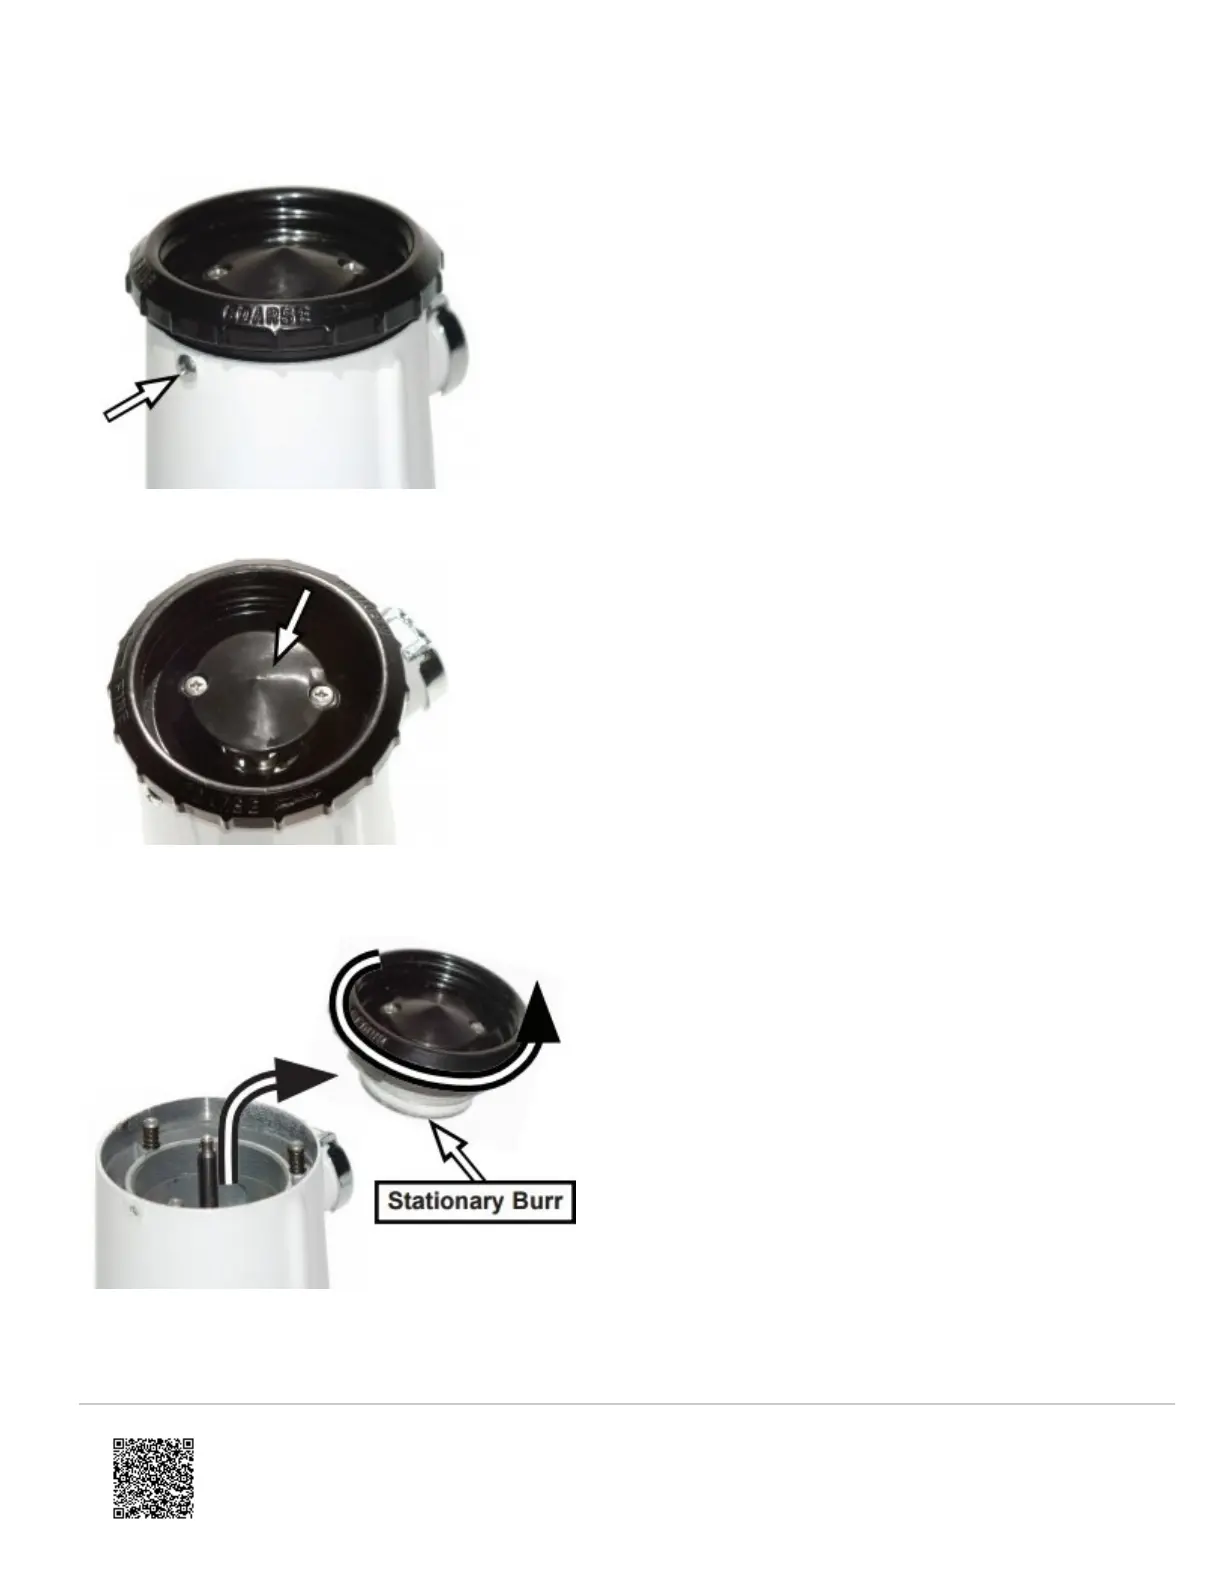
3. Locate the removable burr set screw on the back of the Coffee Mill. Using a Phillips head screwdriver, turn the
screw counterclockwise to loosen and remove the screw.
4. Make sure that you do not attempt to remove the finger guard shown here.
5. Turn the grind adjustment ring counterclockwise several rotations and remove it from the base. The stationary burr
is located on the bottom of the grind ring. tom of the burr with the drive pin on the motor shaft.
6. Lift the rotating burr out of the motor housing.
https://producthelp.kitchenaid.com/Countertop_Appliances/Coffee_Products/Product_Info/Coffee_Product_Assembly_and_O…
Updated: Thu, 12 Aug 2021 20:09:57 GMT
Powered by
3