This document is a user manual for the KitchenAid® Tilt Head Stand Mixer, providing instructions for its use, care, and various recipes.
Function Description:
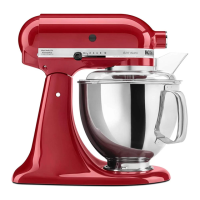
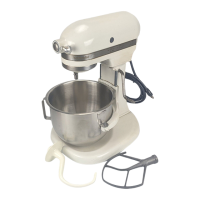
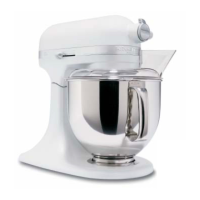
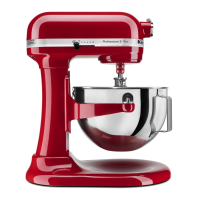
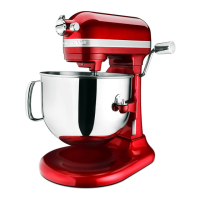
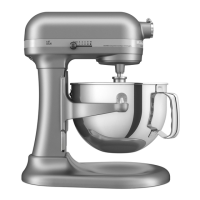
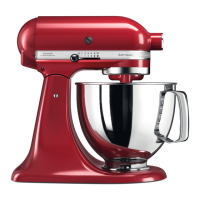
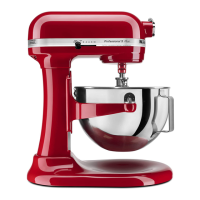
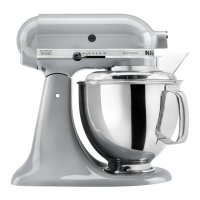
The KitchenAid® Tilt Head Stand Mixer is a versatile kitchen appliance designed for mixing, beating, whipping, and kneading various food mixtures. It features a motor head that tilts back for easy access to the bowl and attachments. The mixer is compatible with a range of KitchenAid® attachments that extend its functionality, such as an Ice Cream Maker, Pasta Roller and Cutter Set, Ravioli Maker, and Grain Mill. These attachments are designed for long life and secure fit, requiring no extra power unit as the power unit is built into the mixer.
Important Technical Specifications:
- Power Requirements: Volts: 120 V.A.C., Hertz: 60 Hz. The wattage rating is located on a tag under the mixer base and on the trim band.
- Bowl Capacity: 4½ or 5 Quart (4.26 or 4.73 L) Stainless Steel Bowl.
- Attachments: Includes a Flat Beater for normal to heavy mixtures (cakes, creamed frostings, candies, cookies, pie pastry, biscuits, quick breads, meat loaf, mashed potatoes), a Wire Whip for mixtures that need air incorporated (eggs, egg whites, heavy cream, boiled frostings, sponge cakes, angel food cakes, mayonnaise, some candies), and a Dough Hook for mixing and kneading yeast doughs (breads, rolls, coffee cakes, buns).
- Speed Control: Features a Speed Control Knob with settings from "Stir" to "10" (Fast Whip). Intermediate speeds (3, 5, 7, and 9) can be achieved by setting the lever between the listed speeds for finer adjustment.
- Dough Capacity: For a 4½-quart mixer, do not exceed 8 cups of all-purpose flour or 6 cups of whole wheat flour. For a 5-quart mixer, do not exceed 10 cups of all-purpose flour or 6 cups of whole wheat flour. For a 6-quart mixer, do not exceed 12 cups of all-purpose flour or 8 cups of whole wheat flour.
Usage Features:
- Assembly: To attach the bowl, turn the speed control to OFF, unplug the mixer, tilt the motor head back, place the bowl on the clamping plate, and turn it clockwise. To remove, turn the bowl counterclockwise. To attach beaters, turn the speed control to OFF, unplug the mixer, tilt the motor head back, slip the beater onto the shaft, press upward, and turn right to hook it over the pin. To remove, press upward and turn left.
- Motor Head Locking: The motor head can be locked in the down position using the Motor Head Locking Lever (not shown in diagram but mentioned). It should always be kept in the LOCK position during operation.
- Pouring Shield (if included): To attach, turn speed control to OFF, unplug, attach beater and bowl, then slide the shield over the bowl from the front until centered, with the bottom rim fitting within the bowl. For best results, rotate the shield so the motor head covers the "u" shaped gap, positioning the pouring chute to the right of the attachment hub. Ingredients can be poured through the chute.
- Speed Control Guide:
- Stir: For slow stirring, combining, mashing, and starting all mixing procedures. Used to add flour, dry ingredients, liquids, and combine heavy mixtures. Also for the Ice Cream Maker attachment.
- Speed 2 (Slow Mixing): For slow mixing, mashing, faster stirring. Used for heavy batters, candies, mashing potatoes/vegetables, cutting shortening into flour, thin/splashy batters, and mixing/kneading yeast dough. Also for the Can Opener attachment.
- Speed 4 (Mixing, Beating): For semi-heavy batters (e.g., cookies), combining sugar and shortening, adding sugar to egg whites for meringues, and medium speed for cake mixes. Also for Food Grinder, Rotor Slicer/Shredder, and Fruit/Vegetable Strainer.
- Speed 6 (Beating, Creaming): For medium-fast beating (creaming) or whipping. Used to finish mixing cake, doughnut, and other batters. High speed for cake mixes. Also for Citrus Juicer attachment.
- Speed 8 (Fast Beating, Whipping): For whipping cream, egg whites, and boiled frostings.
- Speed 10 (Fast Whipping): For whipping small amounts of cream or egg whites. Also for Pasta Maker and Grain Mill attachments.
- Mixing Tips: KitchenAid® mixers mix faster and more thoroughly, so adjust mixing times (often half the time of other mixers). Add ingredients close to the bowl side, not directly into the moving beater. For cake mixes, use Speed 2 for low, Speed 4 for medium, and Speed 6 for high. For nuts, raisins, or candied fruits, fold in during the last few seconds on Stir Speed, ensuring batter is thick enough to prevent sinking. Liquid mixtures should start at lower speeds to avoid splashing.
- Egg Whites: Whip room temperature egg whites in a clean, dry bowl. Gradually increase speed to 10 for 1 egg white, or to 8 for 2+ egg whites. Watch closely to avoid overwhipping. Stages include frothy, begins to hold shape, soft peak, almost stiff, stiff but not dry, and stiff and dry.
- Whipped Cream: Pour cold whipping cream into a chilled bowl. Gradually increase speed to 10 for ¼-¾ cup, or to 8 for 1+ cup. Watch closely for stages: begins to thicken, holds its shape, and stiff.
Maintenance Features:
- Care and Cleaning: Always unplug the Stand Mixer before cleaning. Wipe the mixer with a soft, damp cloth; do not use household or commercial cleaners, and do not immerse in water. Wipe the beater shaft frequently.
- Attachment Cleaning: The bowl, white Flat Beater, and white Dough Hook are dishwasher safe. The Wire Whip, burnished Dough Hook, and burnished Flat Beater should be hand washed and dried immediately; do not wash them in a dishwasher. Do not store beaters on the shaft.
- Beater to Bowl Clearance Adjustment: The mixer is factory-adjusted for the Flat Beater to just clear the bottom of the bowl. If adjustment is needed, turn speed control to OFF, unplug, tilt motor head back, then turn screw (A) slightly counterclockwise to raise the beater or clockwise to lower it. Adjust until the beater just clears the bowl surface. Over-adjusting may prevent the motor head from locking. Proper adjustment prevents beaters from striking the bowl, which can cause coating wear or wire damage.
Troubleshooting:
- Warm Mixer/Pungent Odor: Normal during heavy loads or extended use, especially when new.
- Flat Beater Hitting Bowl: Adjust beater to bowl clearance (see maintenance section).
- Mixer Malfunction/Failure to Operate: Check if plugged in, if the circuit fuse is working (or breaker is closed), turn off for 10-15 seconds and back on; if still not working, allow to cool for 30 minutes. If problems persist, contact KitchenAid Customer Satisfaction Center. Do not return to retailer for service.