0 _i_¸¸__!:!!'i_i_i_:!ii,_:!_i_!i,_¸'i!!!iii;,_::!__di_:!!i!!i_iiii:i__oo i_i_:_iiii::_',_:_;_i_i_i:!_iiiiii_i_!iiii_,_:::(ii _:i_b,!i:_i:_i__i!_;ii:_i_i_:ii!_ii,¸y(iiii_:!__;!:,i,_,;_i_i:_!i___i__::_:!__Ii:i!!i_i:!iil¸_¸¸_ii'!!i?ii _:i!,_::_ii_i_:ii_I i!_i:iiiii_:>_:!i!_iiiiiiiii_!i_ili_
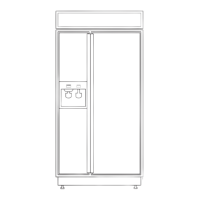
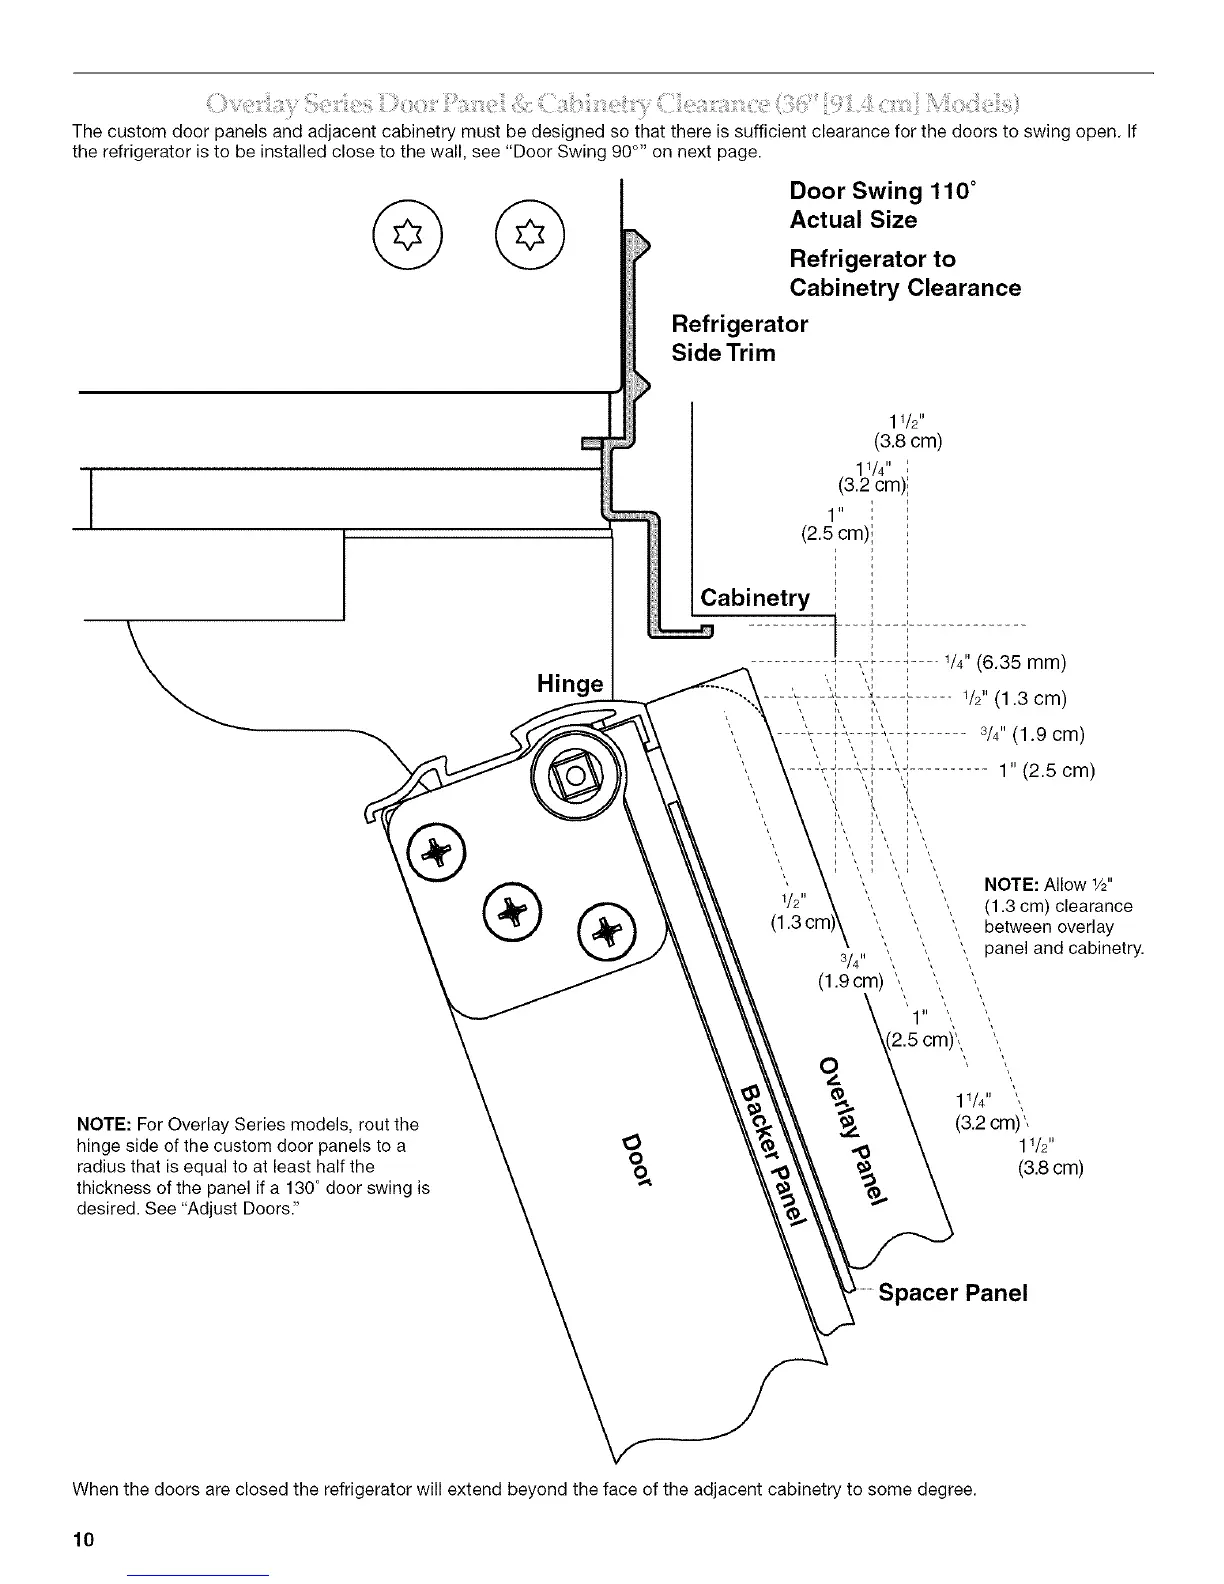
The custom door panels and adjacent cabinetry must be designed so that there is sufficient clearance for the doors to swing open. If
the refrigerator is to be installed close to the wall, see "Door Swing 90°'' on next page.
@©
Hinge
®
NOTE: For Overlay Series models, rout the
hinge side of the custom door panels to a
radius that is equal to at least half the
thickness of the panel if a 130° door swing is
desired. See "Adjust Doors."
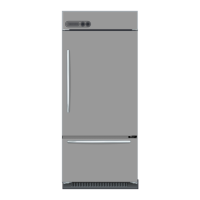
0
Door Swing 110 °
Actual Size
Refrigerator to
Cabinetry Clearance
Refrigerator
Side Trim
I 1/2"
(3.8 cm)
11/4" ,
(3.2 cm)
1"
(2.5 cm)
Cabinetry
1" (2.5 cm)
NOTE: Allow W'
(1.3 cm) clearance
between overlay
panel and cabinetry.
Panel
When the doors are closed the refrigerator will extend beyond the face of the adjacent cabinetry to some degree.
10