This document is an instruction manual for the KitchenAid KCGT 6010/1 cooker hood, providing detailed information on its installation, operation, maintenance, and safety.
Function Description
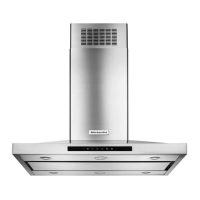
The KitchenAid KCGT 6010/1 is a cooker hood designed to extract cooking fumes and odors from the kitchen environment. It offers two primary modes of operation:
- Venting Mode: In this mode, the hood discharges exhaust fumes to the outside through an upper air outlet (B). This requires a venting pipe and fixing straps, which are not supplied with the hood.
- Recirculation Mode: This mode is used when external venting is not possible. Air is purified by passing through activated charcoal filters (not provided) and then recirculated back into the kitchen. The purified air is sent back into the atmosphere via a pipe that passes through the cupboard cabinetry and connects to a connector ring.
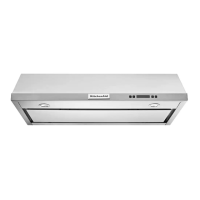
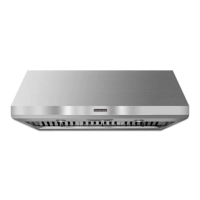
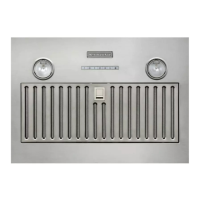
The hood is equipped with a control panel (1) for managing its functions, including lighting and extraction speeds. It features halogen bulbs (4) for illuminating the cooking area.
Important Technical Specifications
- Model: KCGT 6010/1
- Electrical Connection: The hood requires a mains voltage corresponding to the specifications label. It should be connected to a compliant socket or, if direct connection, via a legally complying bi-polar switch for complete mains disconnection. For Great Britain and Ireland, the appliance must be earthed and, if fitted with a BS 1363A 13amp fused plug, requires an A.S.T.A. approved fuse to BS 1362 type.
- Installation Distances: The minimum distance between the upper pan support surfaces on the cooking appliance and the lowest part of the cooker hood should be no less than 50 cm for electrical cookers and 70 cm for gas or mixed cookers. If the gas cooking appliance specifies a greater distance, that instruction must be followed.
- Light Bulbs: The hood uses 20W max (G4) halogen bulbs.
- Negative Pressure (Gas/Fuel Appliances): If used with other gas or fuel-burning appliances, the negative pressure of the room should not exceed 4Pa (4 x 10⁻⁵ bar).
Usage Features
The control panel of the KCGT 6010/1 offers several buttons for operation:
- ON/OFF Light Button (1): Toggles the light on or off.
- Motor ON/OFF Button (2): Turns the hood's motor on or off. When turned on, it operates at the previously selected suction speed.
- Extraction Speed Buttons (3, 4, 5): Allow selection of different extraction speeds (Speed 1, Speed 2, Speed 3).
- Intense Extraction ON/OFF Speed Button (6): Activates an intense extraction speed for approximately 5 minutes, after which the hood automatically reverts to the previously selected speed.
- Timer ON/OFF Button (7): Allows setting a limited running duration for the selected extraction speed:
- Speed 1: 20 minutes
- Speed 2: 15 minutes
- Speed 3: 10 minutes
- Intensive speed: 5 minutes
After the set time, the hood automatically turns off.
For optimal performance, it is recommended to turn on the suction 5 minutes before cooking and leave it running for about 15 minutes after cooking is finished, especially when there is a lot of steam.
Maintenance Features
Regular maintenance is crucial for the hood's proper functioning and safety:
- Cleaning: The hood should be cleaned regularly, both inside and out, at least as often as grease filter maintenance. A damp cloth with mild cleaning products should be used. Harsh products and alcohol are strictly prohibited. Failure to clean regularly can lead to fire hazards.
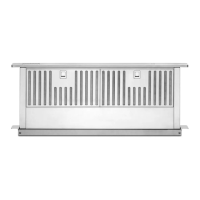
- Grease Filter: The metallic grease filter (2) should be cleaned by hand once a month with mild cleaning products, or in a dishwasher at a low temperature on a short cycle. To dismantle, pull the spring handle (3) to unhook it.
- Carbon Filter (Recirculation Mode Only): Activated carbon filters absorb cooking smells. Their saturation depends on installation, usage, and grease filter cleaning frequency. They must be replaced at least every four months.
- Fitting/Dismantling: To access the carbon filters, first remove the grease filter, then unhook the filter support frame, disconnecting the control panel and lights. Carbon filters are attached to each side, covering the protection grills on the motor impeller, and secured by turning the central handle (C) clockwise. To dismantle, turn the central handle (C) anticlockwise. After replacing, refit the filter support frame, reconnect the control panel and lights, and then the grease filter.
- Replacing Bulbs:
- Disconnect the appliance from the mains supply.
- Ensure bulbs have cooled down before touching.
- Remove the protective cover using a small flat screwdriver.
- Replace the blown bulb with a 20W max (G4) halogen bulb, avoiding direct contact with bare hands.
- Refit the light cover until it clicks into place. If the light doesn't work, check the bulb insertion before contacting customer service.
The manual emphasizes that all maintenance work should be performed after disconnecting the power supply. It also provides troubleshooting guidance for common issues like the hood not working, insufficient suction, or lights not functioning, before advising to contact the Customer Care Centre.