-
I
‘/LI?T!(:r’.
3.: PClf I
D CHANGE AIR SHUTTER SETTING
1. Top Burner
L.oosen air shutter screw and open air shutter to l/4”, using l/4” drill bit to check.
The unit is now ready to be checked out by first testing ALL gas connections for leaks. BE SURE THAT
TiiE ELECTRICITY iS “OFF” BEFORE TURNING ON GAS SUPPLY. Test with pressure gauge or apply
soapy solution or leak detector solution on all gas connections. Repair any leaks that may appear before
putting unit in opealion.
TOP BURNER CHECKOUT
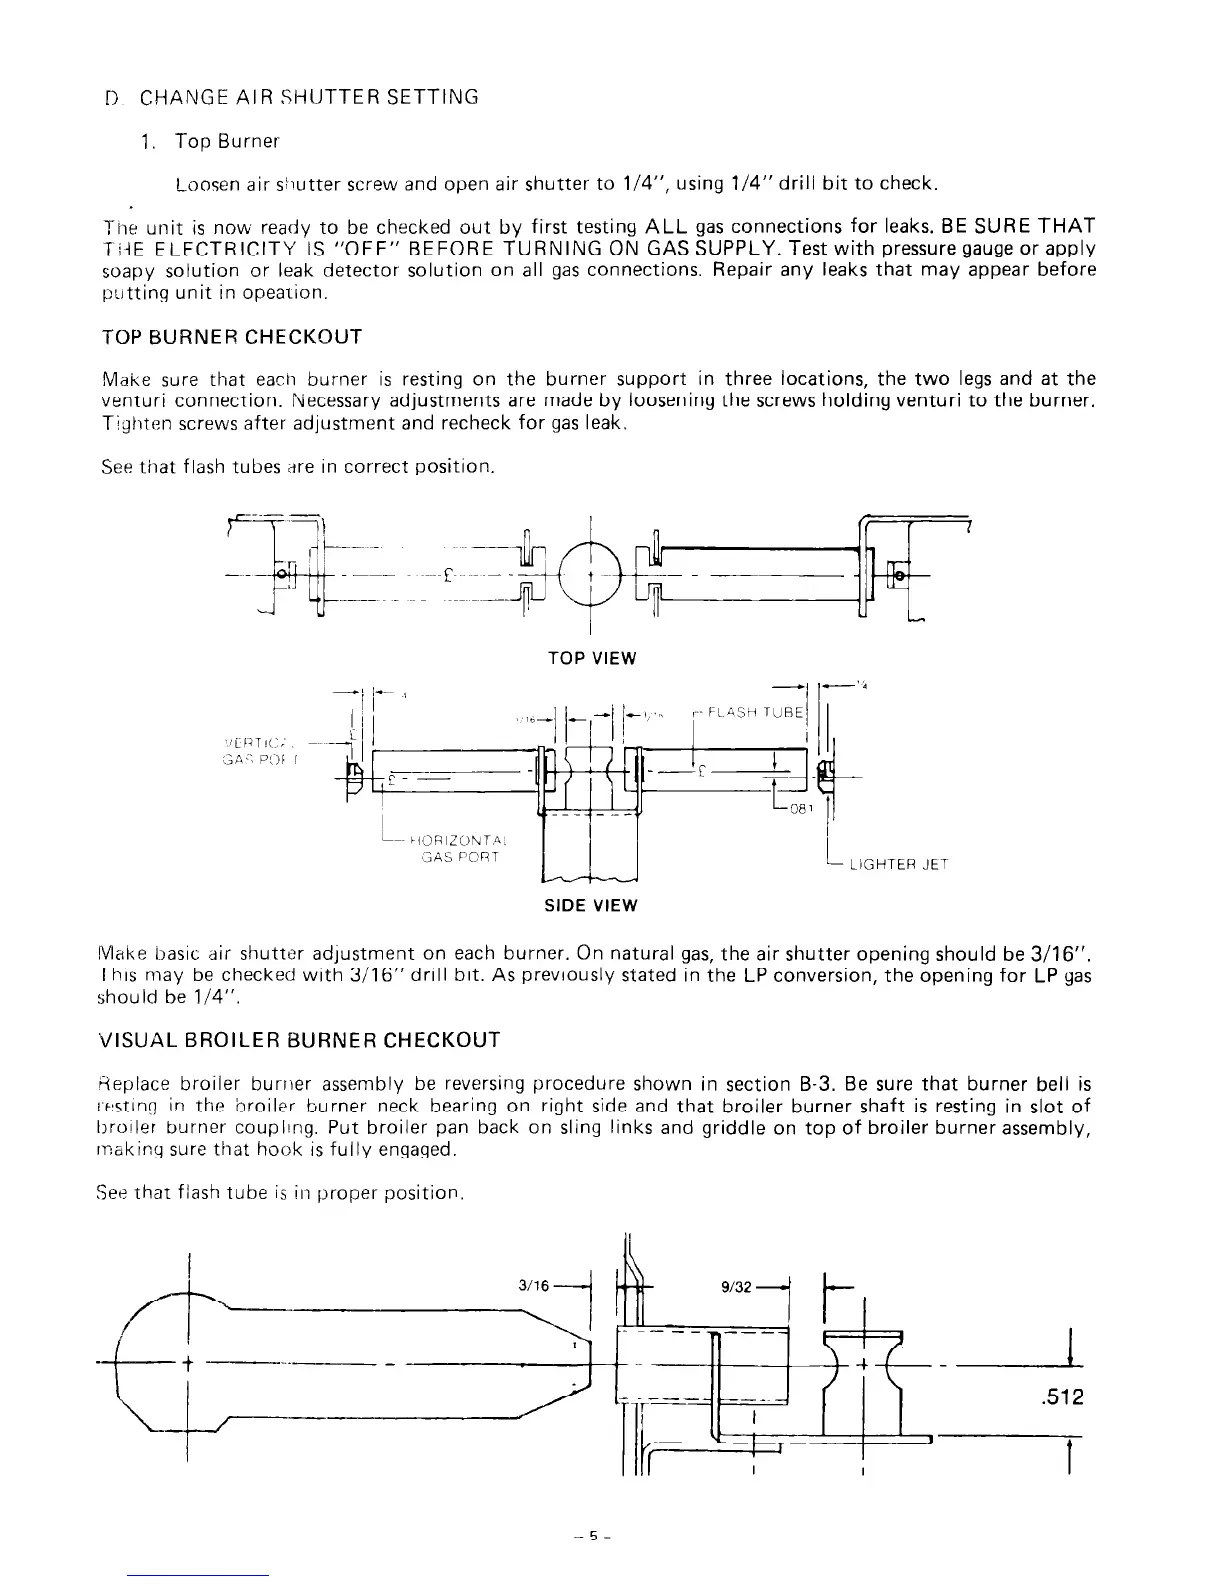
Make sure that eacn burner is resting on the burner support in three locations, the two legs and at the
venturi connection. Necessary adjustments are made by loosening the screws holding venturi to the burner.
Tighten screws after adjustment and recheck for gas leak.
See that flash tubes are in correct position.
TOP VIEW
I
I
j FLASH TUBE
I--~
tlOAlZONT,4L
GAS PCRT
L
LIGHTER Jtl
--
SIDE VIEW
IMake basic air shutter adjustment on each burner. On natural gas, the air shutter opening should be 3/16”.
This may be checked with 3/16” drill bit. As previously stated in the LP conversion, the opening for LP gas
should be l/4”.
‘VISUAL BROILER BURNER CHECKOUT
4eplace broiler burrler assembly be reversing procedure shown in section B-3. Be sure that burner bell is
IrestIng in the broiler burner neck bearing on right side and that broiler burner shaft is resting in slot of
broiler burner coupl!ng. Put broiler pan back on sling links and griddle on top of broiler burner assembly,
making sure that hook is fully engaged.
See that flash tube is in proper position,
!
ip
9/32
1. ~---~
y--
-+
? -1
- ---_ ___~
-Ilk v i : ( ’ ’
i
512
I
I
5-




 To Next Page