INSTALLATION REQUIREMENTS
Gather the required tools and parts before starting installation.
Read and follow the instructions provided with any tools listed
here.
Tools needed
• Tape measure • Masking tape
• Flat-blade screwdriver • Pipe-joint compound
resistant to LP gas
• Phillips screwdriver
• Level • 3/16"(4.8 mm) carbide-tipped
masonry drill bit (for
• Hand or electric drill concrete/ceramic floors)
• Hammer • Noncorrosive leak-detection
solution
• Wrench or pliers
For LP/Natural Gas
• Pipe wrench
Conversions
• 1%e"combination wrench • 1/2"combination wrench
• 3/8"nut driver • 7 mm combination wrench
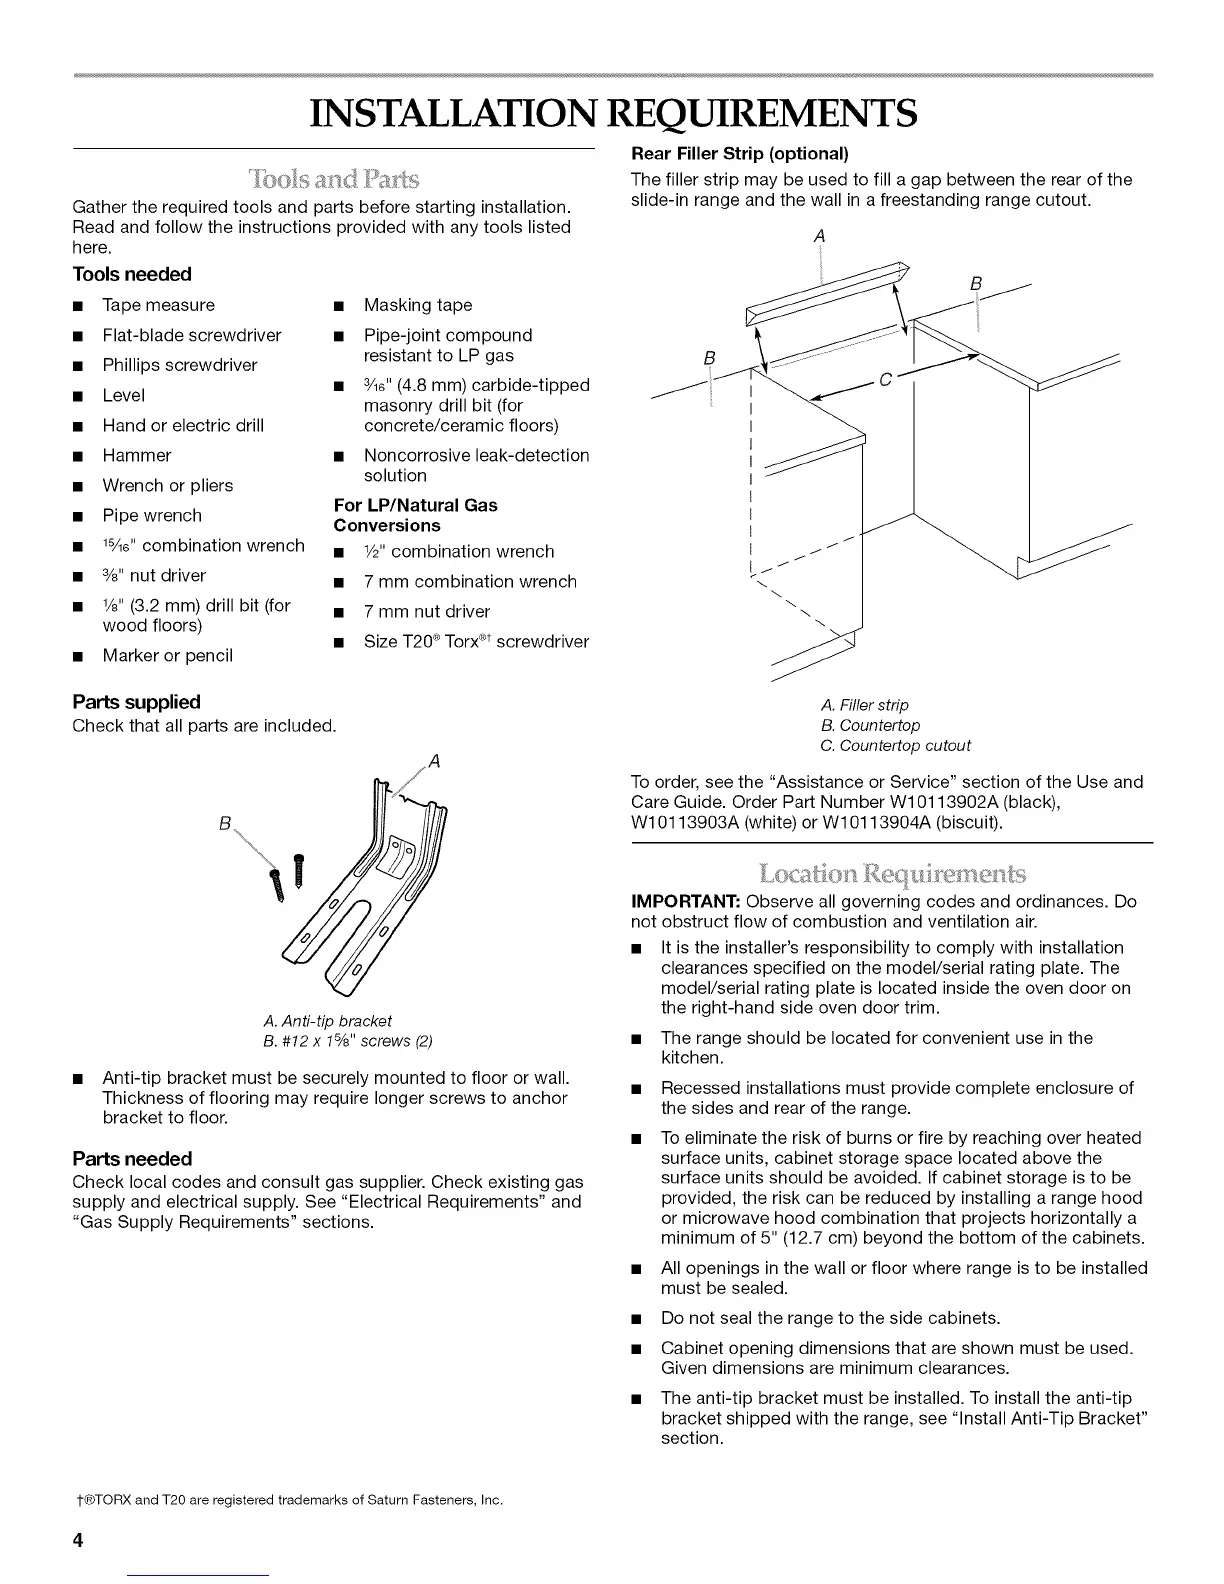
Rear Filler Strip (optional)
The filler strip may be used to fill a gap between the rear of the
slide-in range and the wall in a freestanding range cutout.
A
B
B
• 1/8"(3.2 mm) drill bit (for • 7 mm nut driver
wood floors)
• Size T20®Torx®tscrewdriver
• Marker or pencil
Parts supplied
Check that all parts are included.
A
B\
\ | ,
A. Anti-tip bracket
B. #12 x 15/8"screws (2)
Anti-tip bracket must be securely mounted to floor or wall.
Thickness of flooring may require longer screws to anchor
bracket to floor.
Parts needed
Check local codes and consult gas supplier. Check existing gas
supply and electrical supply. See "Electrical Requirements" and
"Gas Supply Requirements" sections.
A. Filler strip
B. Countertop
C. Countertop cutout
To order, see the "Assistance or Service" section of the Use and
Care Guide. Order Part Number W10113902A (black),
W10113903A (white) or W10113904A (biscuit).
IMPORTANT: Observe all governing codes and ordinances. Do
not obstruct flow of combustion and ventilation air.
• It is the installer's responsibility to comply with installation
clearances specified on the model/serial rating plate. The
model/serial rating plate is located inside the oven door on
the right-hand side oven door trim.
• The range should be located for convenient use in the
kitchen.
• Recessed installations must provide complete enclosure of
the sides and rear of the range.
• To eliminate the risk of burns or fire by reaching over heated
surface units, cabinet storage space located above the
surface units should be avoided. If cabinet storage is to be
provided, the risk can be reduced by installing a range hood
or microwave hood combination that projects horizontally a
minimum of 5" (12.7 cm) beyond the bottom of the cabinets.
• All openings in the wall or floor where range is to be installed
must be sealed.
• Do not seal the range to the side cabinets.
• Cabinet opening dimensions that are shown must be used.
Given dimensions are minimum clearances.
• The anti-tip bracket must be installed. To install the anti-tip
bracket shipped with the range, see "Install Anti-Tip Bracket"
section.
1-®TORX and T20 are registered trademarks of Saturn Fasteners, Inc.



 To Next Page