6
ENGLISH
How to Use the Hand Mixer
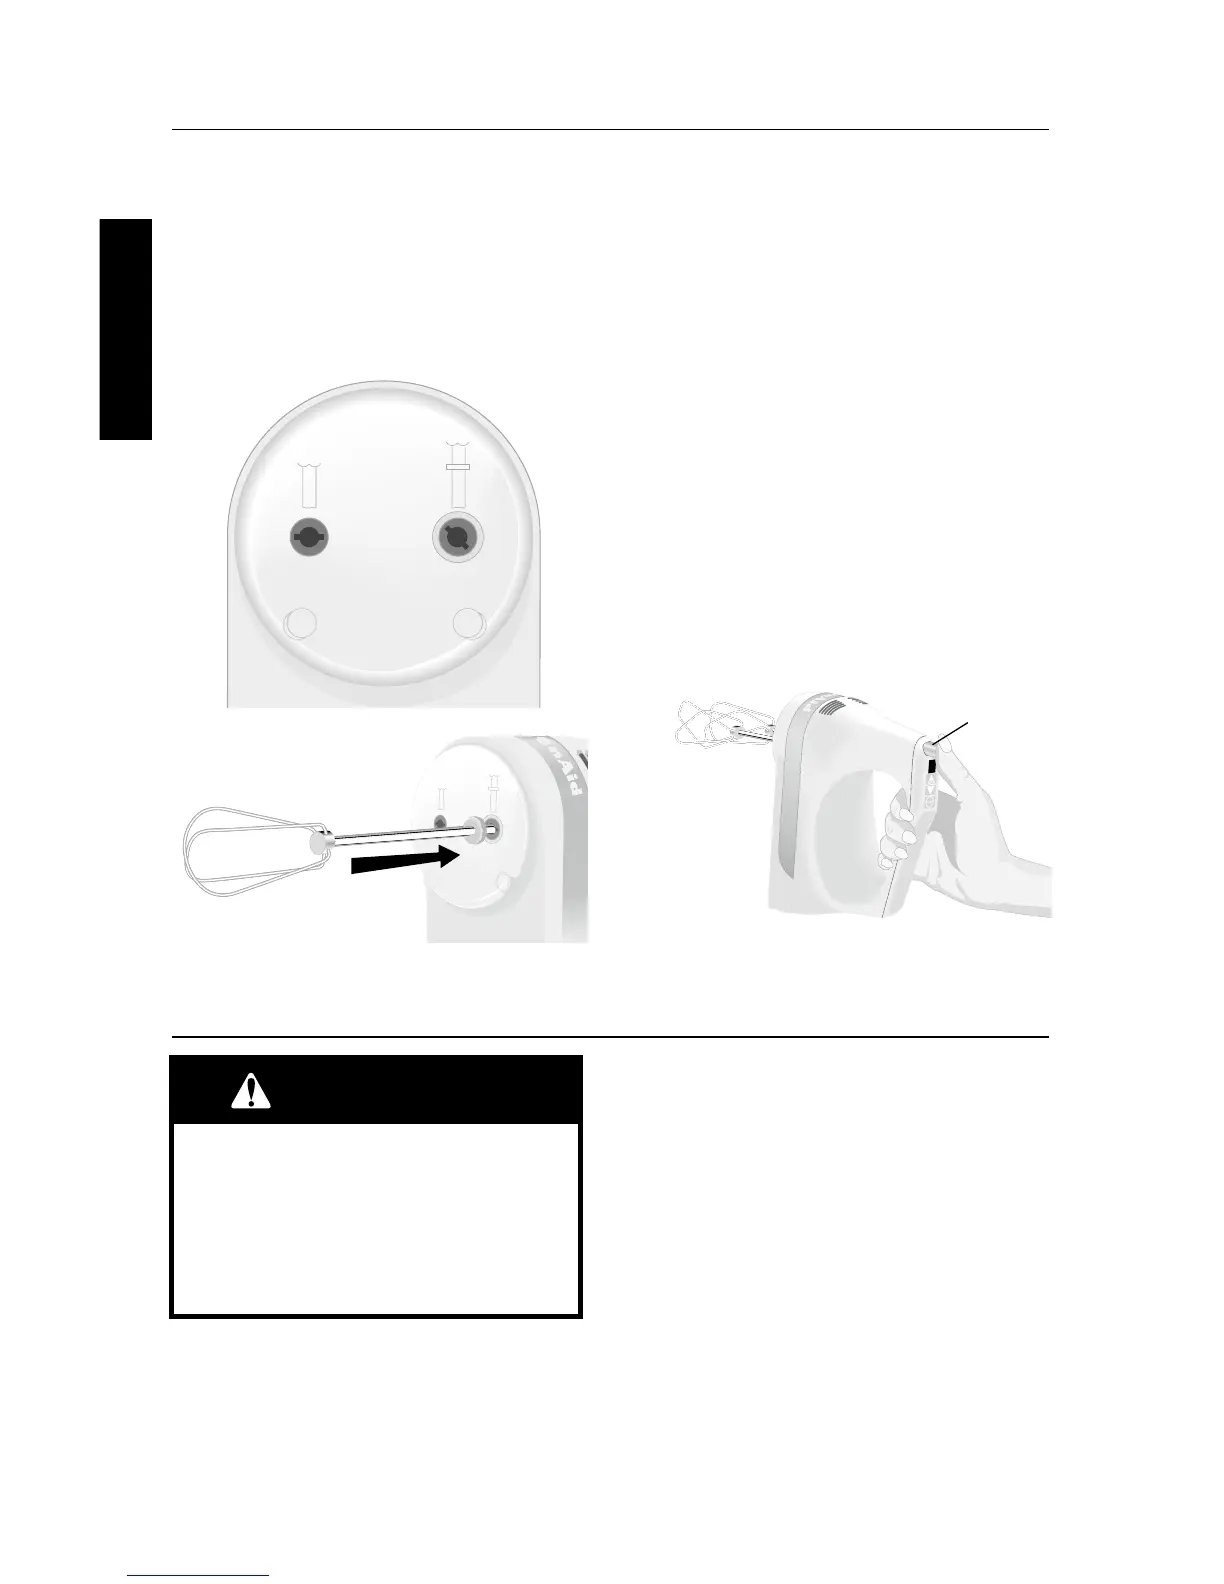
When Using a Pair of Accessories
1. Unplug the Hand Mixer from the
electrical outlet.
2. Insert the accessory shaft with the
collar (A) into the larger opening (D) of
the hand mixer. Align the flanges on
the shaft with the slots in the opening.
Push to lock into place.
3. Insert the accessory without a collar (B)
into the smaller opening (C). Align and
push to lock into place.
When Using a Single Accessory
An accessory shaft without a collar may be
used in either opening (C or D). Those with
a collar may only be used in the larger
opening (D). For attachment instructions,
see “When Using a Pair of Accessories”.
To Remove Accessories
1. If the Hand Mixer is running, stop the
Hand Mixer by touching the “Off”
button.
2. Unplug the Hand Mixer from the
electrical outlet.
3. Press the Ejector Button (E) to release
the accessories from the Hand Mixer,
then remove them.
C
D
E
NOTE: Flashing light indicates ready to
operate. Do not touch beaters. If the Hand
Mixer runs when “0” is flashing, or there is
nothing displayed on the speed indicator,
do not use it. Arrange for service:
In USA call 1-800-541-6390
In Canada call 1-800-807-6777
1. Plug the Hand Mixer into an electrical
outlet.
2. Press the “On” button, and the Speed
Indicator will flash “0”. This indicates
the Hand Mixer is ready to operate.
3. Touch the “On” button again and the
Hand Mixer will start on speed one.
4. To increase the speed, press the Up
Arrow (▲). To decrease the speed,
press the Down Arrow (▼).
5. When the mixing job is finished, shut
off the Hand Mixer by touching the
“Off” button. Unplug Hand Mixer
before removing accessories.
To Operate the Speed Control