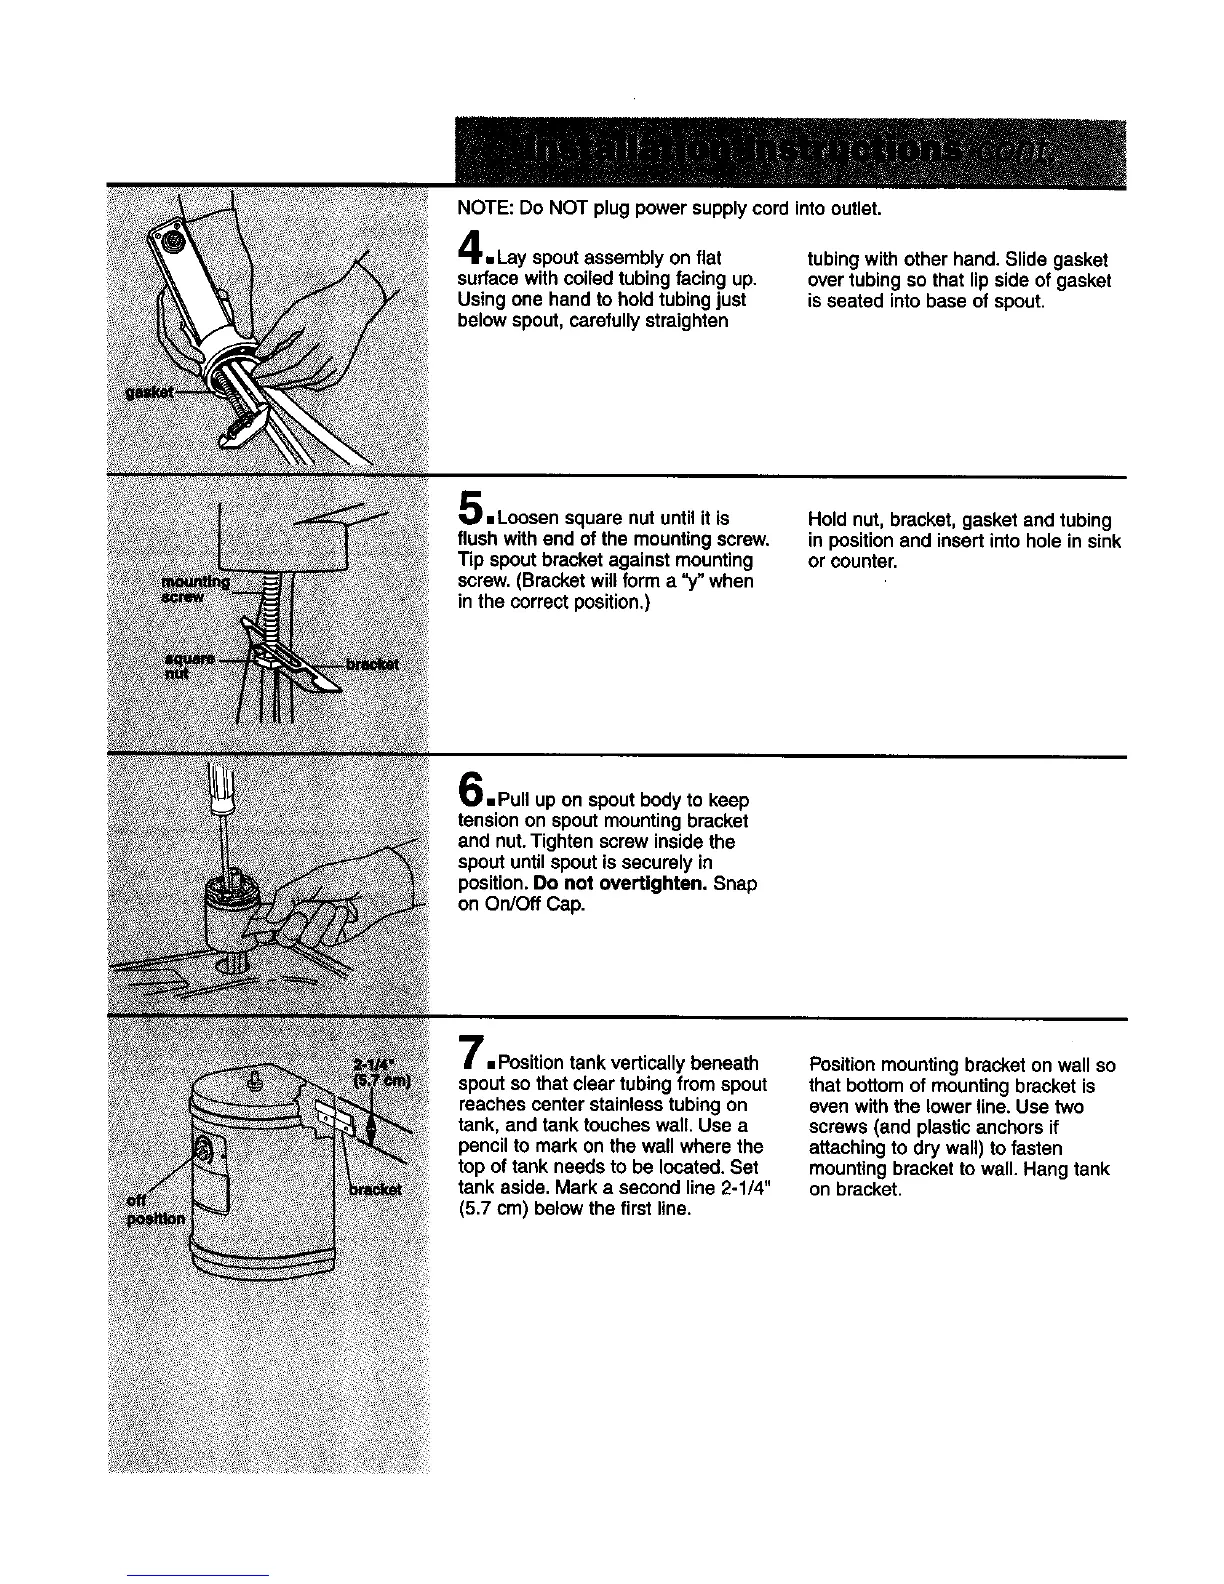
NOTE:DoNOTplugpowersupplycordintooutlet.
=Lay spout assemblyon flat
surfacewithcoiledtubingfacing up.
Using one hand tohold tubingjust
belowspout,carefullystraighten
tubingwith other hand. Slide gasket
over tubingso that lip side of gasket
is seated intobase of spout.
=Loosensquare nutuntilit is
flush withend of the mountingscrew.
Tip spoutbracketagainstmounting
screw.(Bracketwillform a "y" when
in the correctposition.)
Hold nut,bracket,gasketand tubing
in position and insert intohole in sink
or counter.
.Pull up on spoutbodyto keep
tensionon spoutmountingbracket
and nut.Tighten screw insidethe
spoutuntilspoutissecurelyin
position.Do not overUghten. Snap
on On/Off Cap.
=Positiontank verticallybeneath
spoutso that clear tubing from spout
reaches centerstainlesstubing on
tank, and tanktoucheswall.Use a
penciltomark on the wall where the
top of tank needsto be located.Set
tank aside.Mark a secondline 2-1/4"
(5.7 cm) belowthe first line.
Positionmountingbracketon wall so
thatbottomof mountingbracketis
evenwith the lowerline.Use two
screws(and plasticanchorsif
attachingto drywall) to fasten
mountingbracketto wall.Hang tank
on bracket.