3
INSTALLATION REQUIREMENTS
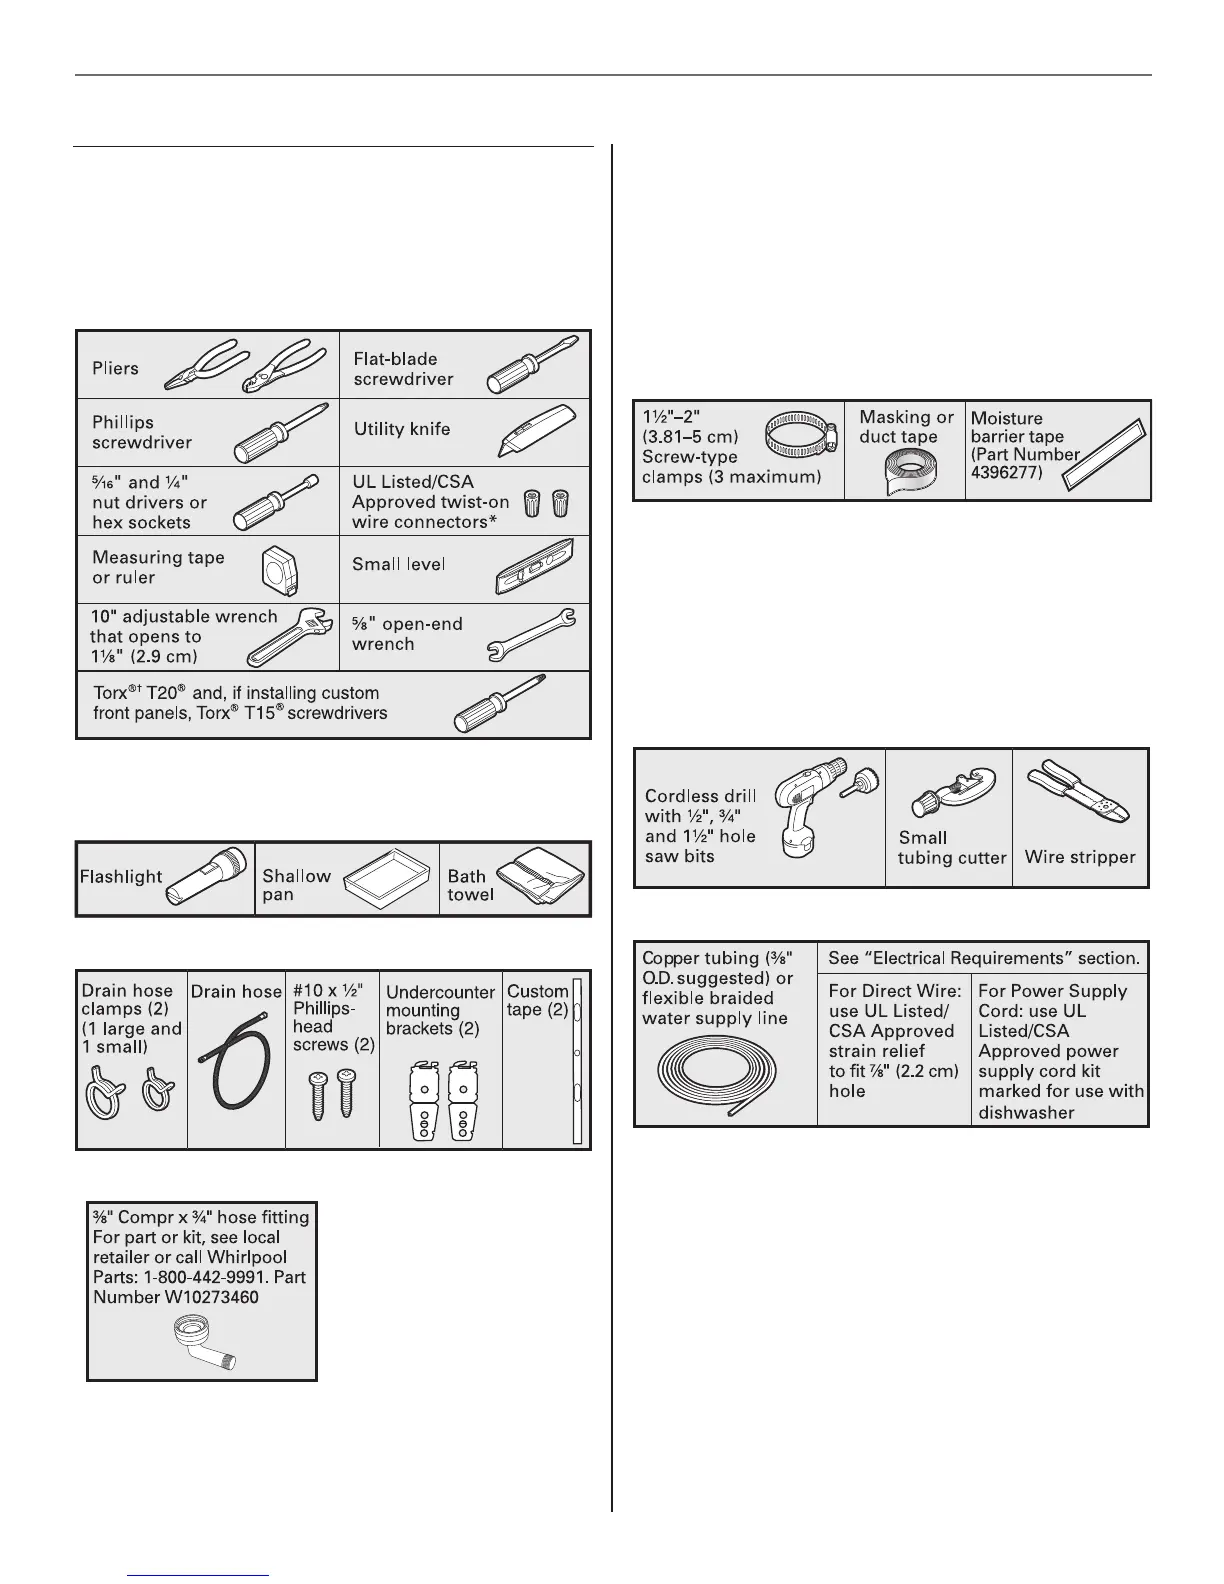
Tools and Parts
Gather the recommended tools and parts before starting
installation. Read and follow the instructions provided with any
tools listed here.
All Installations
Tools needed:
*Must be the proper size to connect your household wiring to
16-gauge wiring in dishwasher.
Other useful items you may need:
Parts supplied:
Parts needed:
(4) #10 x ¹/₂" wood screws (if installing custom front panels)
Supplied in Kit:
(4) Plastic studs (attached to each other by runners)
(4) Short screws (10-16 hex-head screw)
(4) Long screws (8-18 Torx
®
head screws)
(1) Template (located inside Use and Care Guide bag assembly)
(1) Instruction sheet (located inside Use and Care Guide bag
assembly)
NOTE: The screws supplied are used for only ³⁄₄" thick wooden
panel. If the wooden panel is less than ³⁄₄" thick, customer must
purchase screws locally.
Other parts you may also need:
NOTES:
■ Moisture barrier tape is recommended when installing a
dishwasher under a wood countertop.
■ Parts available for purchase in plumbing supply stores. Check
local codes. Check existing electrical supply. See “Electrical
Requirements” section. It is recommended that electrical
connections be made by a licensed electrical installer.
In addition, for first-time installations
Tools needed:
Parts needed:
Make sure all these parts are included in the literature package.
If parts are not included, call 1-800-422-1230.