12
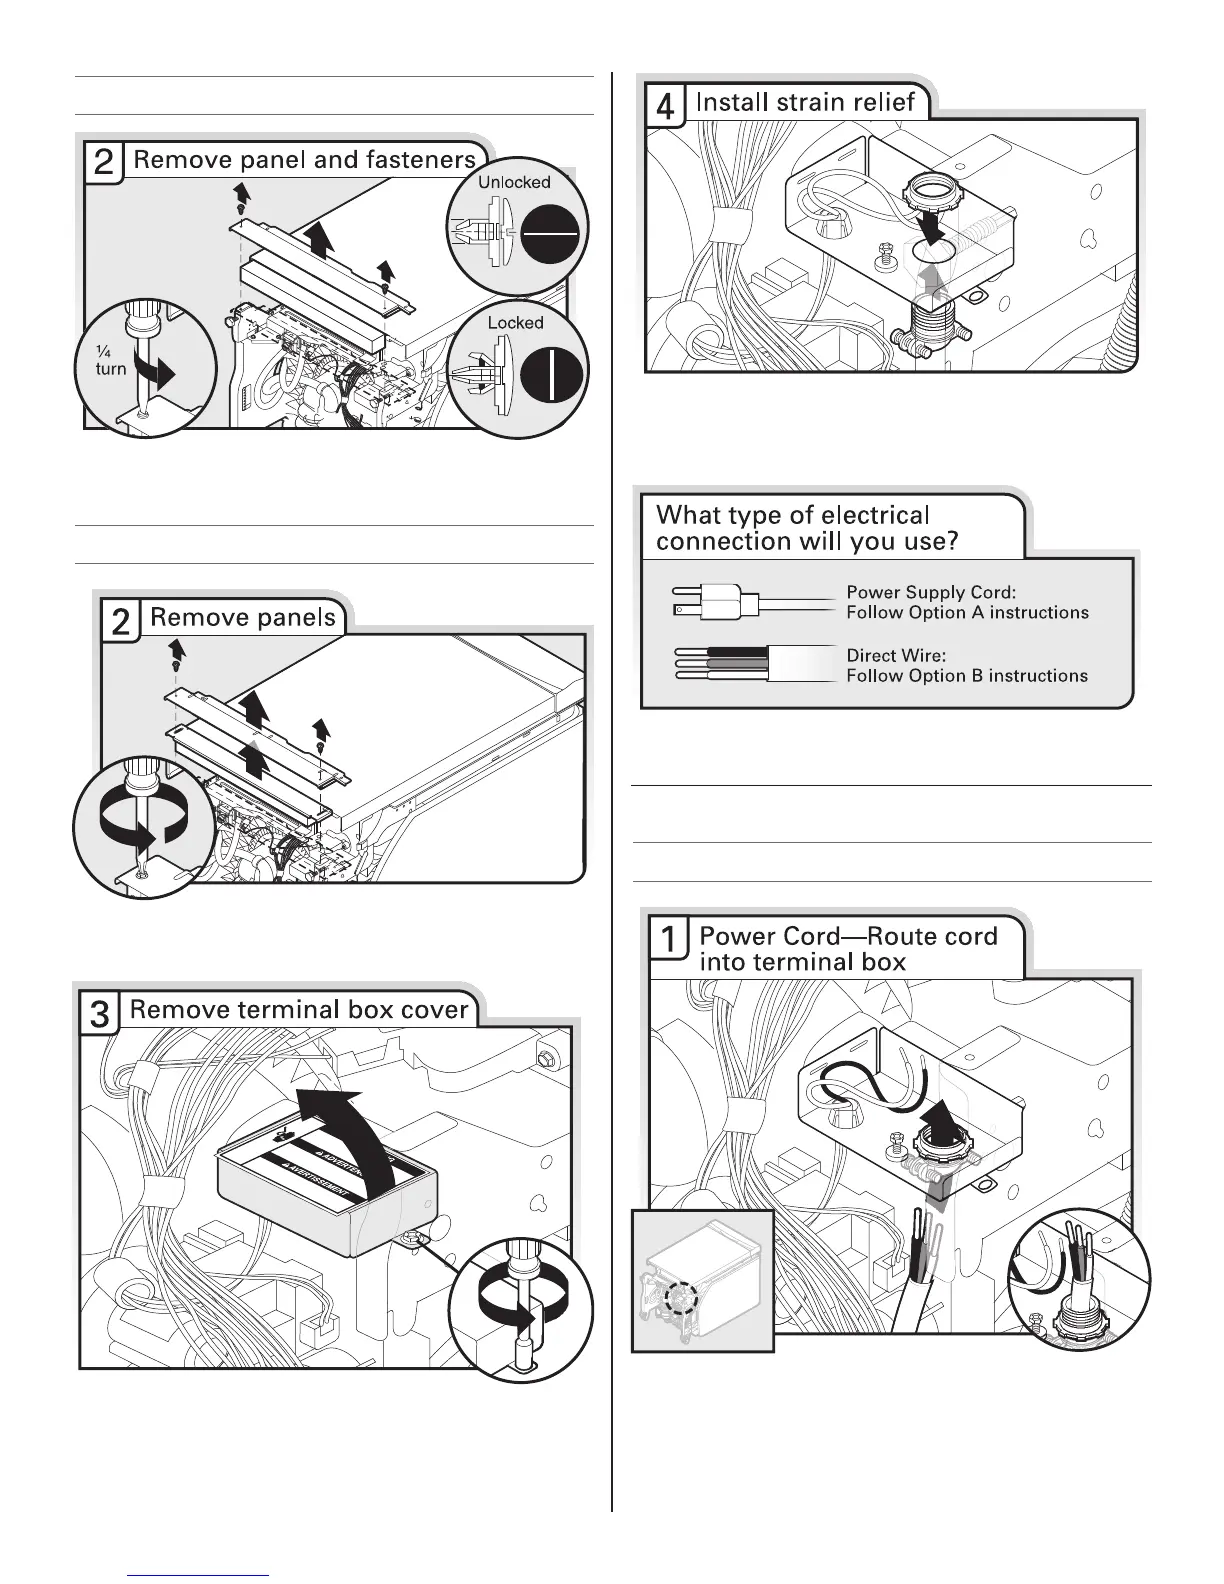
Option A, Remove Access Panel - Plastic Panel
Using a flat-blade screwdriver, turn the plastic fasteners ¹⁄₄ turn
counterclockwise to unlock them. Remove panel. Do not remove
tech sheet from access panel.
Option B, Remove Access Panel - Metal Panel
Using a ¹⁄₄" hex-head socket, nut driver or Phillips screwdriver,
remove 2 screws attaching access panel and lower panel to
dishwasher. Do not remove tech sheet from access panel.
Using a ¹⁄₄" hex-head socket, nut driver or Torx
®
T20
®
screwdriver,
remove terminal box cover. Retain for later use.
Install a UL Listed/CSA Approved strain relief. Make sure screw
heads are facing to the left when tightening conduit nut. Strain
relief is provided with the power supply cord kit.
NOTE: If using Option B, proceed to “Determine Cabinet
Opening,” to continue with the installation of your dishwasher.
Make Power Supply Cord Connection
Option A, Power Supply Cord:
Route cord so that it does not touch dishwasher motor to lower
part of dishwasher tub. Pull cord through strain relief in terminal
box.
Select UL Listed/CSA Approved twist-on wire connectors rated to
connect your power supply cord to 16-gauge dishwasher wiring.