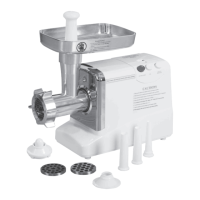
TECHNICAL DETAILS
BEFORE USE
• Before plugging in, ensure the “ON/OFF/ Reverse” switch is turned to "OFF" position.
• Disassemble the grinder head and wash each part thoroughly in warm soapy water;
• Remove all packing grease and oil from the surfaces;
• Dry all parts before re-assembly;
• Keep packing material for future storage of grinder and grinder parts.
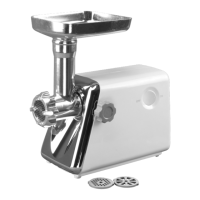
ASSEMBLY INSTRUCTIONS
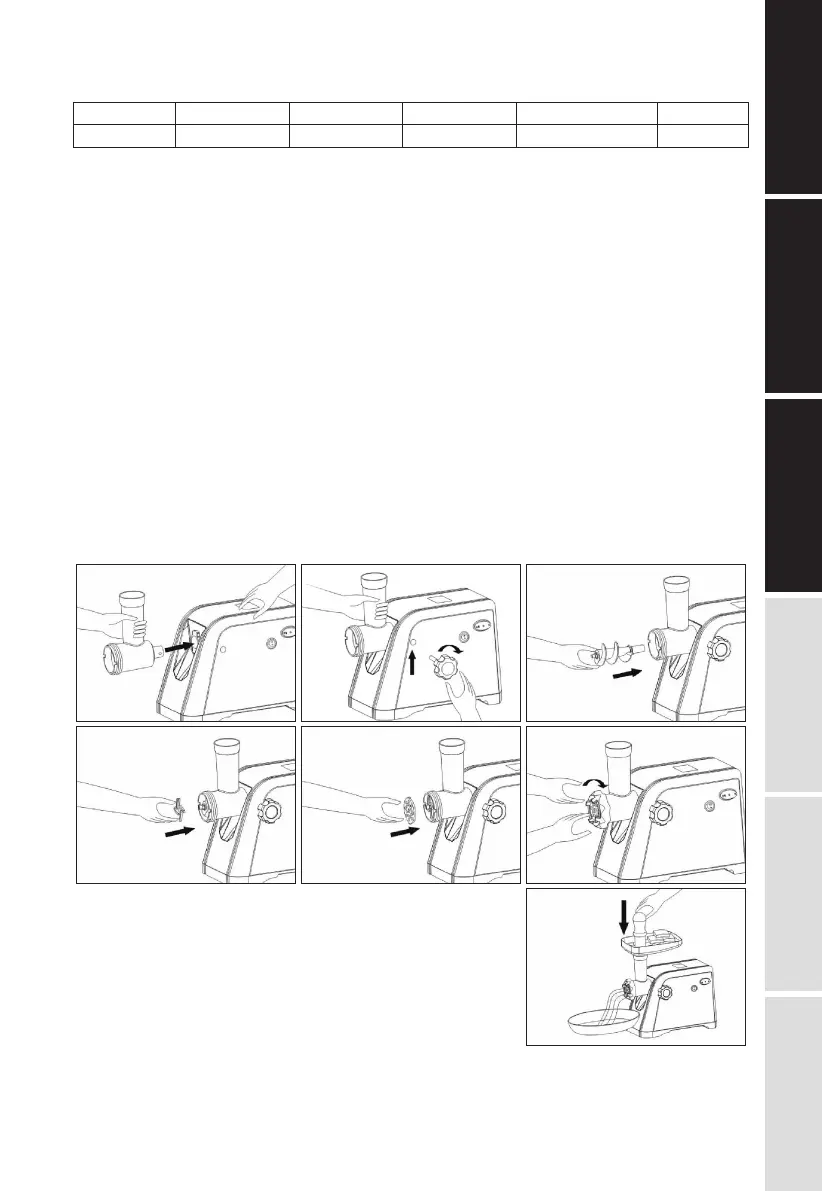
• Insert grinder head into gear housing; be sure that the hopper tray throat is facing upward
(See Fig 1).
• Holding grinder head with one hand. place locking knob into the hole on the side of Motor
housing and tighten it clockwise (See Fig 2).
• Insert auger into the grinder head. You may need to turn the auger to align it with the drive
shaft of the motor (See Fig 3).
• Place cutting knife blade onto Feed Screw shaft of the auger with the Flat edge of blade
facing the front (See Fig 4). If blade is not seated properly, meat will not be ground.
• Place desired grinding plate next to Cutting Blade. The notch in the plate should align with
the protrusion on the grinder head (See Fig 5).
• Firmly screw ring nut onto grinder head. Do not over tighten (See Fig 6).
• Insert the Hopper meat tray onto the throat of the head (See Fig 7).
GRINDING INSTRUCTIONS
• Plug in and turn the “R / ON” switch to "ON" position, then
turn the “ON/OFF/ Reverse” switch to "ON" position.
• For best results, trim all excess tendons, cartilage, cords
and blood clots and remove meat from bones.
• Optimal results occur when meat is chilled to 32-34˚F
before grinding.
• Cut meat into pieces that will easily fit in throat of grinder
head. (Approximately 1inch squares.)
• Place cubed meat into tray. Be sure not to over fill the tray. Make sure the throat opening of
the tray remains clear and open.
Item No.
MG-204185 40 lbs198lbs./hr 500x445x410mm
Weight
2/3HP(500W)
Motor PowerCapacity Dimension
120V 60Hz
Power Supply
E1
TECHNICAL
DETAILS
BEFORE USE
ASSEMBLY
INSTRUCTIONS
AFTER USE
GRINDER
TROUBLE
EXPLODED
AND PARTS LIST
Fig.1 Fig.2 Fig.3
Fig.4
Fig.7
Fig.5 Fig.6