Service Manual – Consumer
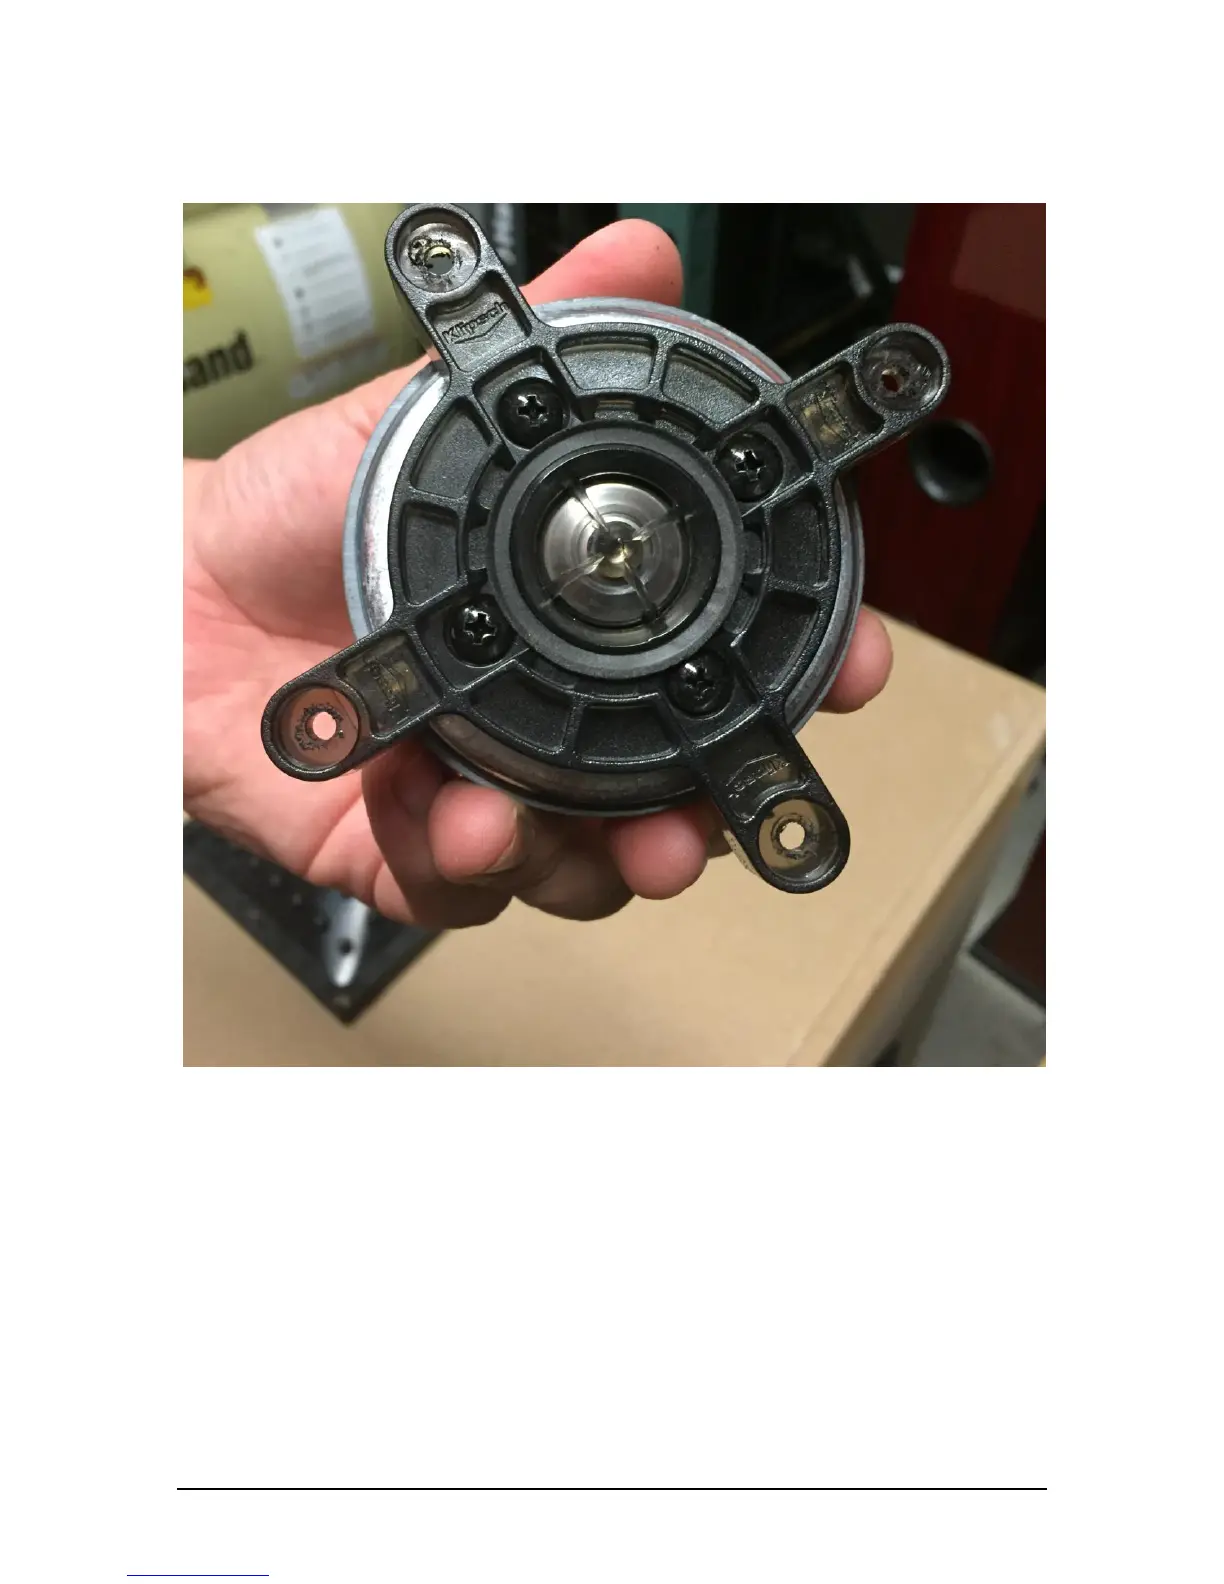
Once the screws have been removed, the tweeter driver will come free as shown below.
Next, place the new tweeter on the horn lens and replace the four (4) screws.
Reattach the wire clips to the positive and negative terminals on the tweeter, and seat the tweeter
back into position.
Replace the eight (8) screws holding the tweeter in place inside the cabinet.
Finally, begin to reseat the silicone horn lens back into position, ensuring the silicone lens fits
snugly and sits flush against the speaker cabinet.

 Loading...