3
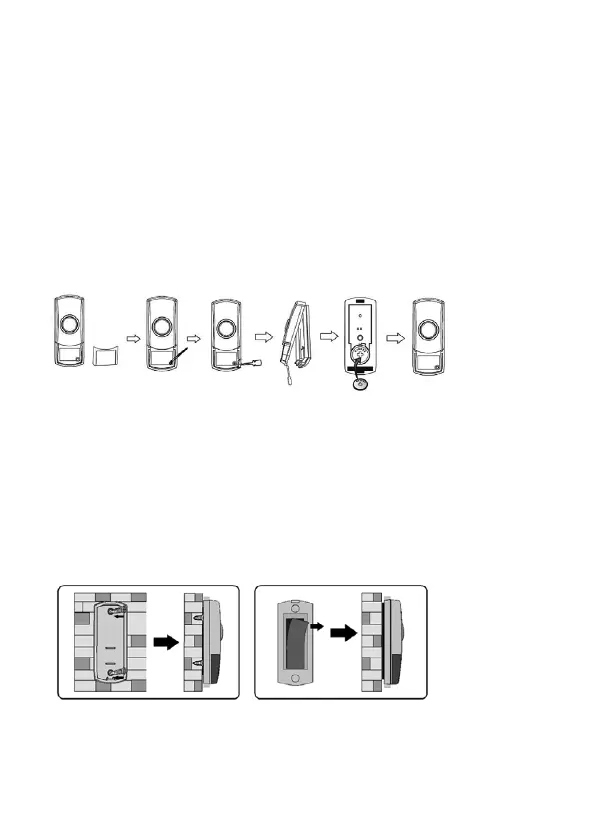
Battery installation
• Each bell push uses a CR2032 battery (included)
• Remove the nameplate cover. Remove the small rubber screw cover in lower right-hand corner with
thin-tipped tweezers or a needle, and unscrew the retaining screw (see Fig. 1)
• Insert a flat-head screwdriver into the slot on the bottom of the bell push and gently turn to open the front
cover
• Install the CR2032 battery ensuring the polarity is correct (+ side up) and replace front cover
• Replace the retaining screw, rubber cover, and the nameplate cover
INSTALLATION
Notes before installation
• If not using the double-sided adhesive pad, fixing screws and wall plugs will be required (not
included)
• Avoid positioning the bell push on metal door frames as this may affect the signal
• Avoid positioning above or near heat sources such as radiators, or in damp areas such as
kitchens and bathrooms
• Please note the IP (Ingress Protection) rating of the bell push when deciding the location for
installation
• The bell push is IP44 rated
User hints – If the receiver does not sound, please check the following:
• Flat batteries in either of the bell pushes – change the batteries
• Wrong battery polarity in either bell push – re-insert batteries correctly
• Units are out of range – operate the receiver within the recommended operation range
• If receiver is getting interference, take the battery out of the bell push, unplug receiver, wait for
10 seconds then replace the battery. Repeat procedure to generate new auto-learning code
Battery installation
• Each bell push uses a CR2032 battery (included)
• Remove the nameplate cover. Remove the small rubber screw cover in lower right-hand corner
with thin-tipped tweezers or a needle, and unscrew the retaining screw (see Fig. 1)
• Insert a flat-head screwdriver into the slot on the bottom of the bell push and gently turn to
open the front cover
• Install the CR2032 battery ensuring the polarity is correct (+ side up) and replace front cover
• Replace the retaining screw, rubber cover, and the nameplate
Mounting Bell Push
Note: before drilling into any wall or surface, ensure there are no cables or pipes that could
be accidentally damaged
User hints – If the receiver does not sound, please check the following:
• Flat batteries in either of the bell pushes – change the batteries
• Wrong battery polarity in either bell push – re-insert batteries correctly
• Units are out of range – operate the receiver within the recommended operation range
• If receiver is getting interference, take the battery out of the bell push, unplug receiver, wait for 10 seconds
then replace the battery. Repeat procedure to generate new auto-learning code
Mounting Bell Push
Note: before drilling into any wall or surface, ensure there are no cables or pipes that could be accidentally
damaged
• When using screws to attach to a surface, open the bell push as instructed in Fig. 1, pierce the fixing holes
on the rear of the bell push, mark locations and drill the holes
• Screw the backplate to the surface and replace cover
• To attach using the double-sided adhesive pad, ensure surface is clean and dry
• Peel back one side of the pad and attach to the bell push. Peel back the rear of the pad and attach to the
desired surface (see Fig. 2)
• When using screws to attach to a surface, open the bell push as instructed in Fig. 1, pierce
the fixing holes on the rear of the bell push, and mark locations for drilling
• Screw the backplate to the surface and replace cover
• To attach using the double-sided adhesive pad, ensure surface is clean and dry
• Peel back one side of the pad and attach to the bell push. Peel back the rear of the pad and
attach to the desired surface (see Fig. 2)
Fig. 2
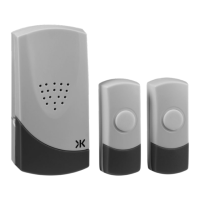
Receiver Unit Installation
Plug the receiver unit into a socket outlet. Please ensure when you test the receiver it is within the
recommended operating range of the 2 bell pushes.
Auto-learning code set up
• After battery installation, press the bell push once on the first bell push to generate a new
operation code and hold the melody button on the receiver for 3 seconds. The receiver will
sound which indicates that a new operation code is registered and memorized. You can then
assign a melody to this bell push by pressing the melody selection button positioned on the
• When using screws to attach to a surface, open the bell push as instructed in Fig. 1, pierce
the fixing holes on the rear of the bell push, and mark locations for drilling
• Screw the backplate to the surface and replace cover
• To attach using the double-sided adhesive pad, ensure surface is clean and dry
• Peel back one side of the pad and attach to the bell push. Peel back the rear of the pad and
attach to the desired surface (see Fig. 2)
Fig. 2
Receiver Unit Installation
Plug the receiver unit into a socket outlet. Please ensure when you test the receiver it is within the
recommended operating range of the 2 bell pushes.
Auto-learning code set up
• After battery installation, press the bell push once on the first bell push to generate a new
operation code and hold the melody button on the receiver for 3 seconds. The receiver will
sound which indicates that a new operation code is registered and memorized. You can then
assign a melody to this bell push by pressing the melody selection button positioned on the
Receiver Unit Installation
Plug the receiver unit into a socket outlet. Please ensure when you test the receiver it is within the
recommended operating range of the 2 bell pushes.
Fig. 2
Fig. 1
 Loading...