1601 W. DEER VALLEY RD. PHOENIX, AZ 85027 | T. 800-552-5669 | TECHSUPPORT@KNOXBOX.COM | KNOXBOX.COM | PAGE 11
OPE-MVUSER-0473-D
©Knox Company. All rights reserved.
INITIALIZING MEDVAULT 2.5 IN KNOXCONNECT
In order to resume use of your MedVault, you must establish users, user PINs, and device settings for your
MedVault in KnoxConnect. Please refer to the Knox Networking Guide and KnoxConnect Admin Guide to
complete this setup before continuing.
Follow instructions for downloading Knox Device Sync app to the computer you will be using to update
your MedVault. The following steps resume after this setup has been completed.
Step #21 Connect MedVault to KnoxConnect
• Apply power to the unit
• Connect the MedVault to the computer using the USB cable supplied with your original MedVault. Insert
the 4-pin Hirose connector into the port on the front of the MedVault
• Launch the KnoxDevice Sync app to push the network configuration to the MedVault and following the
prompts on the pop-up screen
The MedVault should now be connected to your Network.
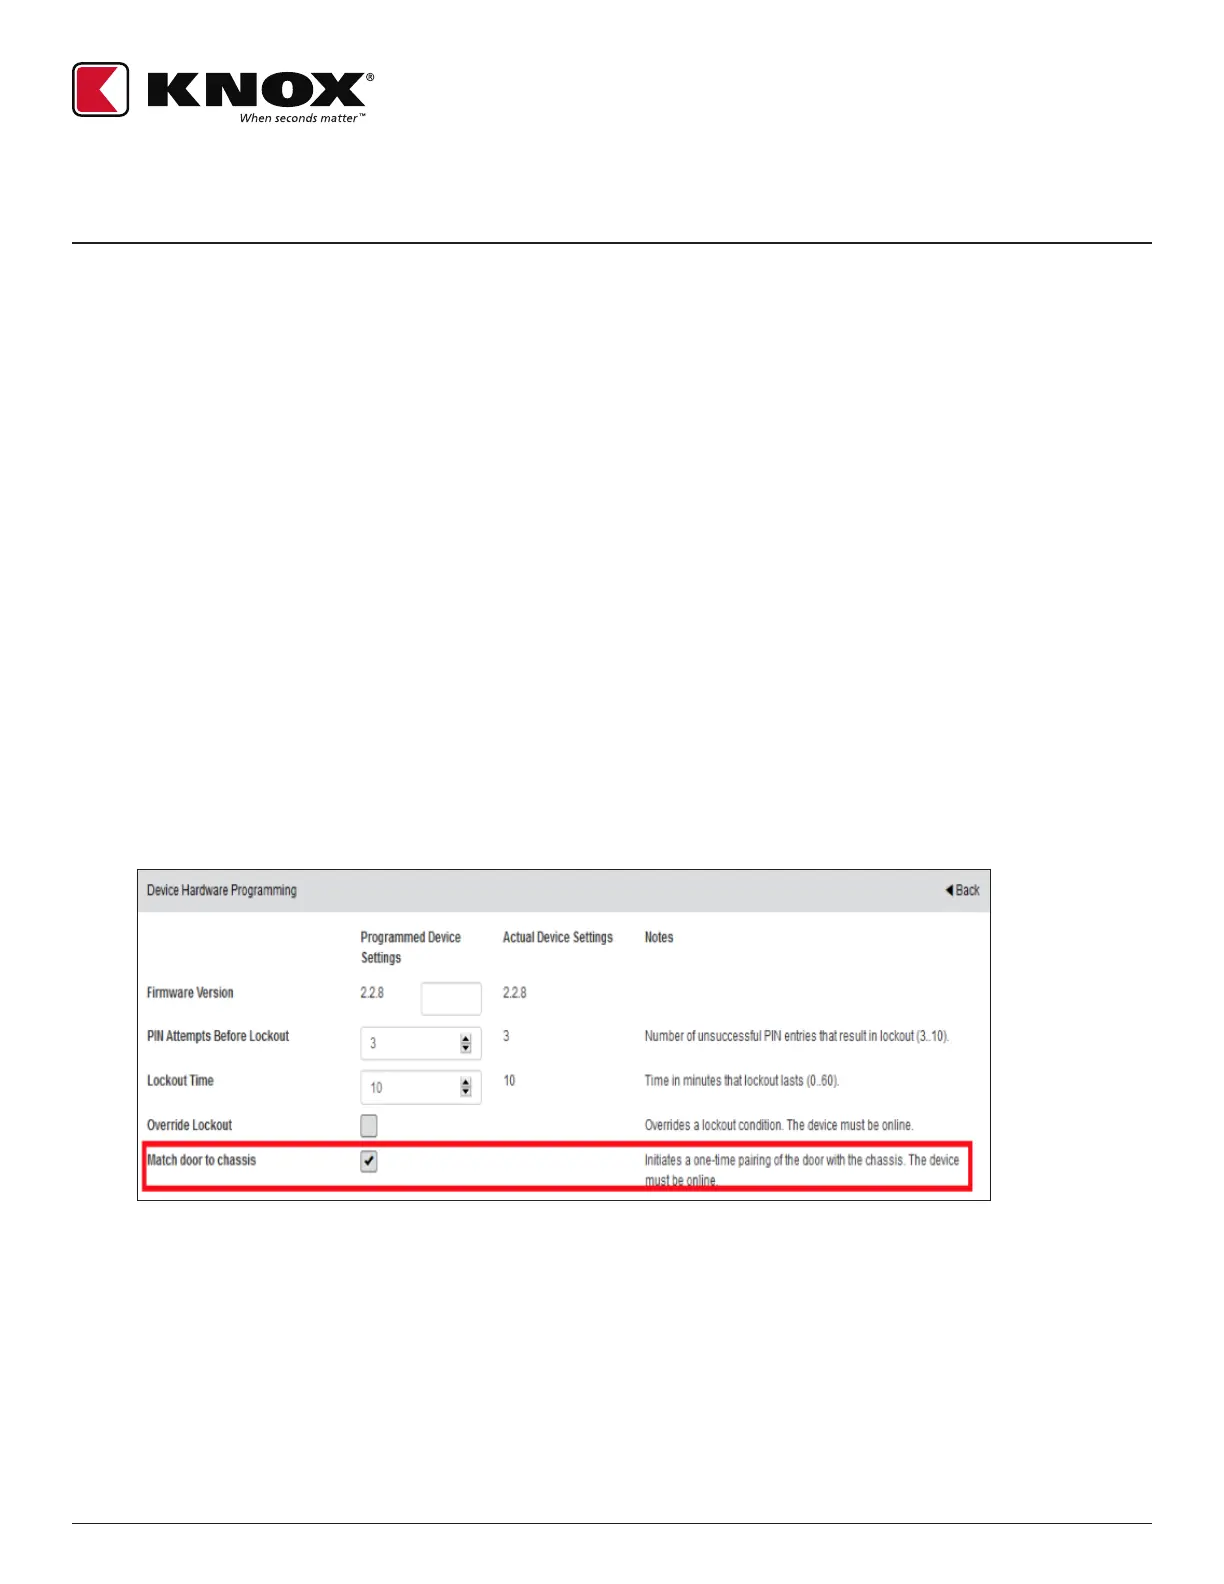
Step # 22 Initialize the High Security Door Sensor
The MedVault door position sensor is a Virtual Interlock Validator (VIV) that must be paired to the new
circuit board. If the VIV is not paired, the MedVault’s display will show an error UNLOCKED: VIV Fail and
an error will appear in the Device Audit Trail on KnoxConnect. To pair the VIV to the new circuit board,
perform the following steps:
• From the MedVault device dashboard, select the Edit button for your MedVault
• Under the Device Hardware Programming section locate “Match door to chassis” and check the box
MEDVAULT
®
INSTALLATION GUIDE
• Click “Save” at the bottom of the page and the “Back” button
• On the MedVault’s keypad, press and hold the “*” button for 5 seconds to force a network sync
with KnoxConnect
• Confirm the MedVault display shows “Locked”
YOUR UPGRADE IS COMPLETE. YOUR MEDVAULT IS READY FOR USE.

 Loading...
