41
46
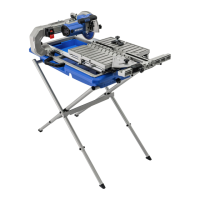
1
HH
2
MITER CUT (FIG. 46)
NOTE: Miter cuts are used for cutting outside
and inside corners on material, decorative chair
rail and base moulding with the material at any
angle to the cutting wheel other than 90°.
● Fill the water tray with clean water.
● Using a pencil or marker, mark the area to
be cut on tile.
● Loosen the lock knob (1) to move the Rip/
Angle guide along the front rail to the desired
position and then tighten the lock knob (1).
● Loosen the Rip/Angle guide adjust lock
knob (2) to turn the guide to the desired
angle along the arc slot and then tighten the
Rip/Angle guide adjust lock knob (2).
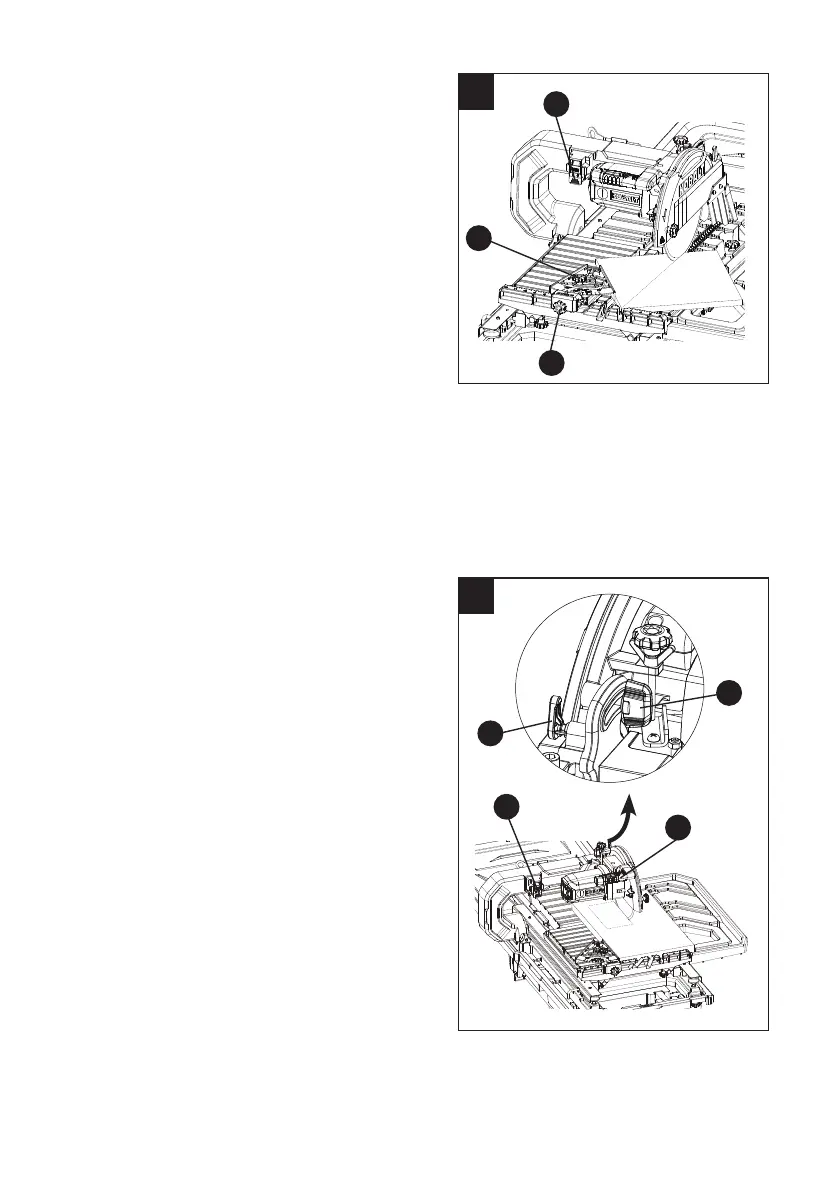
● Pull the ON/OFF switch (HH) upward to turn
the tile saw on to allow the cutting wheel
at the full speed and wait until the stream
of water from the water nozzle completely
cover the cutting wheel.
● Using both hands to slowly push the sliding
table toward the cutting wheel to feed the tile
into the cutting wheel.
● Turn the tile saw o once cut is performed.
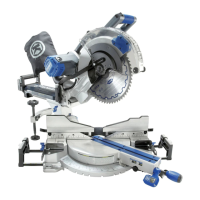
PLUNGE CUT (FIG. 47)
NOTE: Plunge cuts mean to position the tile
under the cutting wheel directly and lower the
cutting head to make cuts onto the interior of the
tile, such as electrical outlets or air conditioner
registers.
● Fill the water reservoir with clean water.
● Using a pencil or marker, mark the area to
be cut on tile.
● Loosen the cutting head lock knob (MM) and
pull out the hold-down latch (SS) to raise the
cutting head upward to the maximum height.
● Pull the ON/OFF switch (HH) upward to turn
the tile saw on to allow the cutting wheel
at the full speed and wait until the stream
of water from the water nozzle completely
cover the cutting wheel.
● Hold the cutting head rmly by the motor
handle (KK).
● Move the tile on the sliding table underneath
the cutting wheel.
● Slowly lower the cutting head to make a cut
on the tile. And then raise the cutting head.
● Turn the tile saw o once cut is performed.
● Withdraw the sliding table from the cutting
head and then adjust the tile position for the
next cut.
47
MM
KK
SS
HH
 Loading...