EasyManuals Logo

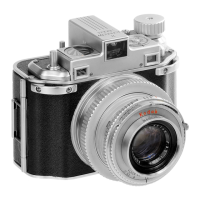
Kodak Medalist II User Manual

Kodak Medalist II
28 pages
To Next Page IconTo Next Page
To Previous Page IconTo Previous Page
Page #23 background imageLoading...
Page #23 background image
the
end of
the
lever
a
little
where
it
comes
in
con-
tact
with
the
stud
on
the
safety
lever
assembly.
If
the
parallax
frame
assembly
(figure
5)
and
the
range
finder
eyelet
lens
assembly
were
removed
from
the
range
finder
plate
in
disassembly,
replace
them
and
fasten
with
the
two
range
finder
eyelet
frame
screws.
The
eyelet
lens
assembly
should
go
on
first
with
the
frame
toward
the
rear;
make
sure
that
it
is
straight
and
that
itis
pushed
as
far
toward
the
front
of
the
camera
as
it
will
go.
RANGE
FINDER
ACTUATING
LEVER
LINK
(See
figure
1).
CAUTION:
Be
careful
not
todamage
the
parallax
frame
assembly
while
perform-
ing
the
following
operations.
Extend
the
focusing
tube
assembly
fully;
then
retract
it
slightly.
With
the
camera
upside
down
and
level,
hold
the
range
finder
actuating
lever
link
so
that
the
long
prongs
are
to
the
left
and
the
steps
in the
link
go up
from
left
to
right.
Slip
the
prongs
between
the
range
finder
actuating
lever
link
washer
and
the
range
finder
actuating
lever
link
nut.
Grasp
the
link
with a
pair
of
tweezers
and
swing
the
right
end
around
toward
the
front
of
the
camera
until
it
is
beyond
and
just
to
the
left
of
the
range
finder
actuating
lever
retaining
screw.
With a
jeweler's
screwdriver,
force
the
link
with
firm
pressure
toward
the
front
of
the
camera
until
the
short
prongs
slide
over
the
stud
on
the
range
finder
actuating
lever
assembly
.
COUNTER DIAL ASSEMBLY AND
SAFETY
CON-
TROL
STOP
PAWL.
Replace
the
safety
control
stop
pawl
(figure
6)
and
safety
control
stop
pawl
spring
and
fasten
them
with
the
safety
control
stop
pawl
stud
.
The
long
end
of
the
safety
control
stop
pawl
spring
fits
into
the
groove
on
the
safety
control
stop
pawl.
The
short
end
rests
against
the
right
side
of
the
projecting
lug
on
the
range
finder
plate.
Replace
the
counter
knob
spring
(figure
5)
and
hold
it
down with the
counter
dial
assembly
while
replacing
the
counter
knob
washer
and
counter
knob
screw.
COUNTER DIAL HOUSING
COMPLETE
(See
figure
4).
Replace
the
key
post
spring
washer
on
the
key
post
with the
concave
side
upward.
Also
replace
the
flat
key
post
spacing
washer
if
one
was
used
on
the
camera
as
originally
assembled;
this
washer
is
not
necessary
unless
the
winding
key
knob
shows
a
tendency
to
wobble
as
it
is
turned
(after
the
counter
dial
hous ing
complete
has
been
replaced).
Replace
the
counter
dial
housing
complete
and
fasten
it
with
the
three
counter
dial
housing
screws
.
Make
sure
the
key
post
is
not
binding
against
the
housing.
Replace
the
key
knob
and
fasten
it
with
the
key
knob
screw.
TRIGGER BUTTON HOUSING
COMPLETE
(See
figure
3)
.
If
the
trigger
bushing
leak
light
washer
was
re-
moved
during
disassembly
,
replace
it
with the
clip-
ped
corner
toward
the
right
front
corner
of
the
range
finder
plate
and
fasten
it
along
the
back
edge
with
-
shellac.
Make
sure
the
hole
is
centered
around
the
trigger
button. Slip
the
trigger
button
leak
light
washer
over
the
trigger
button.
---
Replace
the
exposure
indicator
tube
in
the
hole
in
the
range
finder
plate
directly
above
the
red
signal.
Replace
the
trigger
button
housing
complete
and
fas
ten
it
with
the
three
trigger
button
housing
screws
Make
sure
the
trigger
button
is
not
binding
against
the
housing.
DIRECT VIEW
FINDER
COVER.
Before
replacing
the
direct
view
finder
cover
assembly
(figure
2),
check
the
range
finder
to
make
sure
that
it
is
free
from
any
of
the
defects
illus-
trated
in
figure
21.
If
any
of
these
troubles
is
en-
countered,
refer
to
page
16
for
instructions
on
ad-
justing
the
optical
system
.
Be
sure
all
the
range
finder
optics
are
perfectly
clean.
Even
a
small
amount
of
dirt
may
make
one
or
both
halves
of
the
field
appear
hazy.
Any
required
cleaning
can
be
done
with
a
piece
of
wadded-up
lens
cleaning
paper
or
soft,
lintless
cloth
on
the
end
of
a
toothpick,
using
moisture
from
the
breath
or
lens
cleaner
as
re-
quired.
CAUTION:
If
lens
cleaner
is
used,
it
should
be
applied
sparingly
to
the
lens
cleaning
paper
or
cloth
, not
to
the
glass
.
Never
use
alcohol
or
other
solvents.
Check
to
make
sure
that
the
windows
in
the
di-
rect
view
finder
cover
assembly
are
perfectly
clean.
If
they
are
not,
clean
them
as
described
in
the
preceding
paragraph.
Look
through
the
range
finder
at
a
distant
ob-
ject
and
turn
the
focusing
tube
assembly
in
or
out
until
the
two
halves
of the
field
are
lined
up;
this
establishes
the
approximate
infinity
position
of
the
focusing
tube
assembly.
NOTE:
If
the
range
finder
image
in
the
upper
field
cannot
be
moved
far
enough
to
the
left
to
coincide
with
the
image
in
the
lower
field,
the
left
end
prism
as-
sembly
(figure
22)
must
be
adjusted.
Loosen
slightly
the
right-hand
screw
of
the
three
end
prism
bracket
screws
and
tighten
the
left-hand
screw.
Do not
ad-
just
the
center
screw
. On the
other
hand
,
if
the
image
in
the
upper
field
moves
very
far
to
the
left
when the
focusing
tube
assembly
is
retracted
from
the
in-
finity
position
to
the
closed
position
,
it
may
happen
that
the
upper
field
cannot
be
moved
far
enough
to
the
right
to
coin-
cide
with
the
lower
field
when
an
object
at
3 1/ 2
feet
is
viewed
through
the
range
finder.
In
this
case
,
loosen
slightly
the
left-hand
screw
and
tighten
the
right-
hand
screw.
When
the
end
prism
has
been
properly
adjusted,
the two
range
finder
images
can
be
made
to
coincide
when
either
a
distant
object
or
an
object
at
3 1/ 2
feet
is
viewed.
As
the
focusing
tube
assembly
is
retracted
from
the
in-
finity
position
to
the
closed
pOSition
the
upper
image
should
move
only
slightly
to
the
left
of
the
lower
image.
At
this
I'oint
check
to
make
sure
that
the
paral-
21

Questions and Answers:

Question and Answer IconNeed help?

Do you have a question about the Kodak Medalist II and is the answer not in the manual?

Kodak Medalist II Specifications

General IconGeneral
BrandKodak
ModelMedalist II
CategoryFilm Camera
LanguageEnglish

Related product manuals