8 | EN EN | 9
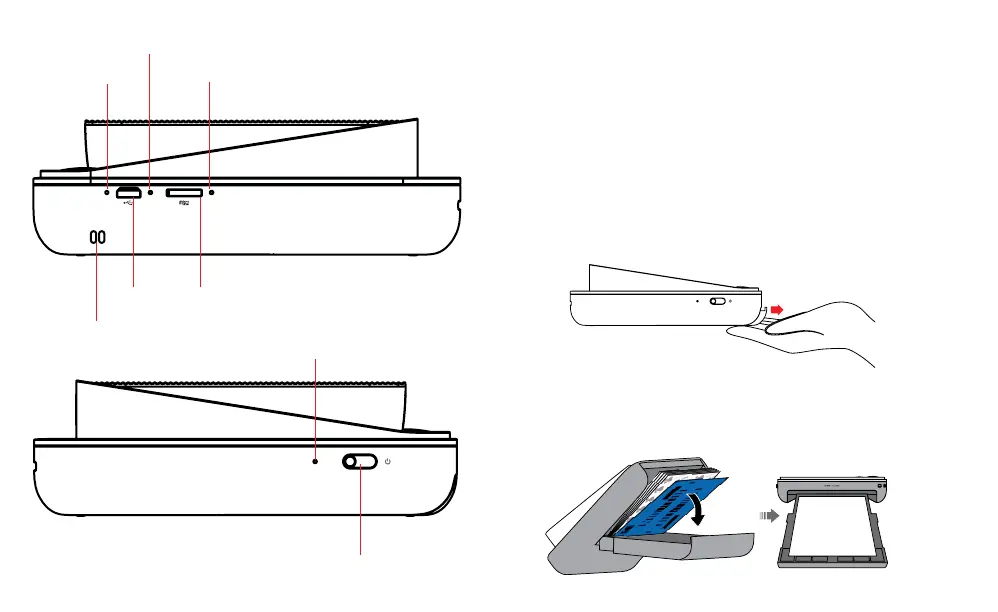
Charging
indicator LED
Reset button
microSD™
indicator LED
Power latch
microSD™
port
Micro USB
port
Power indicator LED
GETTING READY FOR USE
1. Charge it irst: Before you start using your new KODAK SMILE
Classic camera, plug it in to your computer or any USB charging
block with an output of two amps (2A) or higher. The charging
indicator will lash white while the camera charges. Once it turns
solid white and stops lashing, it’s fully charged and ready to use.
2. Load your ZINK® paper into the camera: Follow the steps below to
quickly and easily get your new camera loaded with ZINK® sticky-
back paper so you can start printing photos!
a. Open the paper tray in the back by releasing the tray cover at
the rear of the device. Press down on the arrow and slide the
cover toward you.
b. Load the blue calibration sheet in with the barcode facing
down. Place the other plain sheets on top with the glossy side
facing you. Try to avoid touching the glossy side so you don’t
get ingerprints on it.
Carrying strap
attachment

 Loading...