TP-6519 8/1780 Section 6 Disassembly/Reassembly
3. Install the stator and end bracket.
a. Align the stator so that the alternator frame
vibromount points down toward the generator
base. See Figure 6-19. Install the stator
assembly around the rotor.
b. Align the alignment mark on the top of the stator
with the center of the slot in the generator
adapter.
c. Route the leads connected to the alternator
end bracket through the opening in the base of
the alternator frame.
d. Place the end bracket onto the stator assembly,
lining up the alignment marks on the top of the
stator and end bracket.
e. Thread the four overbolts with locating
washers through the end bracket and into the
generator adapter. Position the locating tab of
each washer to the outer edge of the oblong
(OBROUND) hole on the end bracket. See
Figure 6-20. The overbolts should be parallel
to the outside of the alternator. If the overbolts
are slanted, rotate the locating washer 1/2 turn.
Do not final tighten the overbolts at this time.
4. Secure the generator set to the skid.
a. Attach the vibromount to the alternator through
the hole in the stiffening plate. See
Figure 6-21.
1. End bracket
2. Alternator
3. Alternator frame vibromount
4. Overbolts
1
2
4
3
6519
Figure 6-19 Generator Set, Right Side
GM51561
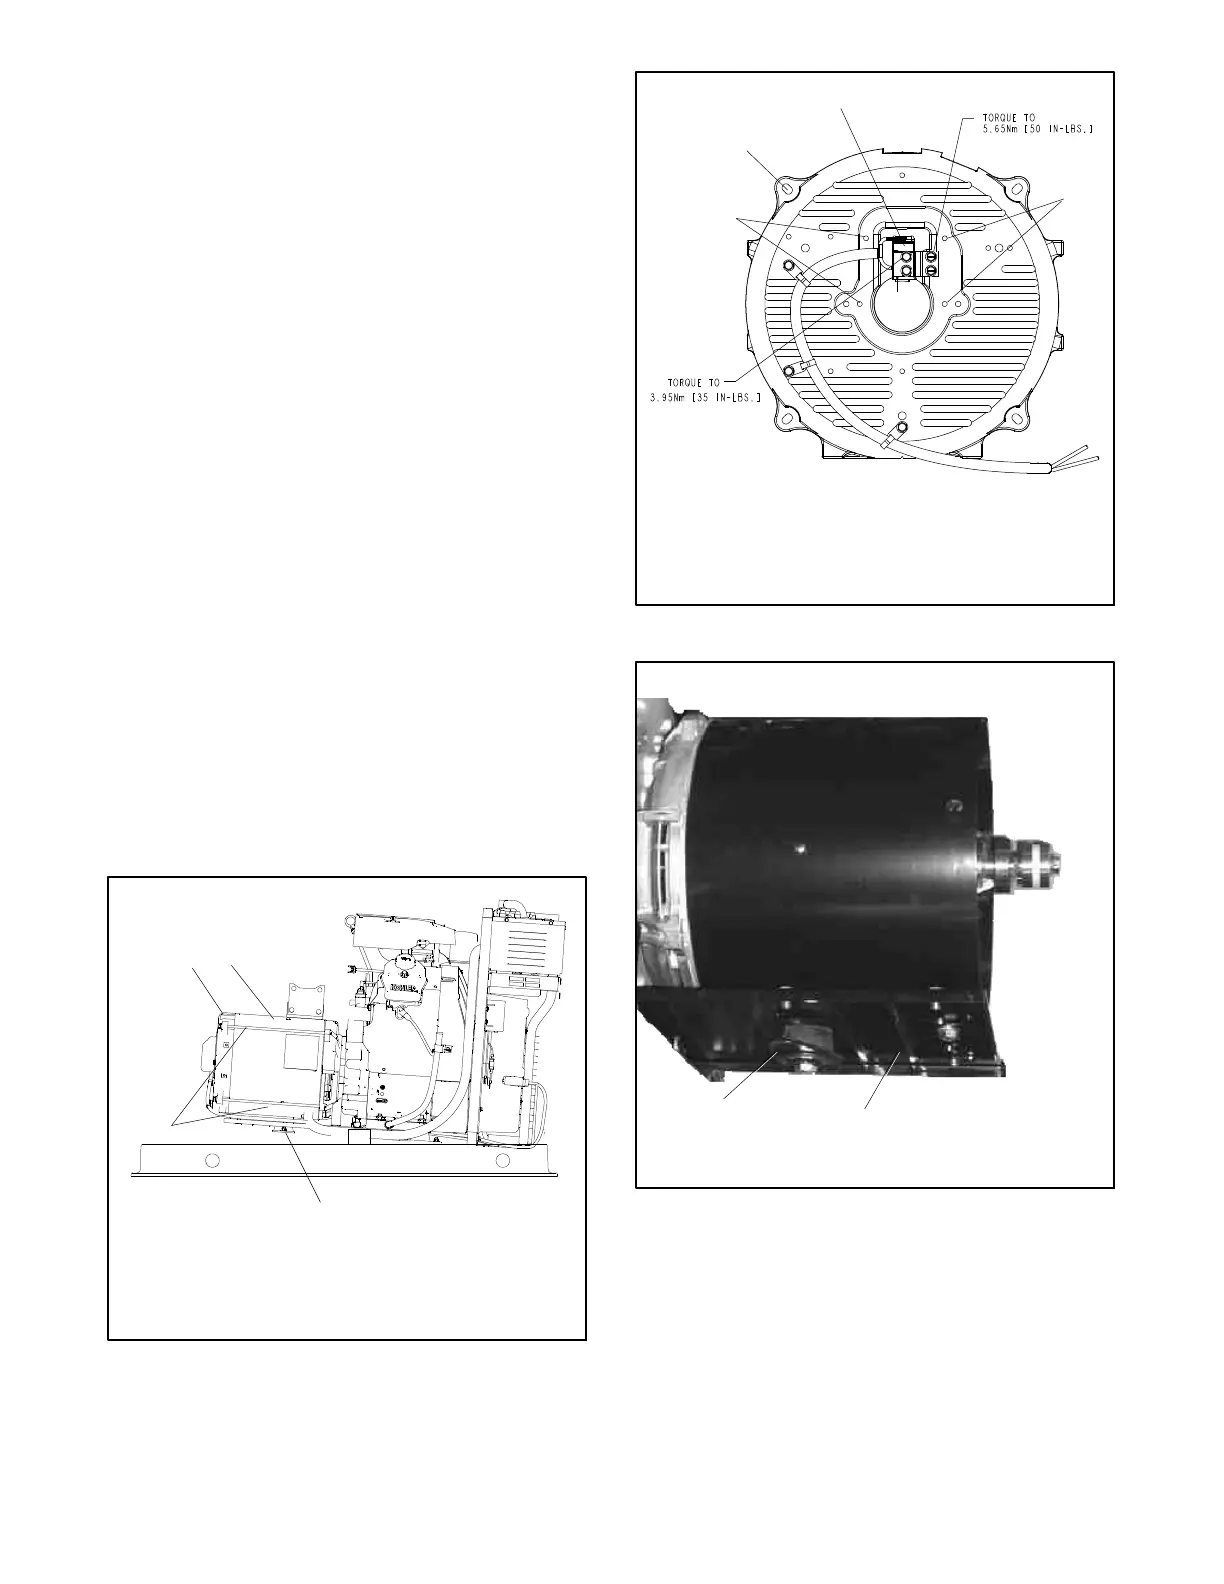
1
1. Brush cover screws
2. Alternator overbolts and centering washers (4 places)
3. Brush holder (See Figure 6-15 for details)
2
3
1
Figure 6-20 End Bracket and Brush Assembly
1. Vibromount
2. Stiffening plate
1
6519
2
Figure 6-21 Stiffening Plate and Vibromount
b. Attach the stiffening plate to the alternator
using the mounting screw.
c. Raise the alternator end of the generator set
and remove the wood support block(s).
 Loading...