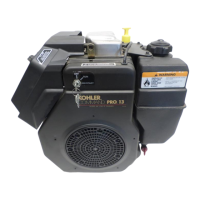
Keihin Carburetor Fuel Shut-Off Solenoid
Most carburetors are equipped with a fuel shut-off
solenoid. Solenoid is attached to fuel bowl. Solenoid has
a spring-loaded pin that retracts when 12 volts is applied
to lead, allowing fuel flow to main jet. When current is
removed, pin extends blocking fuel flow.
Below is a simple test, performed with engine off , that
can determine if solenoid is functioning properly.
1. Shut off fuel and remove solenoid from carburetor.
When solenoid is loosened and removed, gas will
leak out of carburetor. Have a container ready to
catch fuel.
2. Wipe tip of solenoid with a shop towel or blow with
compressed air to remove any remaining fuel. Take
solenoid to a location with good ventilation and no
fuel vapors present. You will also need a 12 volt
power source that can be switched on and off .
3. Be sure power source is switched OFF. Connect
positive power source lead to red lead of solenoid.
Connect negative power source lead to solenoid
body.
4. Turn power source ON and observe pin in center of
solenoid. Pin should retract with power ON and
return to its original position with power OFF. Test
several times to verify operation.
Nikki Carburetor Fuel Shut-Off Solenoid
Most carburetors are equipped with a fuel shut-off
solenoid. Solenoid is attached to fuel bowl. Solenoid has
a spring-loaded pin that retracts when 12 volts is applied
to lead, allowing fuel flow to main jet. When current is
removed, pin extends blocking fuel flow.
Below is a simple test, performed with engine off , that
can determine if solenoid is functioning properly.
1. Shut off fuel, disconnect lead, and remove solenoid
from carburetor. When solenoid is loosened and
removed, gas will leak out of carburetor. Have a
container ready to catch fuel.
2. Wipe tip of solenoid with a shop towel or blow with
compressed air to remove any remaining fuel. Take
solenoid to a location with good ventilation and no
fuel vapors present. You will also need a 12 volt
battery and jumpers.
3. Connect jumper lead to battery B+ and to one
solenoid terminal. Connect jumper lead to other
solenoid terminal. Touch jumper lead to negative
battery terminal and observe solenoid pin.
4. Pin should retract with jumper lead touching
negative battery terminal. Pin should return to its
original position when jumper lead is removed. Test
several times to verify operation. Replace solenoid if
pin does not move.
Carburetor Circuits
Float
Fuel level in bowl is maintained by fl oat and fuel inlet
needle. Buoyant force of fl oat stops fuel fl ow when
engine is at rest. When fuel is being consumed, fl oat will
drop and fuel pressure will push inlet needle away from
seat, allowing more fuel to enter bowl. When demand
ceases, buoyant force of fl oat will again overcome fuel
pressure, rising to predetermined setting and stop fl ow.
Slow and Mid-Range
At low speeds engine operates only on slow circuit. As
a metered amount of air is drawn through slow air bleed
jets, fuel is drawn through main jet and further metered
through slow jet. Air and fuel are mixed in body of slow
jet and exit to idle progression (transfer port) chamber.
From idle progression chamber, air fuel mixture is
metered through idle port passage. At low idle air/fuel
mixture is controlled by setting of idle fuel adjusting
screws. This mixture is then mixed with main body of
air and delivered to engine. As throttle plate opening
increases, greater amounts of air/fuel mixture are drawn
in through fi xed and metered idle progression holes.
As throttle plate opens further, vacuum signal becomes
great enough at venturi so main circuit begins to work.
Main (high-speed)
At high speeds/loads engine operates on main circuit.
As a metered amount of air is drawn through air jet,
fuel is drawn through main jet. Air and fuel are mixed
in main nozzles then enters main body of airfl ow where
further mixing of fuel and air occurs. This mixture is then
delivered to combustion chamber. Carburetor has a fi xed
main circuit; no adjustment is possible.
Carburetor Adjustments
NOTE: Carburetor adjustments should be made only
after engine has warmed up.
Carburetor is designed to deliver correct fuel-to-air
mixture to engine under all operating conditions. Main
fuel jet is calibrated at factory and is not adjustable.
Idle fuel adjusting needles are also set at factory and
normally do not need adjustment.
Low Idle Speed (RPM) Adjustment
NOTE: Actual low idle speed depends on application.
Refer to equipment manufacturer’s
recommendations. Low idle speed for basic
engines is 1200 RPM.
Place throttle control into idle or slow position. Turn low
idle speed adjusting screw in or out to obtain allow idle
speed of 1200 RPM (± 75 RPM).
Governed Idle Speed Adjustment (If equipped)
1. Hold governor lever away from carburetor so throttle
lever is against idle speed (RPM) adjustment screw
of carburetor. Start engine and allow to warm up,
then adjust screw to set approximately 1200 RPM.
Check speed using a tachometer. Turn adjustment
screw (inner) clockwise (in) to increase or
counterclockwise (out) to decrease speed.
Fuel System
28 24 690 06 Rev. PKohlerEngines.com