10.9
Section 10
Reassembly
10
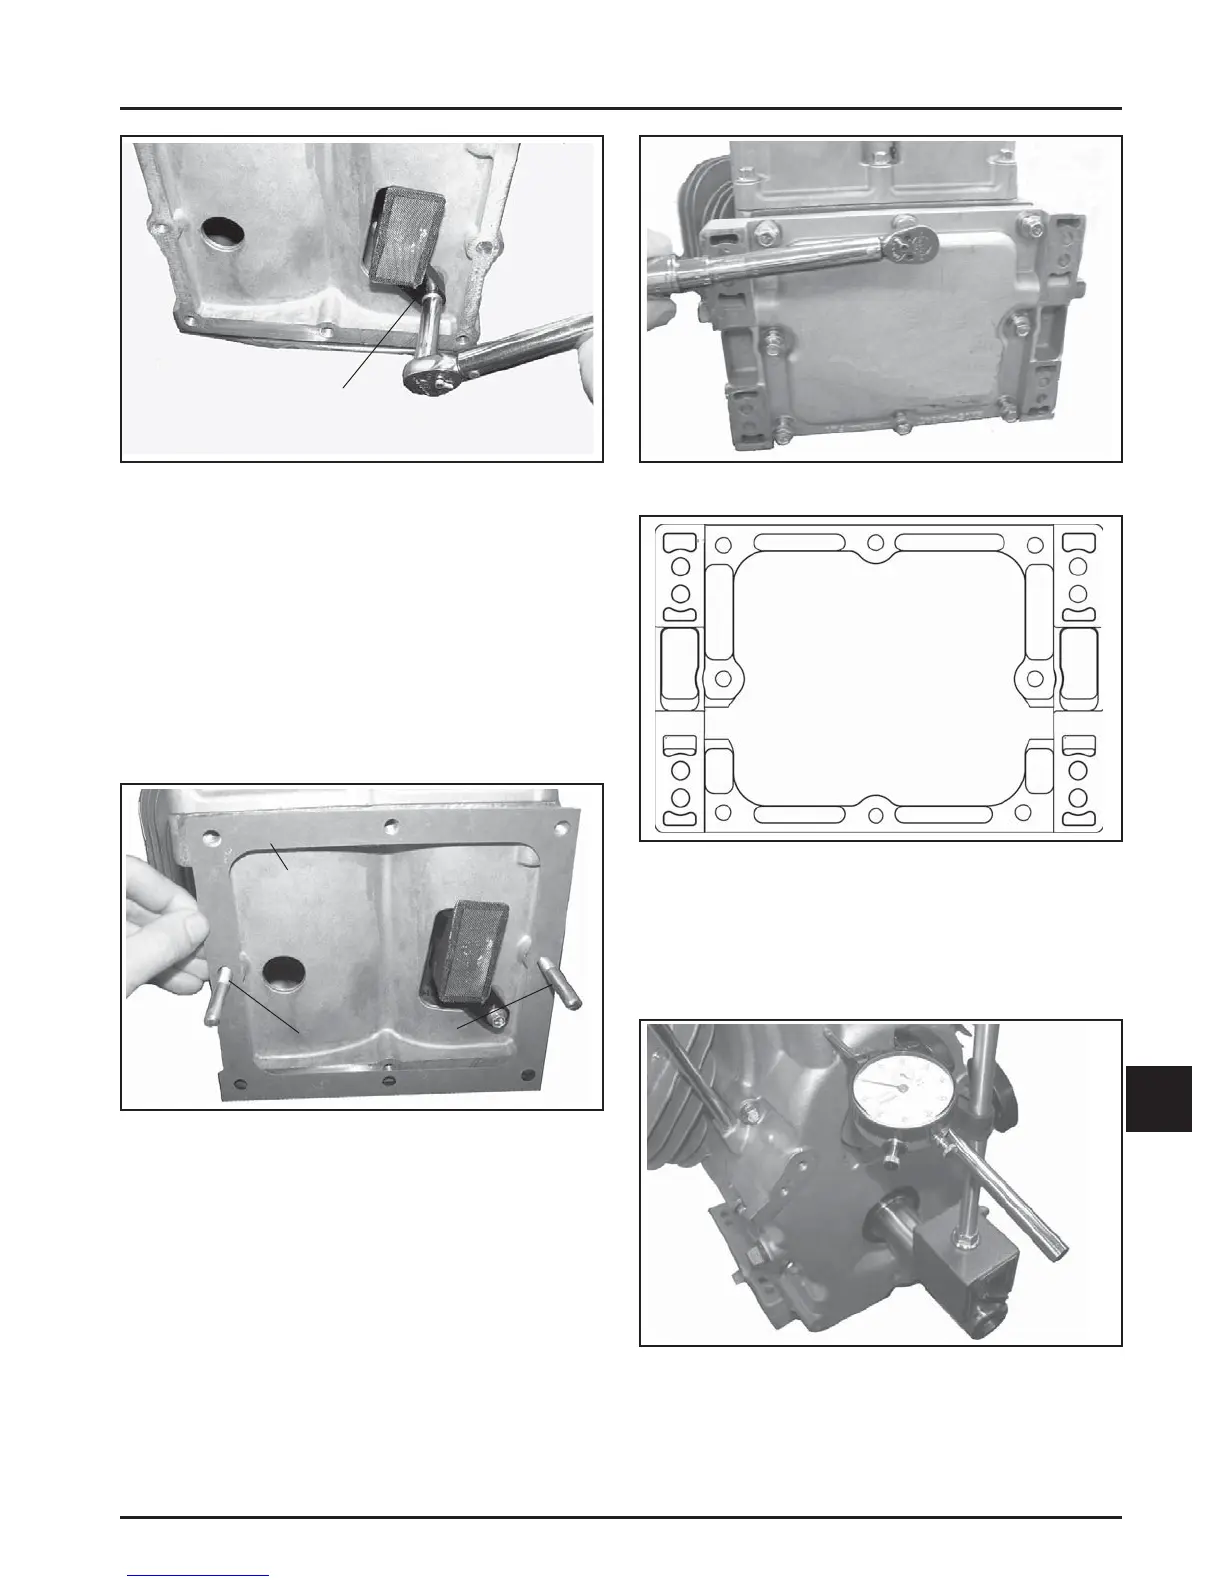
Mounting Screw
Figure 10-33. Torquing Pickup Mounting Screw.
Install Oil Reservoir
1. Use two bolts with the heads removed, or a
similar item as temporary alignment pins and
install into the two center holes on the ends as
shown in Figure 10-34.
2. Install a new oil reservoir gasket onto the bo om
of the crankcase using the alignment pins. The
notched side of the gasket must be towards the
fl ywheel.
Temporary
Alignment Pins
Gasket
Figure 10-34. Installing Oil Reservoir Gasket.
3. Install the oil reservoir onto the crankcase and
temporary alignment pins. The fl ywheel side is
indicated on the cover. Install and fi nger tighten
the screws. Remove the two alignment pins and
install the two remaining screws. Torque the
screws in the sequence shown in Figure 10-36 to
24.4 N·m (216 in. lb.).
Figure 10-35. Torquing Oil Reservoir Fasteners.
8 1 6
3 4
5 2 7
Figure 10-36. Oil Reservoir Torque Sequence.
Check Crankshaft End Play
1. Set the engine on the base, and use a dial
indicator to check the cranksha end play against
the specifi cation listed in Section 1.
Figure 10-37. Checking Crankshaft Endplay.
 Loading...