8.4
Section 8
Disassembly
Governor
Lever
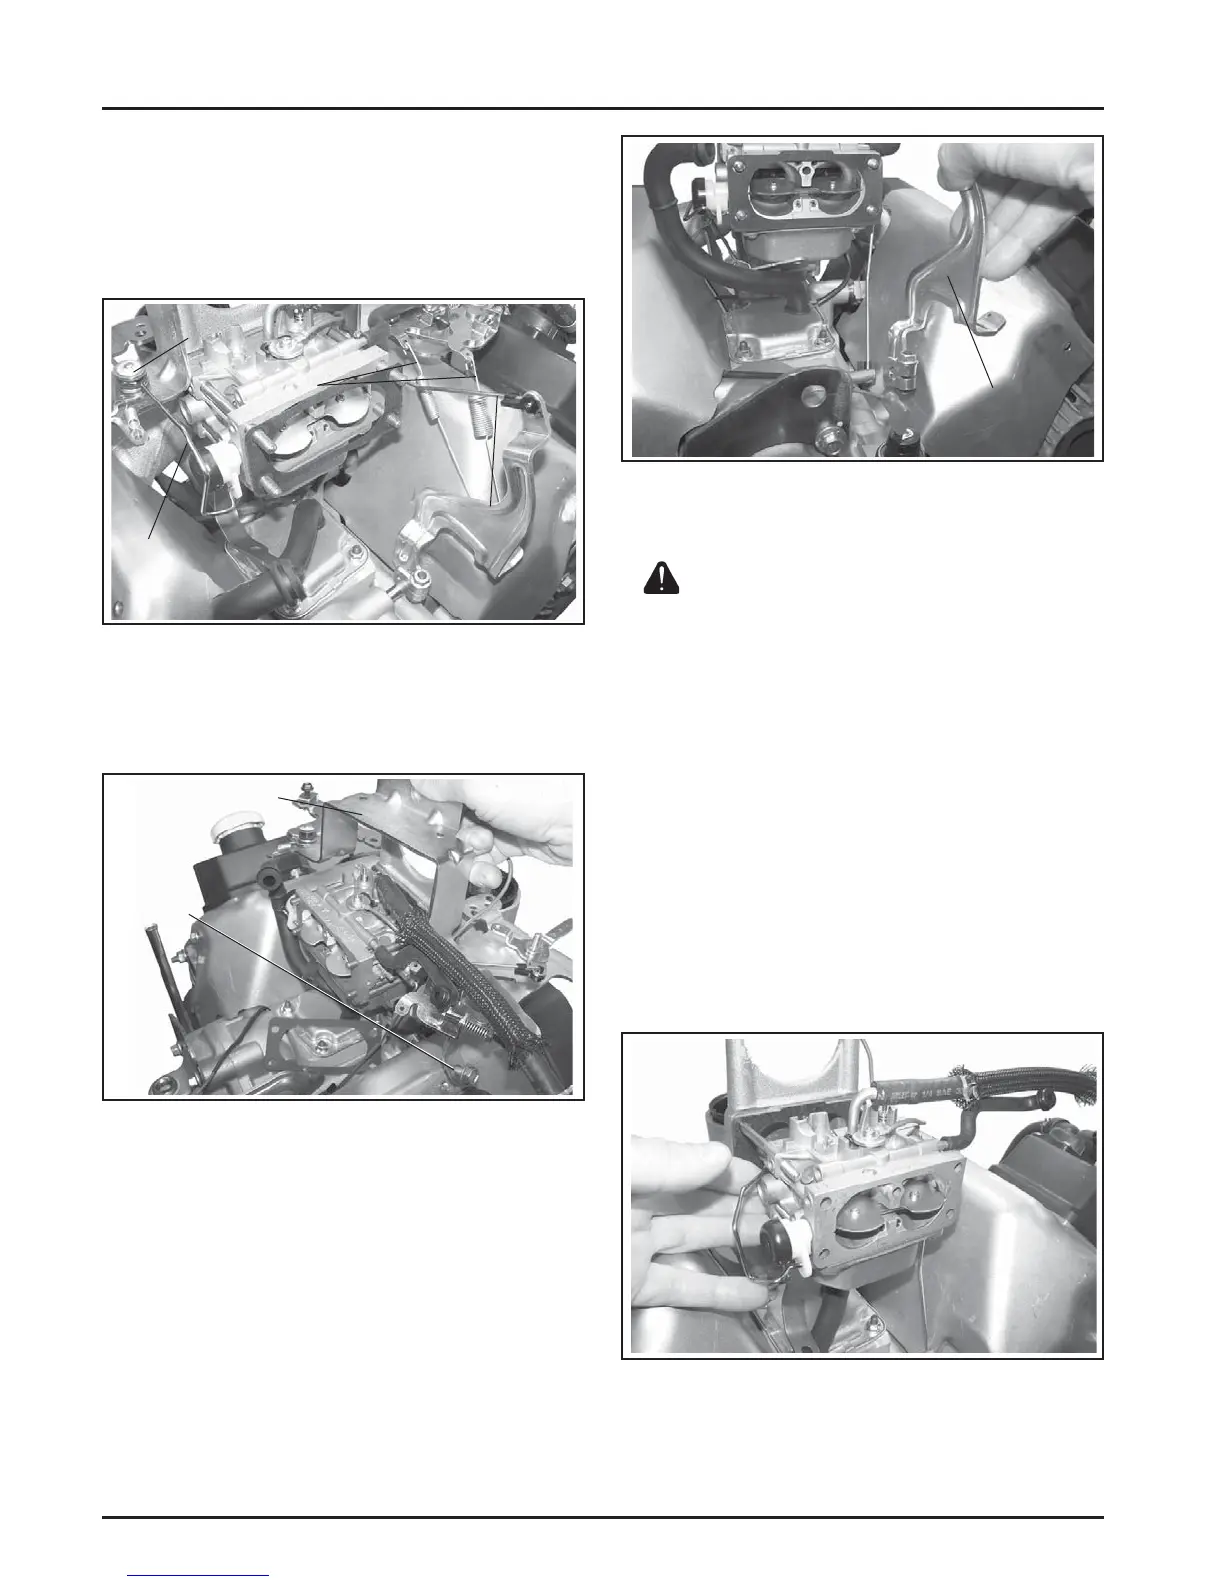
Figure 8-13. Removing Governor Lever.
Remove Carburetor
WARNING: Explosive Fuel!
Gasoline is extremely fl ammable and its vapors can explode
if ignited. Store gasoline only in approved containers, in
well ventilated, unoccupied buildings, away from sparks or
fl ames. Do not fi ll the fuel tank while the engine is hot or
running, since spilled fuel could ignite if it comes in contact
with hot parts or sparks from ignition. Do not start the
engine near spilled fuel. Never use gasoline as a cleaning
agent.
1. Disconnect the fuel shut-off solenoid lead.
2. Remove the fuel inlet hose from the carburetor or
fuel pump. Properly contain any remaining fuel.
3. Remove the carburetor and linkages with choke
return components as an assembly. See Figure
8-14.
Figure 8-14. Removing Carburetor.
4. Remove the carburetor gasket.
3. Carefully pry off the pal nut, remove the two
washers (note assembly order), and disconnect
the choke linkage from the pivot lever. Do not
lose any parts. Secure remaining pivot parts with
tape to avoid losing them. Always use a new pal
nut during reassembly. See Figure 8-11.
Pal Nut
Governor
Springs
Throttle
Linkage
Choke
Linkage
Figure 8-11. Disconnect Control Linkages and
Governor Springs.
4. Remove the rear mounting screw on each side
and li off the control bracket. See Figure 8-12.
Control Bracket
Mounting
Screw
Figure 8-12. Removing Control Bracket.
5. Loosen the hex fl ange nut and remove the
governor lever from cross sha . See Figure 8-13.
 Loading...