9.2
Section 9
Disassembly
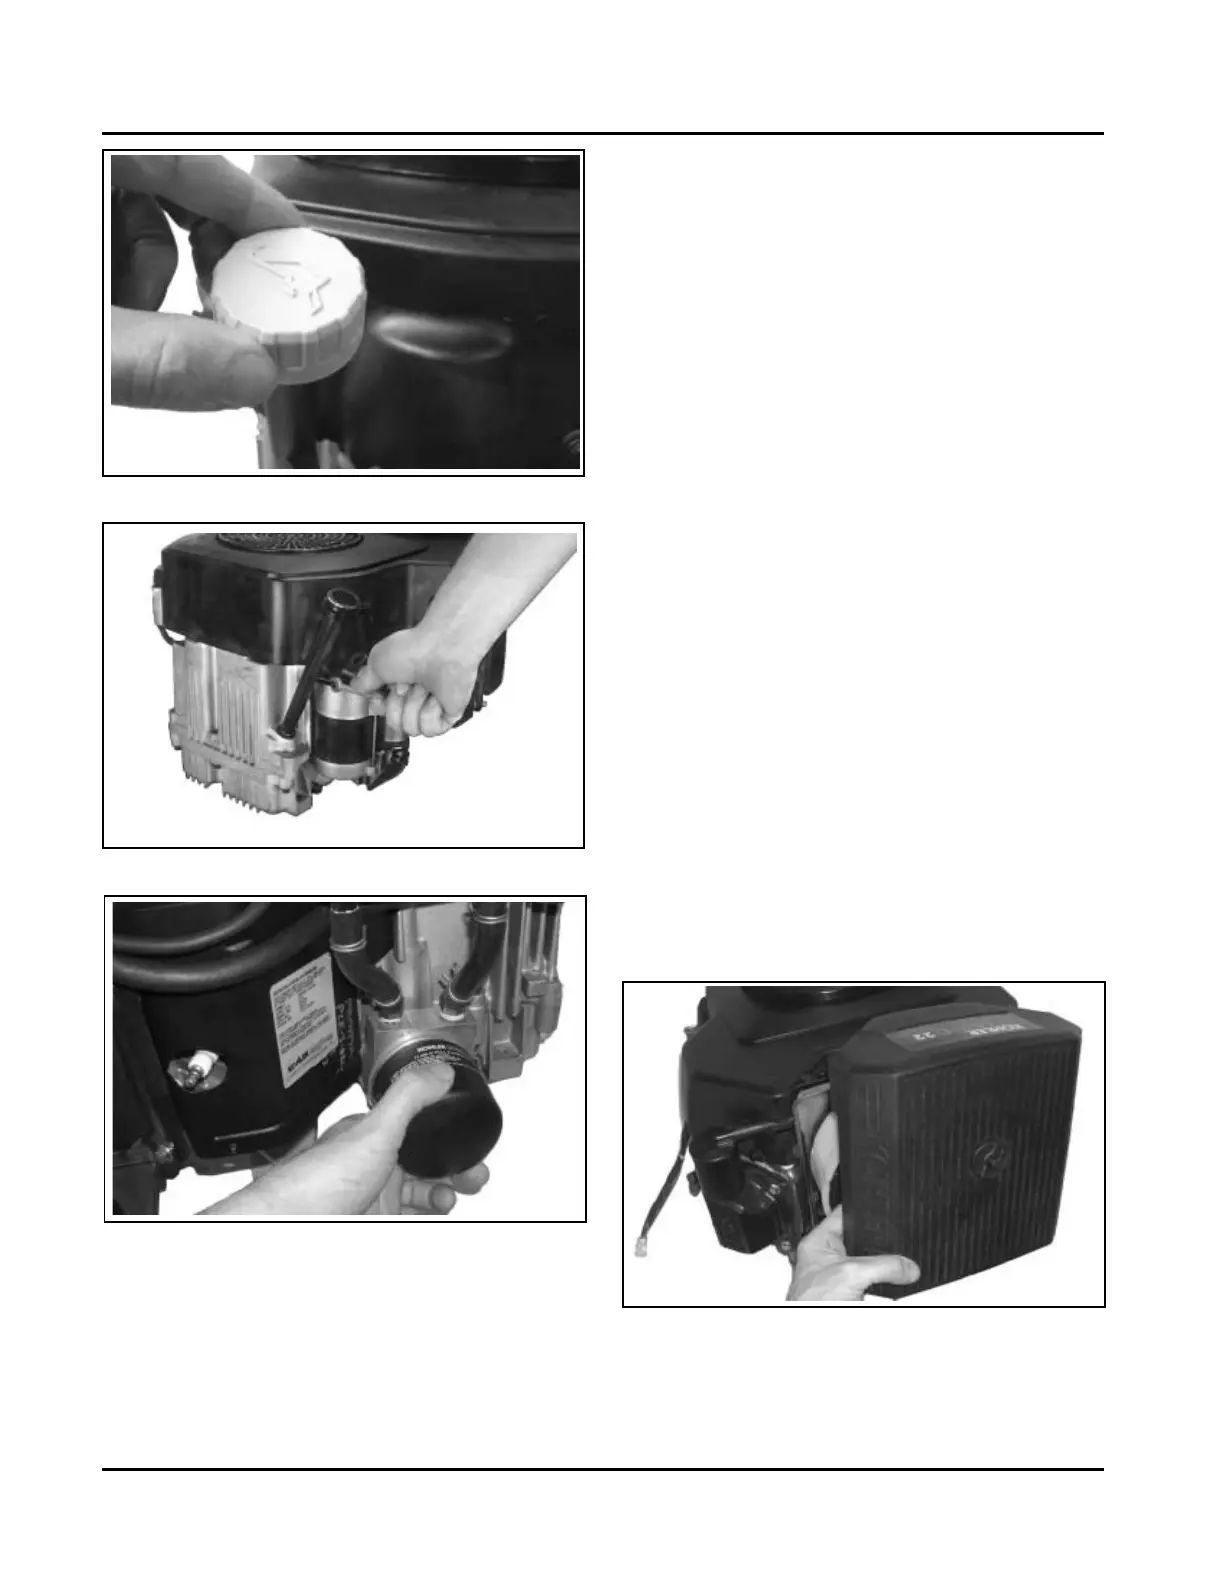
Figure 9-2. Removing Oil Fill Cap/Dipstick.
3. Remove the mounting screw and detach the oil fill
tube. See Figure 9-3.
4. Remove and discard the oil filter. See Figure 9-4.
Remove Oil Cooler
If equipped, the oil cooler can now be removed from
the engine. Two different styles are used, see Figures
6-6 and 6-7 in Section 6.
1. Use a 5/16" allen wrench to remove the oil filter
nipple.
2. For the crankcase-mounted cooler: Separate
the oil cooler from the oil pan. Remove and
discard the gasket located between them.
For the blower housing-mounted cooler:
Separate the filter adapter from the oil pan,
leaving the oil lines attached. Remove the two
hex. flange screws mounting the oil cooler to the
blower housing. Remove the cooler, lines, and
filter adapter as an assembly.
Remove Muffler
1. Remove the exhaust system and attaching
hardware from the engine. On engines equipped
with a port liner, remove it now.
Remove Air Cleaner Assembly
1. Unhook the latches located on either side of the
air cleaner cover, or loosen the cover-retaining
knob, and remove the cover. See Figure 9-5.
Figure 9-3. Removing Oil Fill Tube Bracket.
Figure 9-4. Removing Oil Filter.
2. Allow ample time for the oil to drain from the
crankcase and oil filter.
Figure 9-5. Removing Standard Air Cleaner Cover.
2. Remove the wing nut from the element cover.
Kohler Engine Parts Call K&T 606-678-9623 or 606-561-4983
www.mymowerparts.com