10.18
Section 10
Reassembly
Figure 10-67. Installing Starter and ECU Bracket.
2. Torque the two hex fl ange screws to 16.0 N·m
(142 in. lb.).
3. Connect the leads to the solenoid.
4. Install the dipstick tube and align the mounting
hole with the threaded hole in the ECU bracket.
Secure with the M5 hex fl ange screw. Torque the
screw to 6.2 N·m (55 in. lb.) into new holes or
4.0 N·m (35 in. lb.) into used holes. See Figure
10-68.
Figure 10-68. Installing Dipstick Tube.
Install Electronic Control Unit (ECU)
1. Install ECU to the ECU bracket using the two hex
fl ange screws. Torque the M5 screws to 6.2 N·m
(55 in. lb.) into new holes or 4.0 N·m (35 in. lb.)
into used holes. See Figure 10-69.
2. Connect the Black and Grey electrical connectors.
The connectors and ECU are keyed in such a way
so they cannot be installed incorrectly.
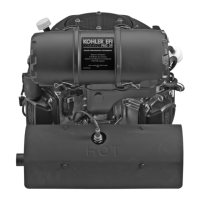
Figure 10-66. Install Oil Separator.
Install Electric Starter Motor and ECU
Bracket
1. Install the electric starter motor using the two hex
fl ange screws. Position the ECU bracket as
shown. See Figure 10-67.
Figure 10-65. Torque Plastic Grass Screen Hex
Screws.
Install Oil Separator and Hardware
1. Ensure the rubber oil separator grommet is in
good condition. Insert rubber grommet into valve
cover. Push oil separator into the rubber grommet
in the valve cover.
2. Secure the oil separator to the blower housing,
placing the spacer and oil separator bracket
against the blower housing and securing with the
strap and two screws. Torque the screws to
2.3 N·m (20 in. lb.). See Figure 10-66.