8.3
Section 8
Disassembly
8
Figure 8-8. Removing Low-Profi le Element and
Precleaner.
4. Remove the three hex fl ange nuts securing the
air cleaner base. See Figure 8-8. Two additional
lower hex fl ange screws must be removed from
the lower air cleaner support bracket.
5. Remove the base.
2. Remove the two upper screws securing the air
cleaner to the mounting bracket and remove the
air cleaner assembly. See Figure 8-6.
Low-Profi le Air Cleaner (Optional)
1. Loosen the cover-retaining knob, and remove the
cover. See Figure 8-7.
Figure 8-7. Removing Low-Profi le Air Cleaner
Cover.
2. Remove the wing nut from the element cover.
3. Remove the element cover, element and
precleaner. See Figure 8-8.
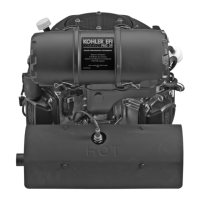
Remove Top Mount Control Panel
1. Remove the thro le control sha nut on top of
the thro le sha and remove the thro le control
lever and spring. See Figure 8-9.
2. Remove the two screws fastening the control
panel and remove the panel from the blower
housing. See Figure 8-9.
3. Remove the lower thro le control bracket from
the cylinder head.
Hex Flange
Nuts
Lower Bracket
Screws
Figure 8-9. Removing Throttle Control Panel.
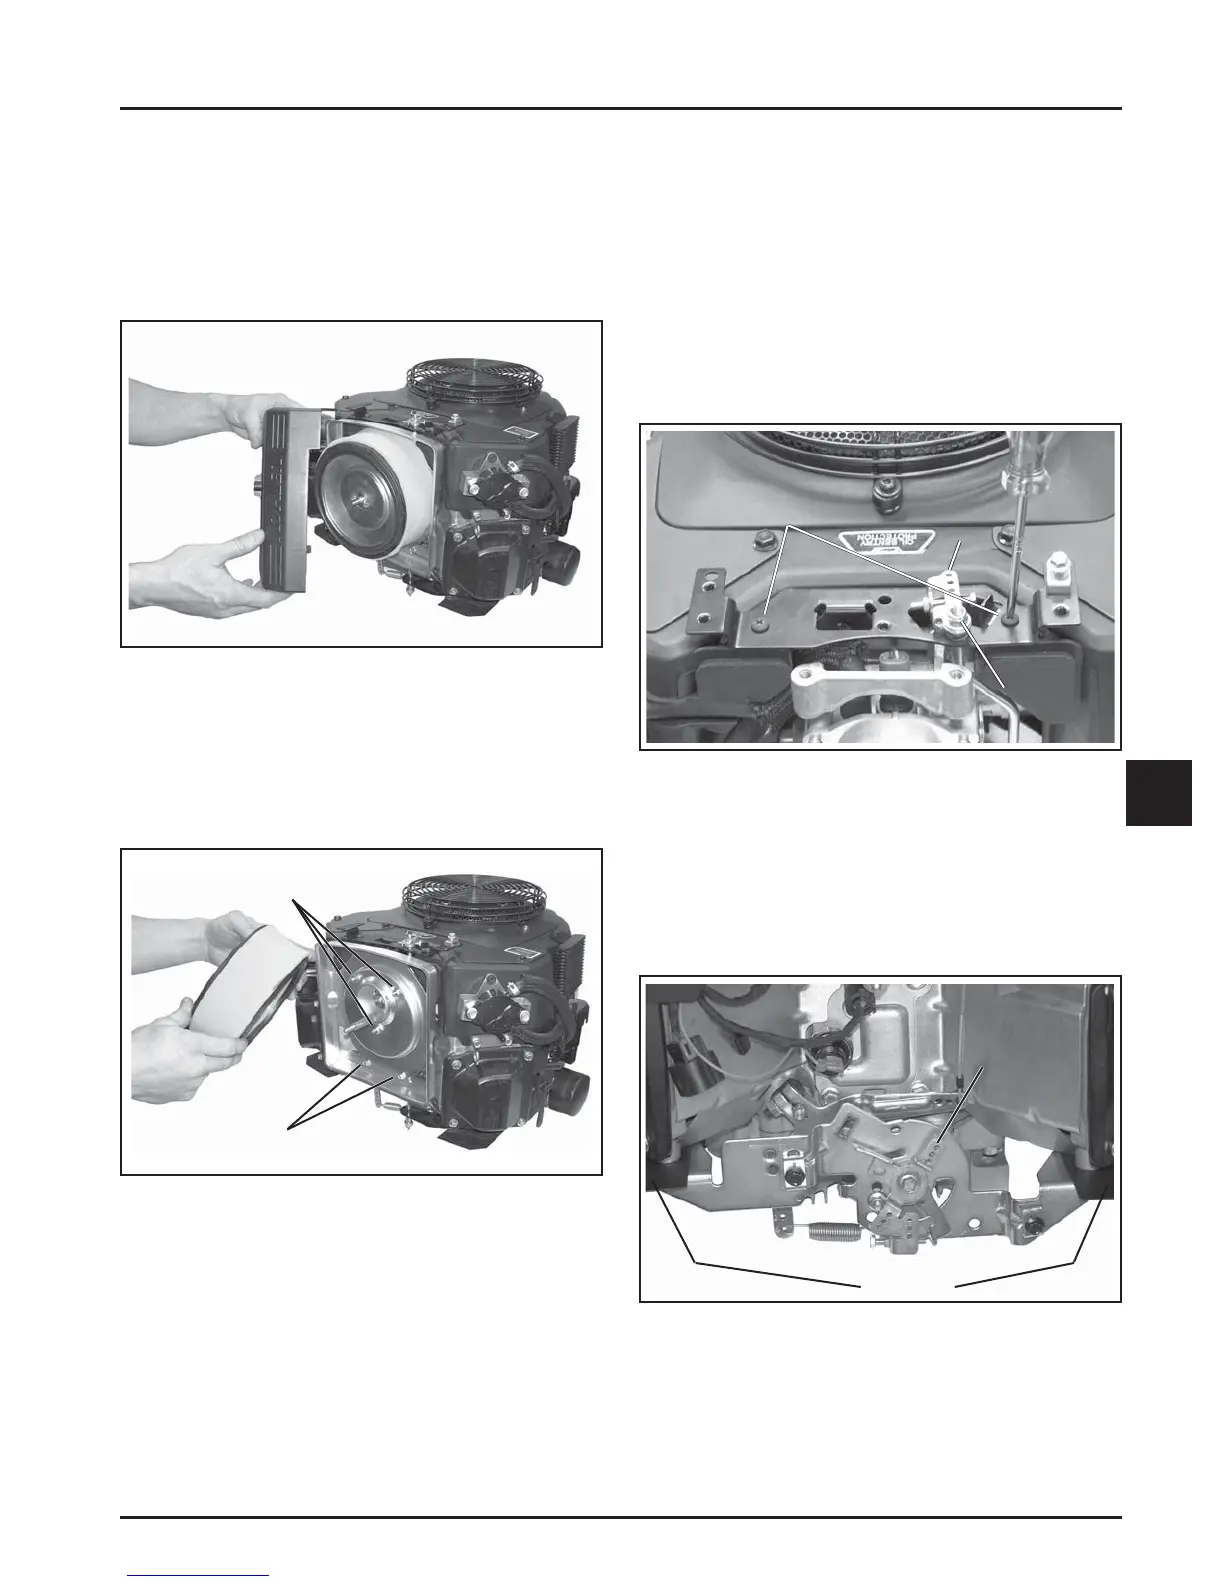
Remove Bottom Mount Control Panel (If So
Equipped)
1. Remove the governor lever spring.
2. Remove the four hex fl ange screws fastening the
thro le panel and remove the panel from the
cylinder heads. See Figure 8-10.
Screws
Throttle
Control Shaft
Nut
Figure 8-10. Removing Throttle Control Panel.
Throttle
Control
Lever
Throttle
Control
Lever
Hex Flange
Screws