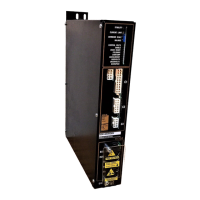
BDS4 C
HAPTER
4 - M
AINTENANC
4-5
The motor system resolver alignment can be
confirmed by conducting the following test:
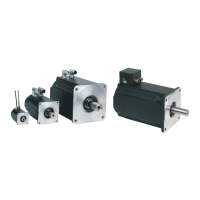
1. Remove power. Disconnect the motor shaft
from any mechanical load.
2. Connect a small jumper between TC1-3 and
TC1-4 (refer to Figures 1 and 3). While in this
mode (resolver zeroing test mode), the
FOLDBACK LED will become the resolver
alignment indicator.
3. Apply power. DO NOT ENABLE THE BDS4.
If necessary have a colleague observe the
FOLDBACK LED. The FOLDBACK LED
will be either off or slowly blinking. Slowly
rotate the motor shaft until the FOLDBACK
LED blinks at its fastest rate (rotate slowly then
pause, giving the circuitry time to react). The
closer the resolver is to being correctly aligned,
the faster the LED will blink. The LED should
be somewhere between one pulse per second
and fully illuminated when it blinks at its
fastest rate.
CAUTION
Remove hand from motor
shaft before enabling. The
shaft will jerk into position
with some force.
4. Enable the BDS4 by pulling Connector C1-Pin
2 on the BDS4 to common. The internal
software of the BDS4 will cause phase M
a
to
have zero current. The M
b
and M
c
phases will
have equal, but opposite, currents causing the
motor shaft to align itself in a neutral position.
The FOLDBACK LED should be fully
illuminated indicating correct alignment of the
resolver. No further attempt at alignment is
necessary. Resolver alignment is correct.
5. If, however, the LED does not become fully
illuminated as indicated in Step 4 above,
proceed with the alignment procedure.
Inhibit the BDS4.
Remove power.
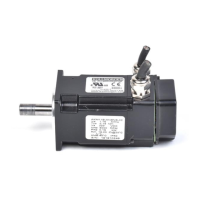
Remove the end plate (cover) from the rear
end of the motor. The shaft-mounted
frameless resolver will be in sight.
The frameless resolver rotor is slid forward
onto the motor shaft and secured by a large
lock nut. This part of the resolver should not
be disturbed.
6. Loosen, but do not remove, the two servo
clamp screws holding the resolver stator
secure. DO NOT MOVE THE POSITION OF
THE MOTOR SHAFT.
7. Apply power. If necessary, repeat Step 3
above. Enable the BDS4. Slowly rotate the
resolver stator (outside element) while a
colleague watches the FOLDBACK LED on
the front of the BDS4 amplifier.
If the LED does not become fully illuminated,
turn the resolver stator in the opposite
direction. Continue to rotate the resolver
stator until the LED becomes fully illuminated.
If the correct alignment position is passed, the
LED will blink more slowly. When the LED
becomes fully illuminated, discontinue turning
the resolver stator and tighten the two servo
clamp screws.
Inhibit the BDS4.
Remove power.
8. Repeat Steps 3 and 4 above.
9. Inhibit the BDS4.
Remove power.
Remove the jumper from the test points.
Replace the motor end cover.
4.4.3.4 Factory Only Adjustments
WARNING
Do not adjust Pots R/DTR,
R/DG, and Pot R/DZ. These
pots are set and sealed at the
Factory and cannot be
adjusted in the field. If these
pot seals are ever broken,
return the complete BDS4
amplifier to the Factory for
alignment.
Artisan Technology Group - Quality Instrumentation ... Guaranteed | (888) 88-SOURCE | www.artisantg.com
 Loading...