NOTICE
• Do not clean and reuse the inner element. When replacing the outer element, replace the inner ele-
ment with a new one at the same time.
• If the outer element and cover are installed while the inner element is not installed properly, the out-
er element may be damaged.
• The sealing portion of the improper part lacks precision, and allows the entry of dust, which leads
to damage of the engine. Do not use such improper part.
6.
Remove inner element (6), then quickly install the new inner element.
Install the inner element securely so that it does not move.
7.
Push new outer element (5) in straight with your hand into the air cleaner body.
Hold the element, and rock it lightly up and down and to the right and left while pushing it in, the element
can be inserted easily.
8.
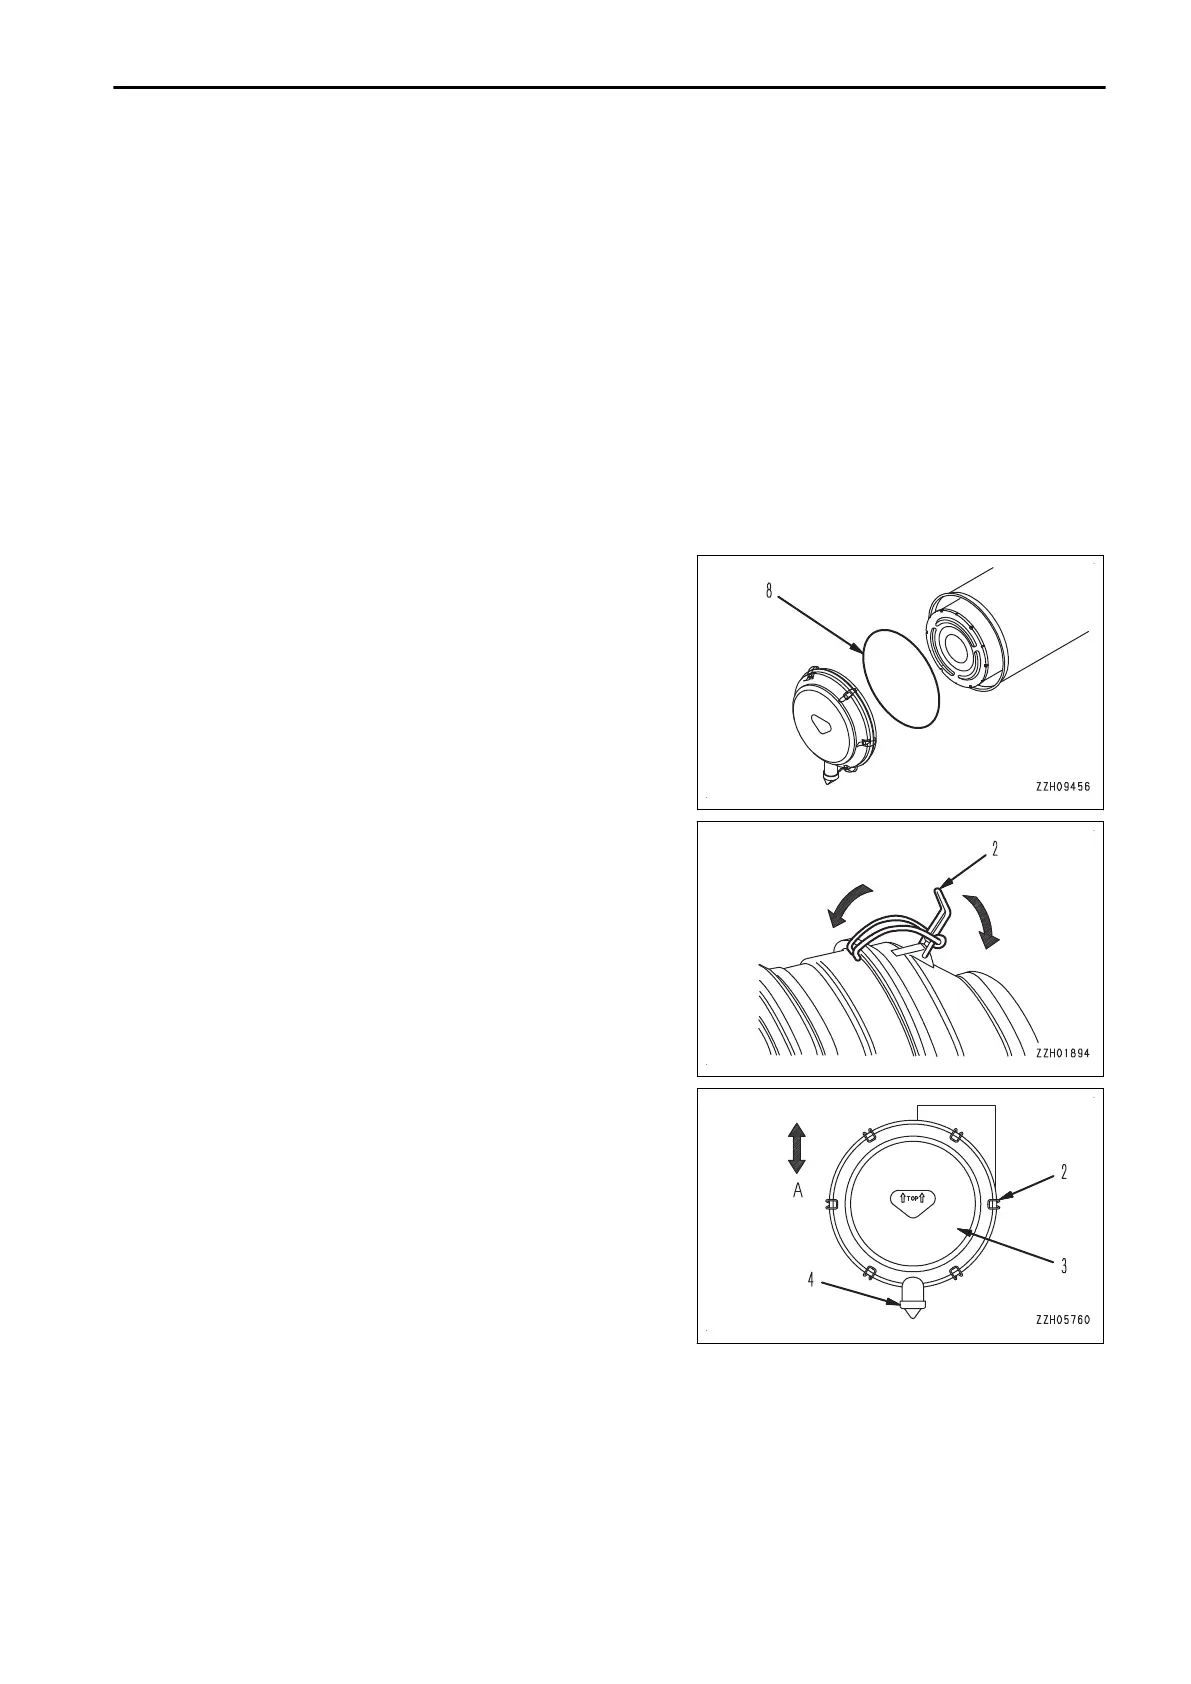
Install cover (3) as follows.
1)
Check that O-ring (8) is fitted to cover (3).
2)
Align cover (3) with the element.
3)
Lock the tip of hook (2) on the protrusion of the air
cleaner body.
4)
Lock hooks (2) diagonally, (top and bottom, right and
left) in the same way as when tightening bolts.
5)
Always install cover (3) so that vacuator (4) faces right
below (A).
6)
When cover (3) is installed, check that the clearance
between the air cleaner body and cover (3) is not too
large.
If the clearance is too large, remove cover (3), and
then install it again.
CHECK AND REPLACE VACUATOR VALVE
Check vacuator valve (4) for damage and deformation of its rubber portion.
If the vacuator is damaged or its rubber part is deformed, replace it with a new one.
MAINTENANCE MAINTENANCE PROCEDURE
4-19
 Loading...