46
2.3 Insertion / Ejection Unit
REGIUS MODEL 190 Service Manual Ver.1.00 2004.11.01
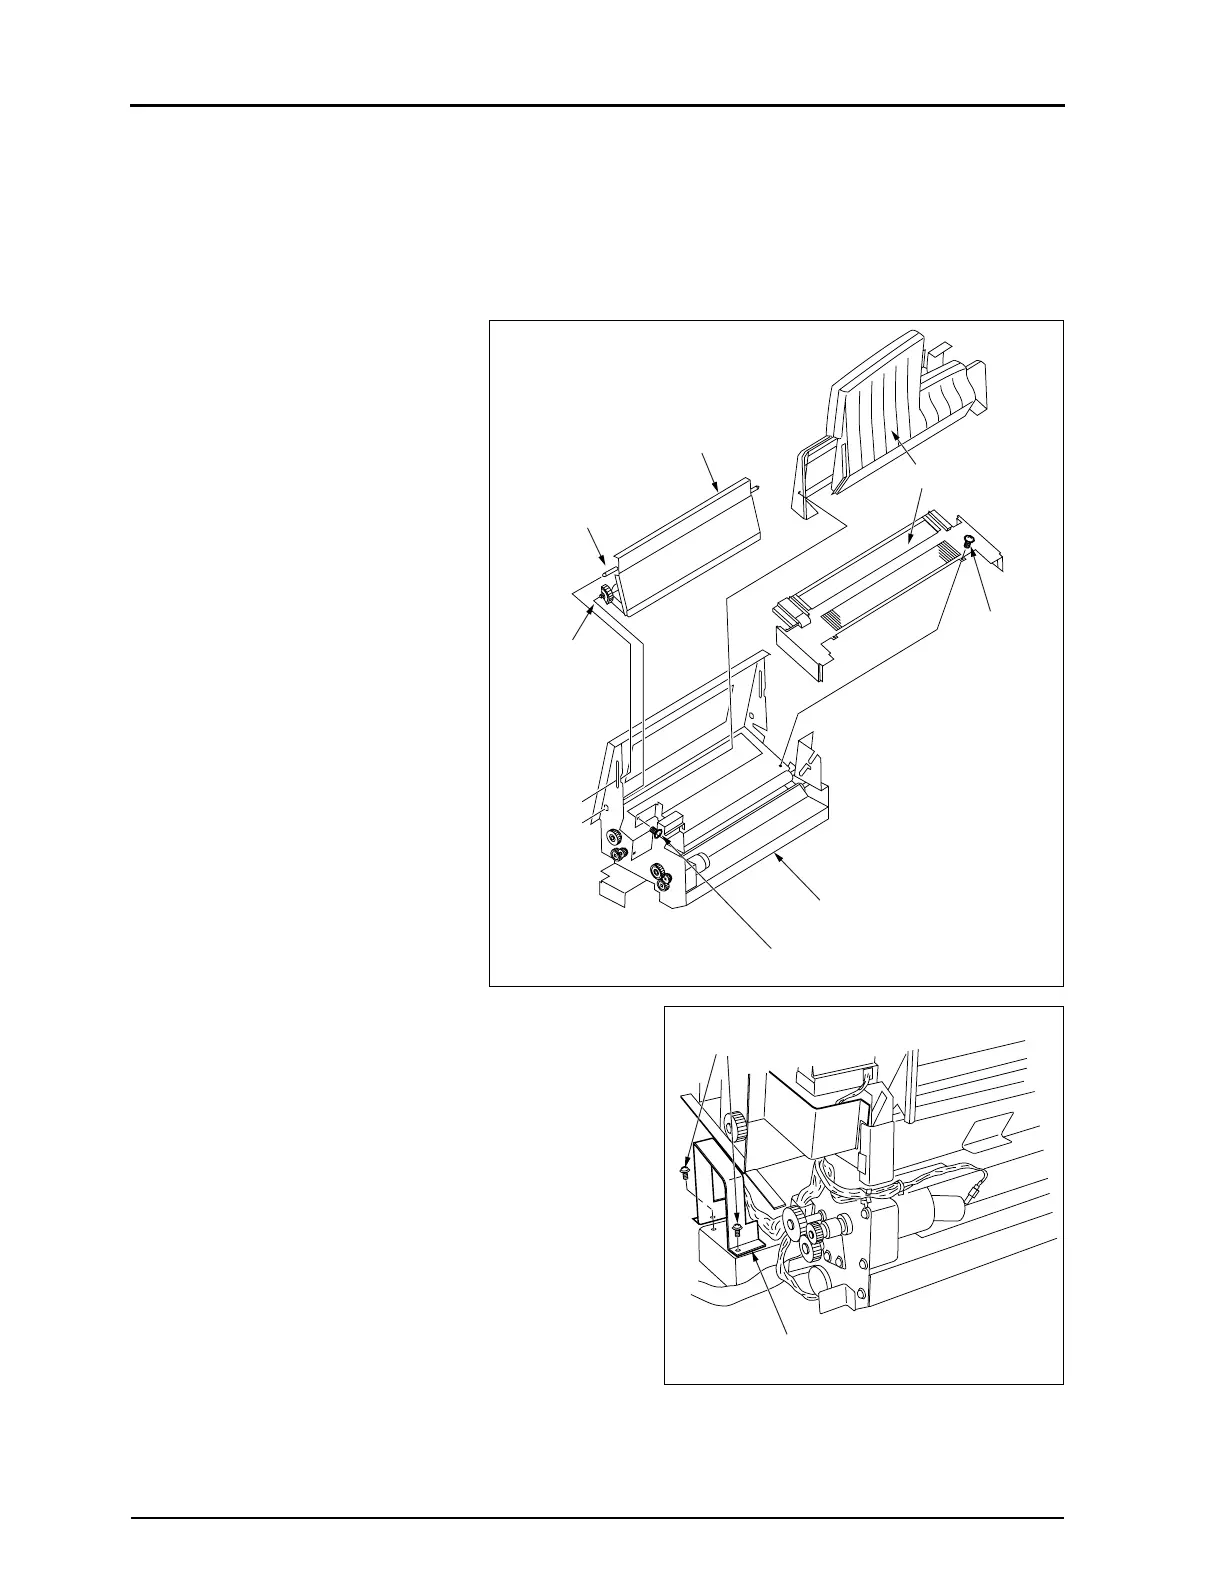
8.
Slide the link pins "B" (both sides) inward, pull out the from
the slide hole on the right and left frame.
9.
Remove the shutter shaft from the right and left frame, and
remove the ejection shutter assy from the insertion / ejec-
tion unit.
10.
Remove 4 fixing screws, and remove the tray assy.
11.
Remove two fixing screws, and remove the tray assy
retainer plate (left).
Ejection Shutter Assy
Tray Assy
Link Pins "B"
(2 locations on
each side)
Shutter Shaft
(2 on each side)
Fixing Screws
(2pcs)
Fixing Screws (2pcs)
Insertion /Ejection Unit
Fixing Screws
Tray Assy Retainer Plate
 Loading...


