KÖNIG & MEYER GmbH & Co. KG
Kiesweg 2, 97877 Wertheim, www.k-m.de
12190-000-56 Rev.10 03-80-347-00 4/19
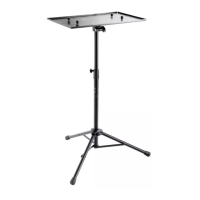
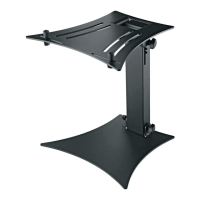
12190 Laptop stand
- This stylish and compact laptop stand is a must-have for DJs and Musicians on the go.
- Stable and light at the same time, thanks to a material composite made of steel and
- aluminum
- Setup and adjustment are done in a snap - tools are not required.
- The desk…
- …is at ~320 mm height and offers plenty of room for equipment below it,
- …is equipped with adjustable edges for all common laptop models, mixers, CD player etc.
- the angle can be easily adjusted - there are four positions to choose from 0° - 15° - 25° - 35°,
- …offers space for 4 protective pads that can be adhered to the desk,
- …it is 304 mm wide and 264 mm deep (usable area: 270 x 230 mm)
SAFETY NOTES
Thank you for choosing this product. This instruction manual informs you about the important steps to set up and
handle the product. We recommend to keep the manual in a separate place for a possible later use.
- Maximum centered load: 8 kg
- Only use indoors, not in damp areas
- The surface must be load bearing and even.
- The equipment is always to be centered and checked
- regularly.
- Changes to the stand (position, angle) must be done
- without any equipment on the stand
- Regularly check to ensure that the installation is secure
- and that the screw connections are tight
- The fact that the product is adjustable, can result in the
- risk of pinching/wedging of your fingers. Careful and
- attentive handling during setup, operation, and
- disassembly is indispensable
- A damaged product may not be used until it has been
- restored to working condition by a qualified technician
SETUP /
OPERATION INSTRUCTIONS
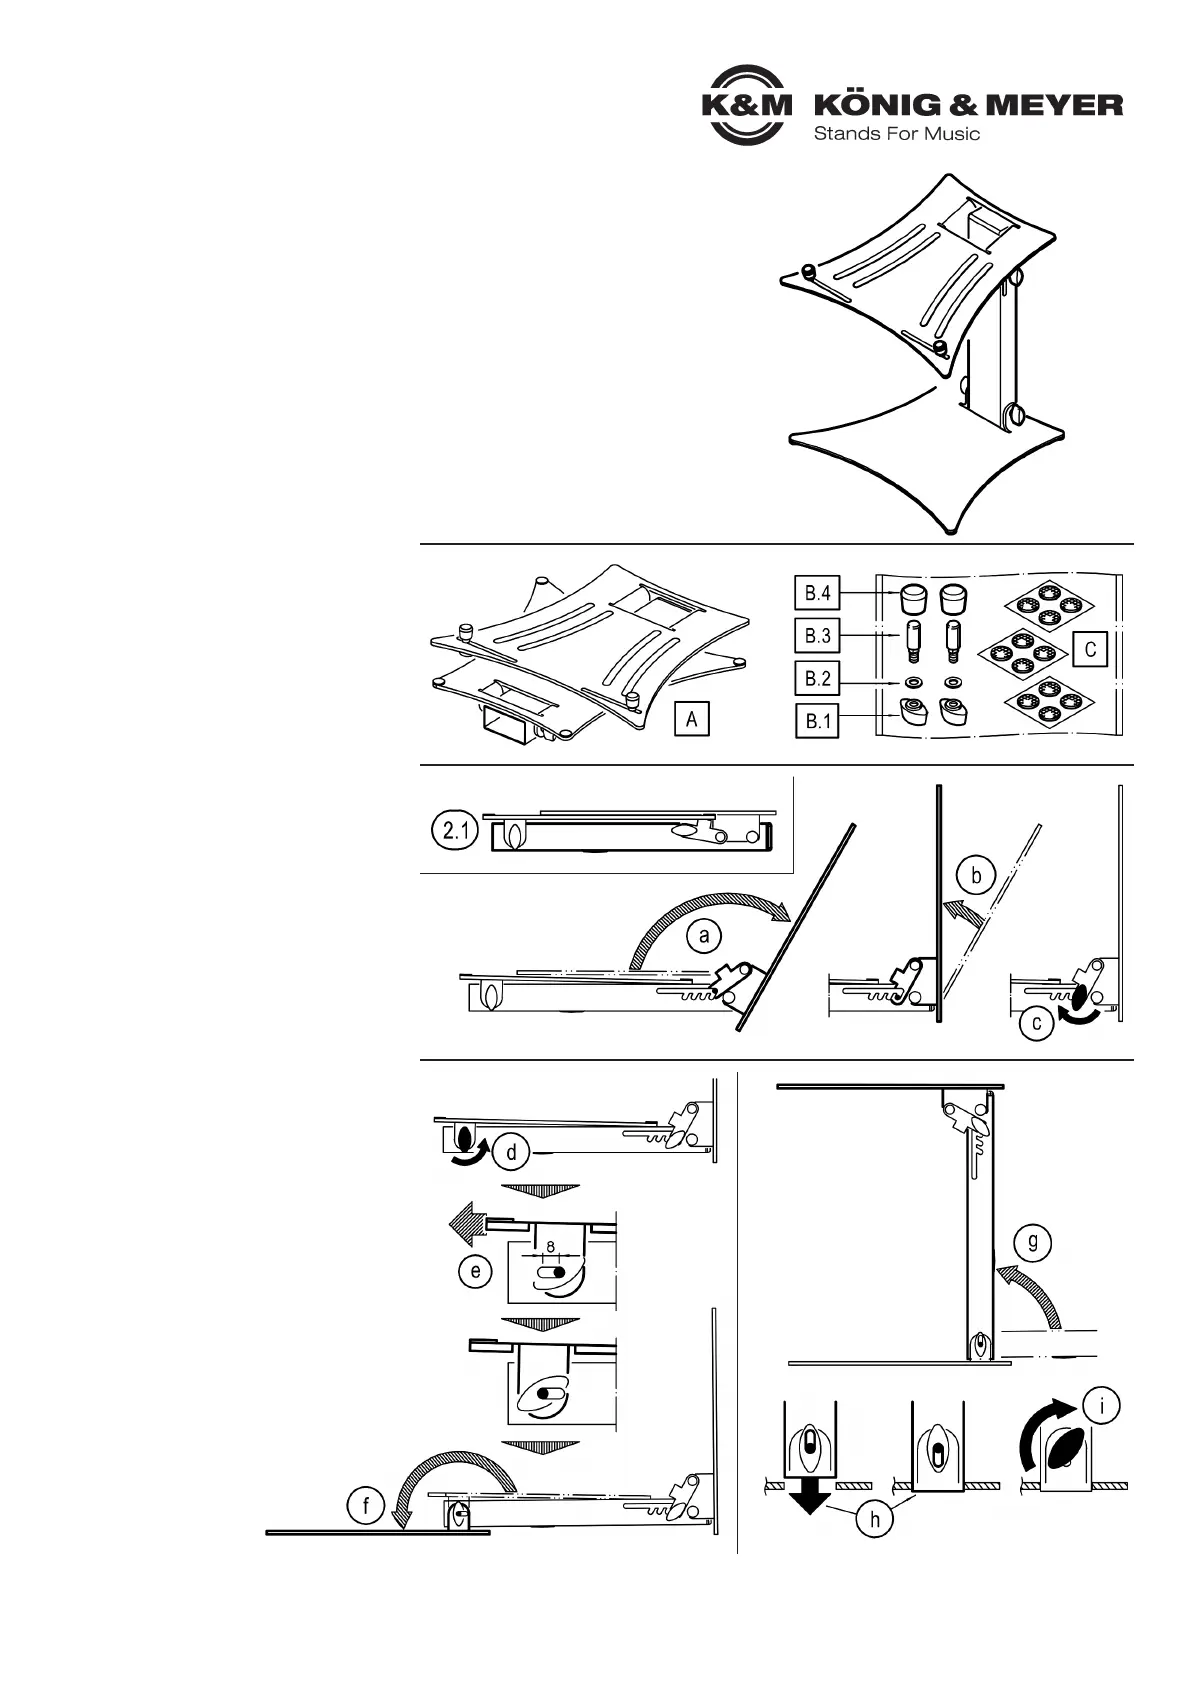
1. COMPONENTS
Please check to ensure that all components are included
and to the extent possible in working order.
A Laptop Stand (pre-assembled)
B Edges (each 2x) - in the accessories bag:
B B.1 Wing Nut 21 mm/M5
B B.2 Washer ø 5.3/10 mm
B B.3 Lock bolt ø 8/M5
B B.4 Rubber cap ø 15 mm
C Rubber knobs - in the accessories bag
C - 3 Strips with 4 self-adhesive knobs each ø 13 mm
2. SETUP and INSTALLATION
2.1 Take the LAPTOP STAND A out of the box and
2.1 place it on the tube.
2.2 DESK:
2.2 a Open up the desk by unfolding it as far as it will go
2.2 b By pushing it back a bit the cross bars will click into
2.2 b the upper 4 slits, by which the desk is placed at a
2.2 b 90°position.
2.2 c Tighten both wing nuts on the cross bar
2.3 FOOT PLATE:
2.3 d Loosen both foot plate wing nuts a bit
2.3 e If needed, push the foot plate outward as far as it
2.3 e will go (8mm)...
2.3 f …and open up until it is on the floor
2.4 STAND TUBE:
2.4 g Hold in a vertical position…
2.4 h …and place it into the holder as far as it will go
2.4 i Tighten both foot plate wing nuts
1. COMPONENTS
2. SETUP and INSTALLATION
2.2 DESK
2.3 FOOT PLATE
2.4 STAND TUBE
 Loading...