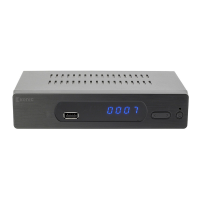
Use
Installing the batteries
1. Remove the cover from the battery compartment.
2. Insert the batteries into the battery compartment.
Make sure that the battery polarity (+/-) matches the
polarity markings inside the battery compartment.
3. Place the cover onto the battery compartment.
First-time installation
1. Make sure that all connections are correct. Refer to
the section “Connection scheme“.
2. Switch on the TV.
3. Switch on the device.
4. If you use the device for the rst time or if you have
restored the factory settings, the main menu will
appear on the TV screen.
5. “OSD Language”: Press the right/left buttons to
select a language.
“Country”: Press the right/left buttons to select a
country.
“Time zone“: Press the right/left buttons to select a
time zone.
“Active Antenna“: Press the right/left buttons to set
the active antenna to on or o.
“LCN“: Press the right/left buttons to set the LCN
(logical channel number) search to on or o.
“Start Search”: Press the OK button to start searching
for channels automatically.
6. When the automatic channel search is completed,
you are ready to watch TV or listen to the radio.
Menu
1. Press the up/down buttons to select the main menu
item. Press the OK button to access the main menu
item.
2. Press the up/down buttons to select the sub-menu
item. Press the right button to access the sub-menu
item.
3. Press the OK button to conrm the settings.
4. Press the exit button to exit the menu.
“Installation”
“Auto Search”
• Press the OK button to start searching for channels
automatically.
• Press the exit button during the search to stop
searching for channels automatically.
“Manual Search”
• “Channel No.”: Set the channel number.
• “Frequency”: Set the frequency (kHz).
• “Bandwidth”: Set the bandwidth: “6MHz” / “7MHz” /
“8MHz”.
• “Start Search”: Press the OK button to start searching
for channels manually.
“Channel Filter”
• Set the channel lter to search all channels or
encrypted channels only.
“Country”
• Set the country.
“LCN”
• Set the LCN (logical channel number) search to on or
o.
“Active Antenna”
• Set the antenna voltage to on or o.
“Channel”
“Channel Manager”
• Press the colour buttons to select dierent options:
- Red: Lock or unlock the channel.
Note: The system will ask for a password to lock or
unlock a channel.
- Green: Delete the channel.
- Yellow: Skip the channel.
- Blue: Rename the channel.
“Favorite List”
• Press the colour buttons to set the channels in dierent
groups:
- Red: Set the channel to group “Fav1“.
- Green: Set the channel to group “Fav2“.
- Yellow: Set the channel to group “Fav3“.
- Blue: Set the channel to group “Fav4“.
“Preference”
“OSD Language”
• Set the OSD language.
“OSD Timeout”
• Set the time length for the OSD menu to appear before
it automatically goes o.
“OSD Transparency”
• Set the transparency of the OSD menu.
“1st Preferred Subtitle” / “2nd Preferred Subtitle”
• Set the subtitle language.
“Hard Hearing”
• Set the special option available for hearing-impaired
viewers to on or o.
“1st Preferred Audio” / “2nd Preferred Audio”
• Set the audio language.