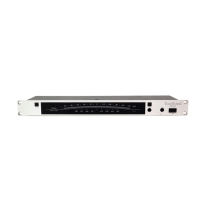
TUNING PROCEDURE
Connect an instrument to the INPUT jack (2 or 10). However when the plug is connected to the front
panel, the rear panel INPUT jack cannot be used. When tuning by listening to the sound, connect an
amplifier to the OUTPUT jack (11) of the DTR-2
1. Turn the POWER switch (1) on and set the reference pitch according to the “CALIBRATION
PROCEDURE”. The left side LED of the LED meter lights and the system is ready for tuning.
(When the DTR-2 is turned on, the reference pitch is set to 440 Hz.)
2. Play a single note on the instrument. The note name nearest to the note is lit on the NOTE LED
(7). If the pitch of the instrument is higher than the note by a semitone, a # (sharp) is indicated. If
the pitch of the instrument is extremely off, the desired note name will not be indicated. In such a
case, adjust the pitch of the instrument so that the correct note name will be indicated. Take care
not to play two notes or more simultaneously.
3. Adjust the pitch of the instrument. Check that the desired note name lights on the NOTE LED
before adjusting the pitch of the instrument so that the center LED lights on the LED meter (5).
4. For stringed instruments, follow steps 2 and 3 for each string.
About CENT:
Cent is the minimum unit for indicating the percentage of pitch. A semitone is 100 cents and 1 octave
1200 cents. The DTR-2 meter indicates the error between the pitch of an input sound and the correct
pitch in units cents. One cent is a very small unit, however, and an error of about ±3 cents does not
present a serious problem.
About the reference pitch and calibration:
For tuning instruments, A4 (=440 Hz) at the center of a piano is used as the reference pitch. Setting
the pitch by this reference is called calibration.
CALIBRATION PROCEDURE
Calibration consists of manual calibration that sets the reference pitch (the center of the piano = A4)
using the DTR-2 main unit and automatic reference calibration in which the DTR-2 recognizes the
pitch of the instrument and sets it as the reference pitch. Once set, the reference pitch will be retained
until the POWER switch is turned off.
Manual Calibration
1. Turn the POWER switch (1) on. When the DTR-2 is turned on, the reference pitch is set to 440 Hz.
2. Press the CALIB key (8) several times and set the reference pitch within the range of 438 Hz to
445 Hz. Press the CALIB key once to make E of the NOTE LED (7) blink when the reference pitch
is 440 Hz, or F to blink when the reference pitch is 441 Hz. In other words, the LED corresponding
to the current reference pitch set by the DTR-2 blinks. (In the case the reference pitch is set
beyond the range of 438 Hz to 445 Hz under automatic reference calibration, C or # darkly flashes
according to a portion exceeded). Press the CALIB key continually to change the reference pitch.
Each time the key is pressed, the blinking NOTE LED moves and the setting of the reference pitch
rises by 1 Hz as shown below.