INSTRUCTIONS
Video instruction available:
http://koslow.com/metal_test_kits/ThermoElectric_Alloy_Sorter?cPath=1
1. Remove protective plastic boot from the metallic hot probe tip.
2. Plug the TEAS into 110 Volt AC line power.
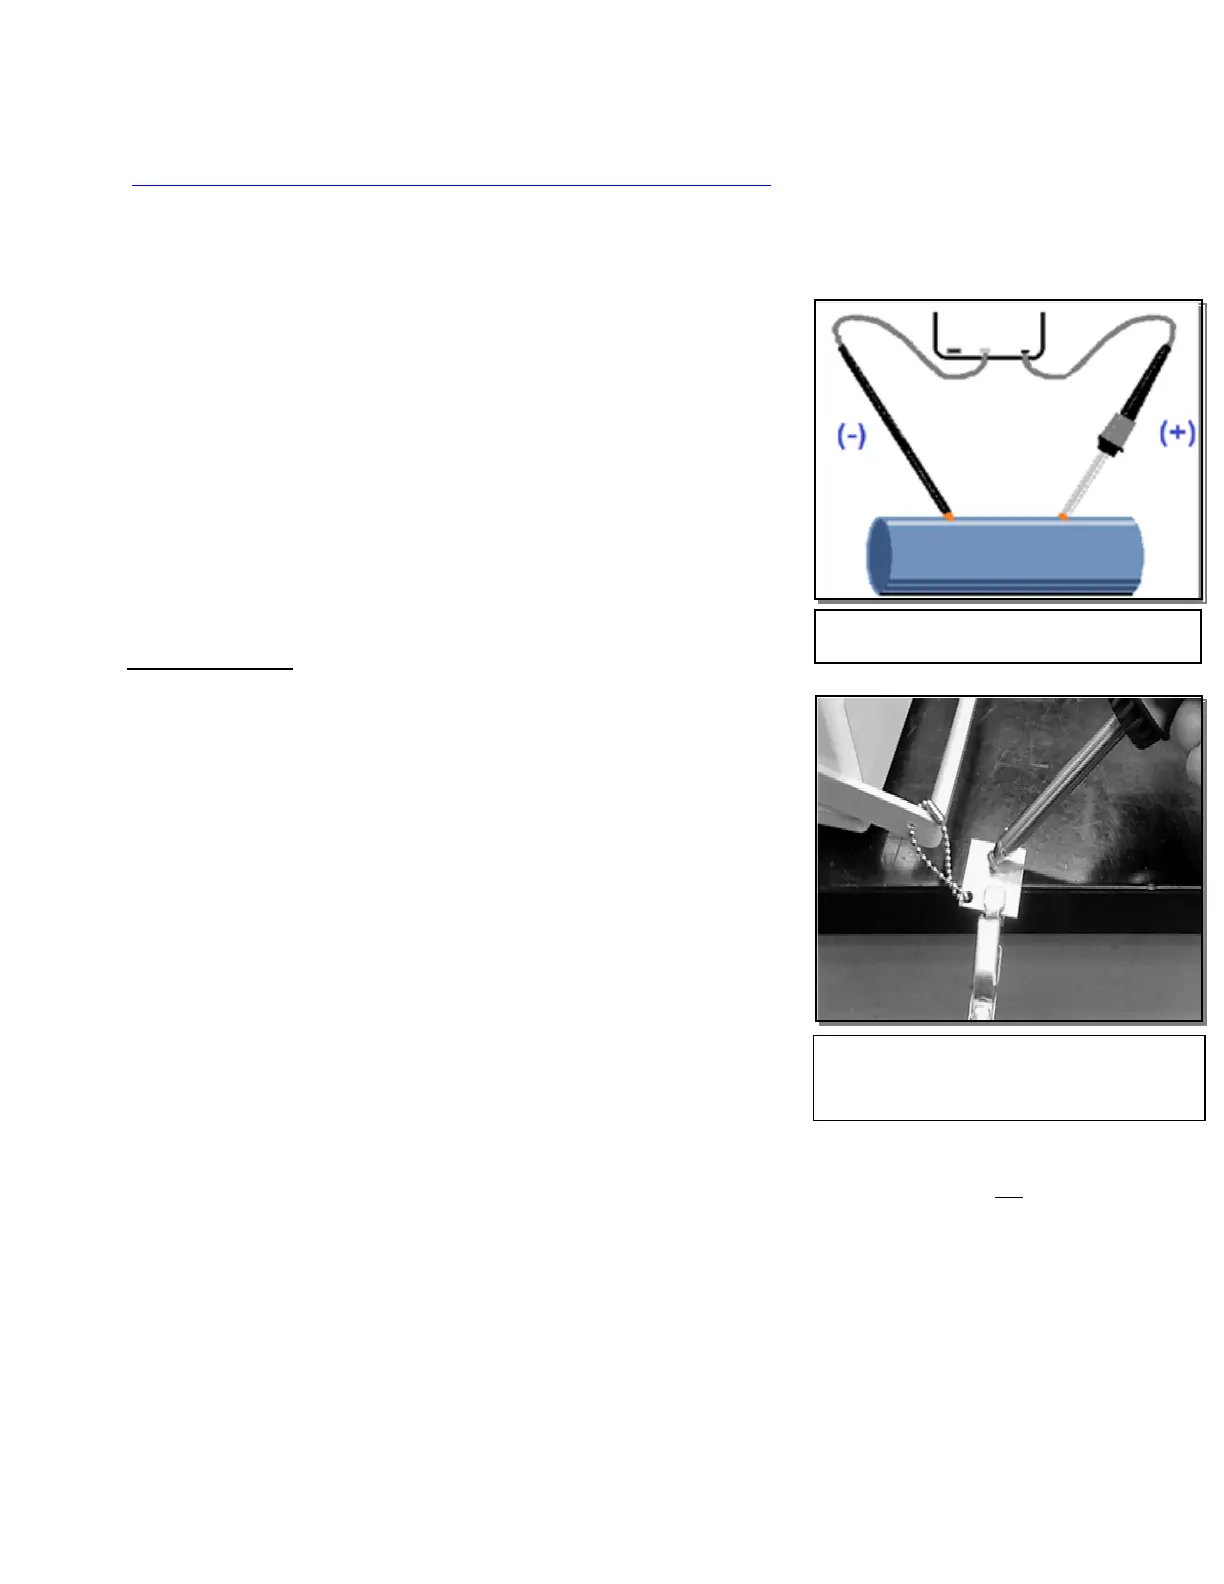
3. Connect the Cold Circuit. Either the Alligator Clip, The Wand or Block to
the BNC connector on the bottom side of the instrument. The BNC fitting
requires pushing and twisting.
4. Turn on the power switch. Caution: the probe will get hot. Do not touch
the metal shaft or tip. The amber light will remain constant for about one
minute. The side holster is helpful for safely securing the thermal probe
when not in use. Keep tip away from kit foam or other damageable
materials.
5. Wait about five (5) minutes for the Hot Probe temperature to stabilize
fully. At this time, the amber light will blink regularly, signaling the probe is
at the correct operating temperature. The display LCD should read 0000 +/-
2.
6. Operation Check: Place the provided Daily Qualification Standard (DQS)
into the jaw of the alligator clip. The standard is on a ball-chain attached to
the instrument handle. Fig. B.
7. Contact the Hot Probe tip to the test metal for only two seconds. Apply
just a little more pressure than when using a ballpoint pen, around (70 psi).
The display should read 60 +/- 10. This re-standardization step shall be
performed at the start and finish of each run and at least once during every
hour of continuous operation. This concludes the Operation Check.
8. Next, prepare your actual test metal. Test metal and probe tips must be
clean and free of scale. Wipe metal surface with a cloth or abrade with an
abrasive.
9. Select best Cold Circuit lead for your application (page 8 for details)
Either:
A) Alligator Clip
B) The Wand
C) The Heavy Block
10. Contact the Hot Probe tip against the test metal for one second and read the displayed numeral. It might be
necessary to press down on the sample one or two times for a precise reading. It is important not to keep the
probe in contact with the metal for more than two seconds. After two seconds, the readings become erroneous
because the values can drift due to heat dissipation. Wait two seconds between tests to allow the probe
temperature to stabilize.
11. Compare the displayed TE numeric readings to acceptable metal standards, or the supplied chart. The chart
provided is suggested values and is useful as a guide. The TE-3000 is a capable instrument as long as the
variations of one metal have a 10 point ‘buffer’ from the fluctuations of a second metal. It is also possible that
different alloys give the same TE reading. Some materials might provide slight variations in TE readings due to
heat treatment during alloy formation. Ambient conditions can change, influencing test results.
12. When the instrument is not in use, turn off the power. The Hot Probe takes a few minutes to cool down.
Fig B. Maintain better contact with the
DQS if Alligator Clip over-hangs the
Fig A. The Thermo-Electric Circuit
 Loading...