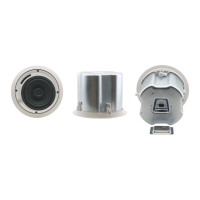
Figure 5: Plugging and Securing the Cable
7. Push the speaker into the ceiling hole until the front baffle rim is leveled with
the ceiling.
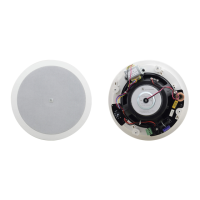
8. Tighten the mounting tabs by turning the screw counter clockwise (see
Figure 6).
Turning one quarter of a circle rotates the tab outwards; after that the screw is turned to
tighten the tabs to the rear side of the ceiling surface
When tightening the mounting tabs, the tabs automatically turn outward,
thus clamping the speaker to the wall from its rear side.
Figure 6: Tighten the Mounting Tabs
9. If required, you can further secure the speaker by connecting the speaker
support ring to an independent secure anchor point.
10. Adjust each speaker to the appropriate tap setting before installing the grille
(see Figure 7).