Contents
1
Introduction 1
2
Getting Started 1
2.1
Quick Start 1
3
Overview 3
4
Your VP-108 1:8 XGA / Balanced Stereo Audio DA 3
5
Installing the VP-108 in a Rack 6
6
Connecting the VP-108 1:8 XGA / Balanced Stereo Audio DA 7
6.1
Connecting the Balanced/Unbalanced Stereo Audio Input/Output 9
6.2
Controlling via RS-232 (for example, using a PC) 8
6.2.1
Setting the Dipswitches 8
6.2.2
Setting the MACHINE # 9
6.3
Connecting the REMOTE Connector 9
7
Technical Specifications 11
8
Table of Hex Codes for Serial Communication 12
Figures
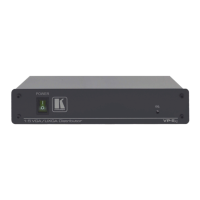
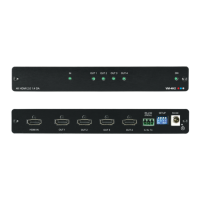
Figure 1: VP-108 1:8 XGA / Balanced Stereo Audio DA 4
Figure 2: VP-108 Underside 5
Figure 3: Connecting the VP-108 1:8 XGA / Balanced Stereo Audio DA 8
Figure 4: Connecting the Balanced Stereo Audio Input/Output 9
Figure 5: Connecting the Unbalanced Stereo Audio Output 9
Figure 6: Connecting an Unbalanced Source to the Balanced VP-108 Input 9
Figure 7: Connecting a VP-108 Unit to a PC without using a Null-modem Adapter 8
Figure 8: SETUP Dipswitches 8
Figure 9: REMOTE Terminal Block Connector 10
Tables
Table 1: VP-108 1:8 XGA / Balanced Stereo Audio DA Features 5
Table 2: VP-108 Underside Features 5
Table 3: Dipswitch Settings 8
Table 4: Machine # Dipswitch Settings 9
Table 5: Technical Specifications of the VP-108 1:8 XGA / Balanced Stereo Audio DA 11
Table 6: VP-108 Hex Codes 12