ATTENTION
!
When mounting a different saw on the sled repeat
Steps 1-5. When installing a different blade in the saw, repeat Step 3.
WARNING:
!
The wedge lock is functional only on the Kreg
Rip-Cut
™
. To avoid interference with the operation of the Accu-Cut
™
, raise
the wedge (P) by pushing the handle (Q) forward and down. Make sure
the handle is in this position whenever using the Accu-Cut
™
.
ATTENTION
!
Always wipe the guide strips with a damp cloth and
remove dust and debris from the workpiece before positioning the track.
ATTENTION
!
Should the zero-offset guide strip become worn or
damaged, remove the starting block from the track and install it on the
other end. Perform the trimming operation on the second guide strip.
When the guide strips are no longer usable, contact Kreg Customer
Service to purchase replacements.
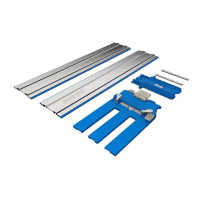
Assembly
K
L
M
B
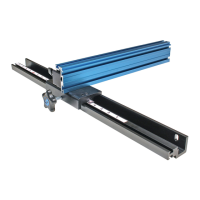
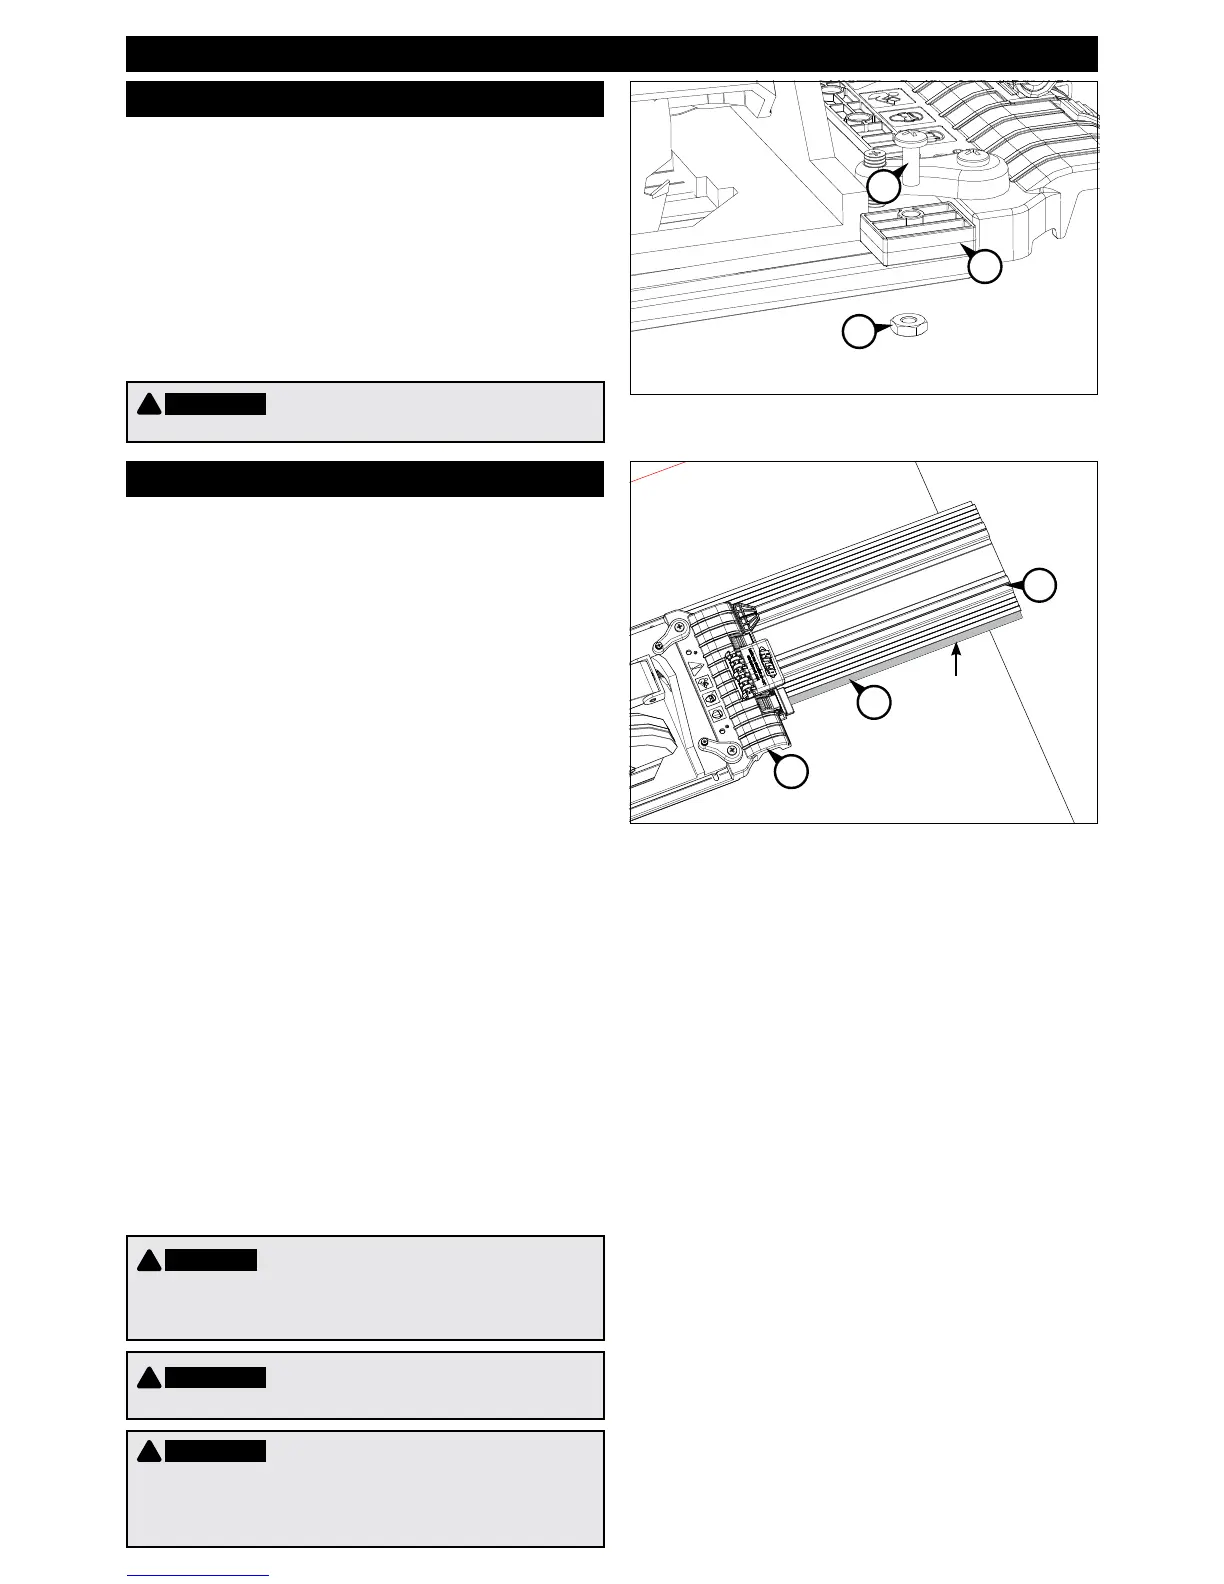
Reinstall the Indexing Stop
Trim the Guide Strip
6
The indexing stop (K) allows you to
remove the saw from the sled assembly
and then re-mount it in exactly the same
position without having to re-trim the guide
strip. Place the indexing stop against the side of
the saw base and secure it to the sled with the
machine screw (L) and nut (M). For maximum
positioning exibility, the sled is slotted and the
indexing stop can be rotated 180°.
7
The guide strips (B) grip the workpiece
surface to ensure the track (A) does not
move during use. When properly trimmed,
the guide strips allow you to align the edge
of the strip with the cutline and provide
zero-clearance support next to the blade to
minimize chip-out.
To allow positioning the edge of the guide
strip on the workpiece cutline (zero oset),
position and fully support the track on a
100” [254cm]-long scrap workpiece with the
edge stop on the bottom of the starting block
against the edge of the workpiece. Position
the saw/sled assembly on the starting block
using the indicator clip to ensure proper
alignment and engage the track rails. Adjust
the depth of cut so the blade will protrude [⅛”]
[3mm] through the workpiece during the cut.
With the blade clear of the workpiece, turn on
the saw. Applying light downward pressure on
the saw and maintaining a steady, controlled
pace, trim the guide strip and workpiece along
the entire length of the track. Turn o the saw
and allow the blade to stop before removing
the saw/sled assembly from the track.
H
Cut Line
A
ENGLISH
 Loading...