Do you have a question about the Kreg Precision Router Lift and is the answer not in the manual?
Safety precautions for the workspace, including cleanliness and lighting.
Precautions for using electrical tools safely, including grounding and cord care.
Guidelines for user safety and well-being while operating tools.
Best practices for operating and maintaining power tools for safety and performance.
Importance of professional repair and use of identical replacement parts.
Specific safety rules for router table installations and operation.
Specifications for safe extension cord usage, including gauge and condition.
Warning about chemical exposure risks from product use and construction activities.
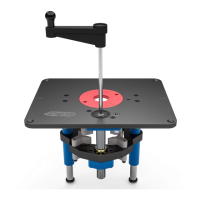
Main lifting component of the router lift.
Secures the router carriage in position.
Allows precise height adjustment of the router.
Rings for matching bit opening size for various bits.
Tool for installing and removing insert rings.
Used for raising and lowering the router carriage.
Aids in starting cuts on curved edges.
Tool for adjustments and assembly.
Fasteners used for attaching clamp blocks.
Hold the router motor securely in place.
Securing clamp blocks based on router model for proper fitment.
Placing the router motor into the lift carriage and securing it.
How to install and remove insert rings for bit compatibility.
Steps for installing a router bit into the lift.
Basic principles for routing operations using the lift.
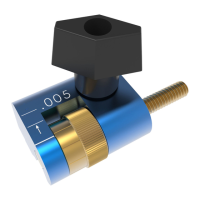
Making precise height adjustments using the micro-adjustment dial.
How to use the starting pin for safe curved edge routing.
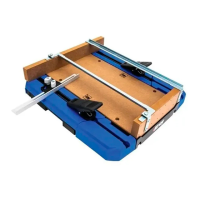
Considerations for integrating with the beaded face-frame system.
Procedures for maintaining the lift posts and adjustment screw.
Identifying common sources of vibration in router setups.
| Product Type | Router Lift |
|---|---|
| Brand | Kreg |
| Product Name | Precision Router Lift |
| Category | Power Tool Accessories |
| Material | Aluminum |
| Base Material | Aluminum |
| Mounting Plate Included | Yes |
| Compatibility | Most Routers |
| Plate Dimensions | 9-1/4" x 11-3/4" |
| Table Opening | 9-1/4" x 11-3/4" |
| Fine Adjustment per Revolution | 1/16" (1.6mm) |