EasyManua.ls Logo

Krick 20310 User Manual

Krick 20310
26 pages
To Next Page IconTo Next Page
Page #1 background imageLoading...
Page #1 background image
Page 1 © Klaus Krick Modelltechnik Knittlingen August 2002
SUBMARINE Type VII b
Technical data of the original of the model:
Scale 1:1 1:60
Length 66.5 m 1120 mm
Width 6.2 m 125 mm
Height (keel to top edge of tower) 9.5 m 170 mm
Building Instructions
Congratulations on your purchase of this construction set. The submarine type VII was probably one of
the most built submarines in the world. In its time it set the standard and became very successful. We
hope that you will have a lot of fun building this model - either as a display version or a fully functional
diving model.
With this construction set you can either build a pure display model without any additional kit or a fully
functional diving model using the dive and drive set (Order no. 10311) which includes a flood tank and
pump. The diving rudders fore and aft were enlarged somewhat for the functional version in
comparison with the scale. Also, some covers on the hull of the diving model were designed to be
removable, which, on the standard version, do not, of course, have to be cut open. These instructions
apply to both models - any differences are clearly described.
You also need the following material to build the standard model:
- ABS special adhesive, order no. 80478
- Fast adhesive “Ruck-Zuck”, order no. 80492
- UHU “plus endfest” 300 adhesive, order no. 45640
- UHU “plus Acrylit”, order no. 48315
- UHU “allplast”, order no. 48410
- Spray lacquer, colours light grey and dark grey
- Small pots of paint (Humbrol or similar), black
- Lead ballast strips, 60 g, order no. 60107 (2 off)
We recommend the following tools for the construction:
- Sharp and strong model building knife, order no. 416002
- Replacement blades for the knife, order no. 420019
- Drill bits, sizes 1 mm, 1.5 mm, 2 mm, 3 mm, 4 mm, 5 mm and possibly 7 mm
- Metal ruler
- Sanding block and sanding paper, various grades
- Round and flat files
Question and Answer IconNeed help?

Do you have a question about the Krick 20310 and is the answer not in the manual?

Krick 20310 Specifications

General IconGeneral
BrandKrick
Model20310
CategoryToy
LanguageEnglish

Summary

Model Construction Overview

Essential Materials and Tools List

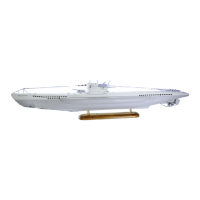
Lists all necessary materials and recommended tools for building the submarine model.

Initial Component Preparation

Instructions for cutting ABS components and preparing the Dive and Drive Kit.

Hull Assembly Procedure

Hull Halves Cutting and Sectioning

Cutting out and preparing hull halves, then sectioning the central hull part.

Internal Hull Structure Assembly

Gluing internal strips and connecting pieces to form the hull's inner structure.

Central Hull Section and Braces

Attaching the central hull section and fitting cover fastening braces.

Keel Fitting and Ballasting Instructions

Preparing the keel, ballasting it, and attaching it to the hull.

Pressure Tank Assembly and Installation

Pressure Tank Shell Preparation Steps

Preparing the lower and upper shells of the pressure tank, including drilling.

Tank Assembly, Testing, and Hull Integration

Assembling tank shells, leakage tests, and installation within the hull.

Subsystem Installation Guide

Bowden Cables and Hoses Installation

Installing Bowden cables and tube pieces into the pressure tank.

Keel and Diving Stabiliser Attachment

Gluing the keel triangle and diving stabilisers to the hull.

Flood Tank Construction Details

Assembling the flood tank from its floor and upper parts.

Rudder and Fin System Installation

Installing trunk tubes, fore diving rudders, and associated shafts.

Servo, Motor, and Pump Connections

Installing servos, connecting motors, and pump with associated hoses.

Superstructure Assembly

Ornamental Deck and Tower Attachment

Assembling and attaching the ornamental deck and tower parts to the hull.

Detailed Tower Construction

Cutting and assembling the various components of the model's tower.

Final Assembly and Testing Procedures

Weapon and Fitting Installation

Assembling guns and attaching remaining deck fittings.

Water Line Marking and Ballasting for Trim

Marking the water line and using lead ballast for precise model trimming.

Initial Operational and Water Tests

Performing initial tests in water to verify functions and trim.

Related product manuals