3-POINT HITCH
1. Preparations for attaching the 3-
point hitch implement
1.1 Changing the category 1 and 2 of 3-
point hitch implement
This section describes the procedure to change from
category 1 to category 2.
This tractor is equipped with both category 1 and 2 of
3-point hitch implement.
Category 1 type is standard and assemble all parts
shown as the procedure in this section.
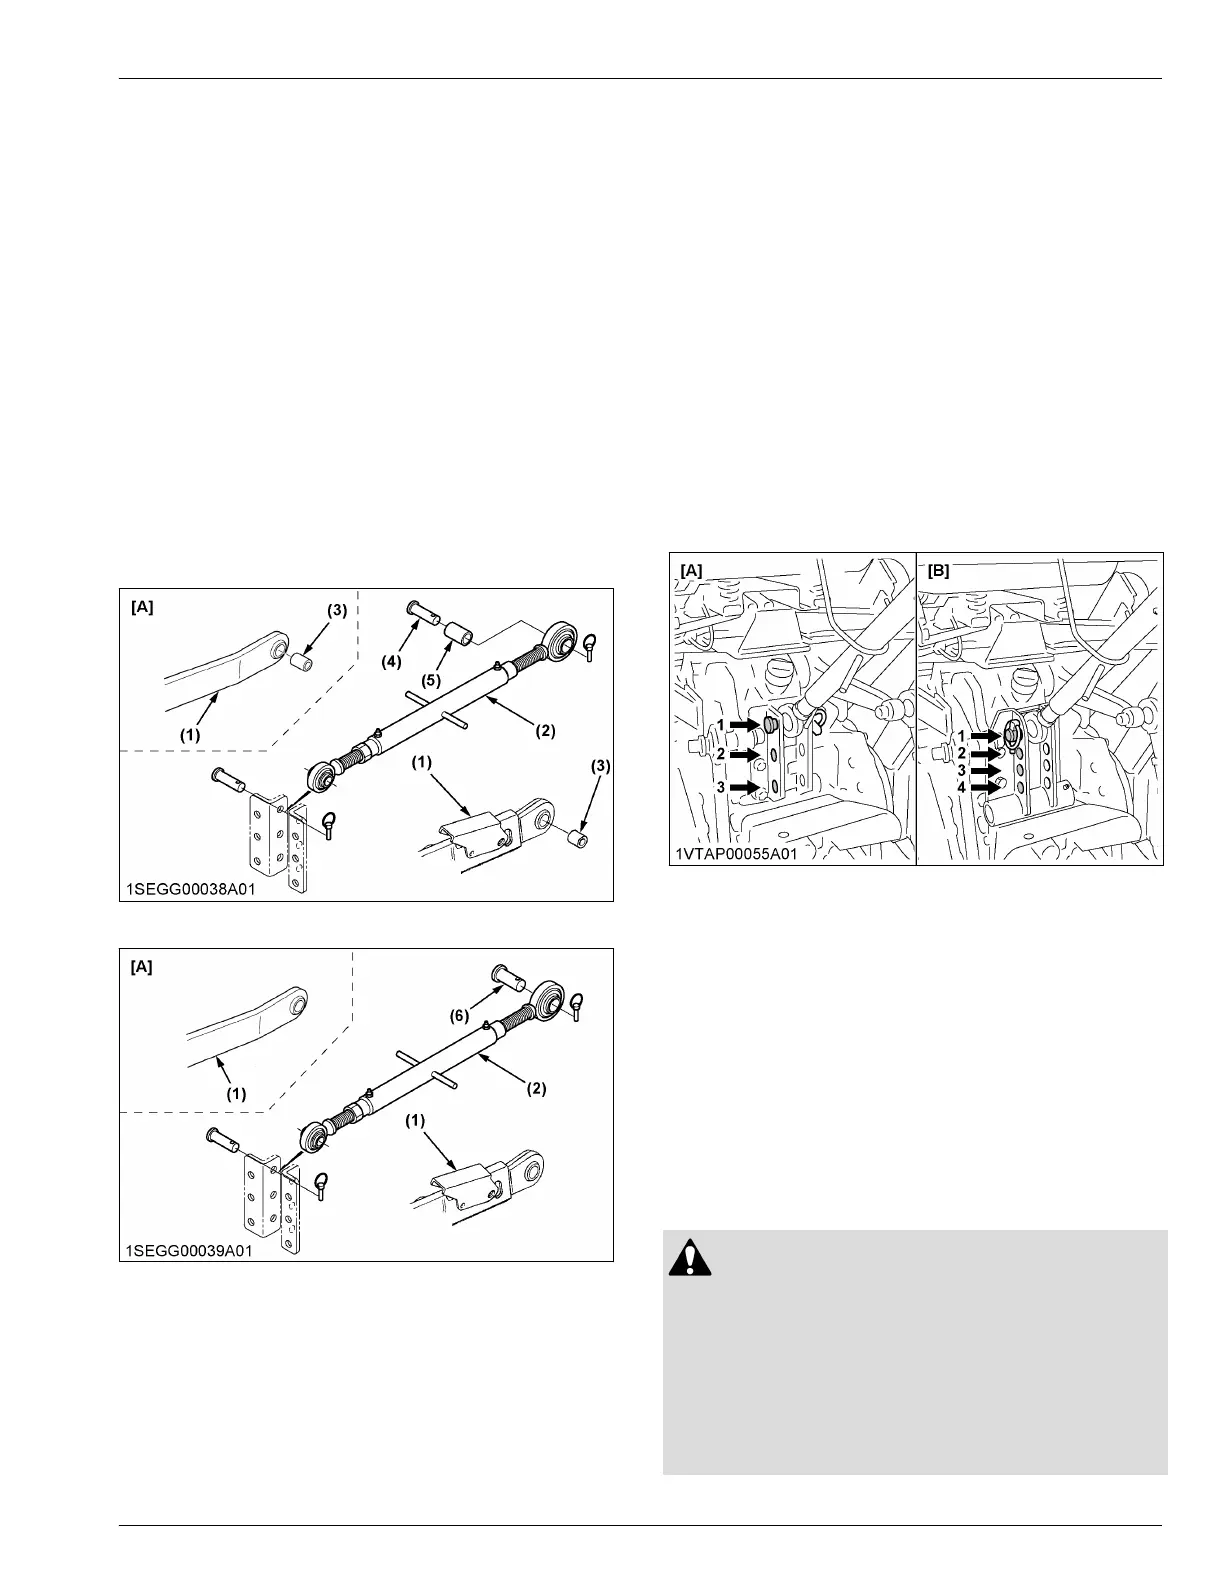
1. Remove the adjusting collar from the lower link.
2. Remove the adjusting collar from the rear top-link-
pin.
3. Use the correct rear top-link-pin for category 2.
[Category 1 type]
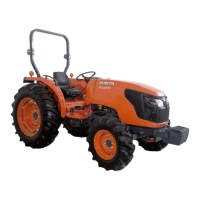
[Category 2 type]
(1) Lower link
(2) Top link
(3) Collar of lower link [Category
1]
(4) Top link rear pin [Category 1]
(5) Collar of top link [Category 1]
(6) Top link rear pin [Category 2]
[A] MX5400 [2WD]
1.2 Selecting the holes of lower links
There are 2 holes in the lower links.
For most operations, the lifting rods should be attached
to the inner hole.
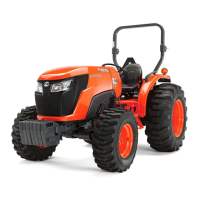
1.3 Selecting the holes to mount the top
link
1. Select the proper set of holes according to
Hydraulic control unit use reference chart on page
96.
If the hydraulic unit is set for draft control, draft
response is more sensitive when an implement is
connected to the upper set of holes to mount the
top link. If draft control is not required, it is
recommended to use the hole-4 in the figure as low
set.
[A] With position control [B] With draft control
1.4 Dealing with the drawbar
1. Remove the drawbar if a close mounted implement
is attached to the 3-point hitch.
(For detail for the drawbar, see DRAWBAR on page
89)
2. Attaching methods of 3-point
hitch implement
2.1 Precautions for attaching and
detaching the 3-point hitch implement
WARNING
To avoid personal injury or death:
• Be sure to stop the engine before attaching the
3-point hitch implement.
• Do not stand between tractor and implement
unless the parking brake is applied.
• Before attaching or detaching the 3-point hitch
implement, locate the tractor and implement on
a firm level surface.
3-POINT HITCH 3-POINT HITCH AND DRAWBAR