EasyManua.ls Logo

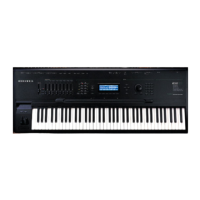
Kurzweil K2000 - Front Panel and Display Access; Front Panel and Display Removal Steps

Kurzweil K2000
133 pages
To Next Page IconTo Next Page
To Previous Page IconTo Previous Page
Loading...
SECTION 3
K2RDSASM.DOC
01/04/93
Remove
the
cover,
Connector
Board,
and
Engine
Board
as
per
3.3.1,
3.3.2,
and
3.3.3
above.
Remove
any
remaining
connectors.
Locate
and
remove
all
mounting
screws
using
a
#2
Phillips
screwdriver.
Reverse
this
procedure
to
install.
3.3.5
Front
Panel
and
Display
Access
and
Removal
NOTE:
To
access
and/or
remove
the
Front
Panel
or
Display,
the
front
panel
escutcheon
must
first
be
removed.
Remove
the
securing
nut
to
the
1/4"
jack
at
the
bottom
of
the
escutcheon
just
to
the
right
of
the
volume
knob.
Remove
the
six
(6)
flat
head
screw
securing
the
escutcheon;
two
on
top
(one
at
each
end)
and
four
on
the
bottom.
Gently
remove
the
escutcheon.
3.3.5.1
Display.
Removal
Using
a
#2
Phillips
screwdriver,
remove
the
four
(4)
screws
mounting
the
Display
to
the
frame.
Trace
the
twisted
pair
of
yellow
wires
to
J2
on
the
Backlight
Board
(located
in
the
top
right
hand
corner
of
the
unit
just
behind
the
front
frame.
Disconnect
J2.
Trace
the
ribbon
cable
to
J4
on
the
Engine
Board
and
disconnect.
The
Display
can
now
be
removed/repaired/replaced.
3.3.5.2
Front
Panel
Removal
Trace
the
ribbon
cable
to
its
connector
on
the
left
hand
edge
of
the
Audio/Power
Board
and
disconnect.
Using
a
#2
Phillips
screwdriver,
remove
the
thirteen
(13)
screws
securing
the
Front
Panel
to
the
frame
and
remove
the
assembly.
Reverse
3.3.5
above
to
install
Front
Panel
and/or
Display.
3.3.6
Removal
of
any
other
items
in
the
K2000R
remain
obvious
and
requires
no
discussion.
8

Related product manuals