Do you have a question about the Kurzweil MARK 10 - EASY and is the answer not in the manual?
Verify the current operating system version by pressing the MIDI button and the lowest white key.
Press the ORCHESTRA button for a sound, then VARIATION for an additional sound.
Play ORCHESTRA sound with touch variations for timpani and strings.
Hold GRAND PIANO, press STRINGS 2, then release both to layer sounds.
Hold GRAND PIANO, press STRINGS 2 six times, then release both to adjust volume.
Press a bass preset in LEFT SPLIT, then any instrument from the SOUNDS section.
Hold CUSTOM, press any SOUNDS instrument for left split; press SOUNDS for right split.
Press buttons above SPLIT POINT label and then a key to set the split point.
Press Bossanova button, then START/STOP to listen. Use VARIATION/FILL for second version.
Choose a style, press KEY START and BASIC buttons, play one key to start.
Press button below BASIC twice until ADVANCED or CHORD/INV is lit for full chord play.
Press SONG 1, RECORD button, then PLAY/PAUSE to record. Press PLAY/PAUSE to hear.
Select new sound, press RECORD, then PLAY/PAUSE to add tracks up to a maximum of six.
Press PUNCH IN, desired track, PLAY, then PUNCH IN again at the moment to rerecord.
Hold MIDI button, press highest white key (C) to erase all songs in RECORDER section.
Insert disk, press LOAD SONGS, UP button, find song number, press flashing SONG button.
Insert disk, press LOAD SONGS, then any flashing SONG button to load all songs.
Press a SONG button with red TRACK lights, then press PLAY/PAUSE button.
Press DEMO, then LOOP button in RECORDER section for indefinite song looping.
Press Format, select 'Y' or 'H'/'L' based on disk type, and wait for formatting.
Hold METRONOME button, play any key to change sound and volume.
Hold MIDI button, play specific black keys to sample seven different touch sensitivity settings.
Press PANEL SET to save setup, press PANEL RECALL to recall saved panel settings.
Press both TRANSPOSE buttons, then any key to transpose; press middle C to cancel.
Hold MIDI button, push D above middle C to raise key or B below to lower key.
| Type | Digital Piano |
|---|---|
| MIDI | Yes |
| Headphone Jack | Yes |
| Polyphony | 64 Voices |
| Effects | Reverb, Chorus |
| Connectivity | MIDI |
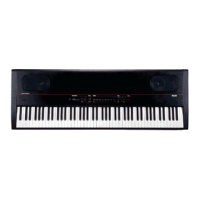
| Keyboard | 88-key weighted hammer action |